What is nfs service. We raise the NFS server on Ubuntu. How to allow NFS server writable users from an NFS client that has a different UID from the user's UID that owns files on the NFS server
The combination of “NFC” (Near field communication) is increasingly found in the specifications of modern smartphones and tablets. In this article, we will try to consider this interface from the point of view of practical use, so that readers can independently conclude that it is necessary to have it on their phone.
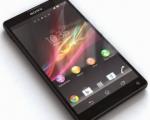
In testing, we used two models of smartphones that have already been discussed in detail on our resource: Acer CloudMobile S500 and Sony Xperia acro S. We also want to note that most of the information, including the described programs and usage scenarios, will only apply to smartphones based on Android. It is this operating system that is the most “friendly” today when it comes to working with NFC.
Introduction
At first glance, it may seem that numerous wireless interfaces today already cover all possible popular tasks and scenarios, so another option is simply not needed. However, if you look at the development of modern technologies, you can see that more and more attention is paid to energy consumption, especially when it comes to mobile devices. In particular, version 4.0 of the well-known family of Bluetooth protocols is just focused on reducing battery costs. The second point worth mentioning is that not every task requires a long range. It even happens the other way around - you want to explicitly limit the distance between interacting devices. In addition to the obvious reduction in consumption, this also affects safety. Yes, and about the volume of transmitted data, you can also make a similar remark. So the idea of a slow wireless interface that operates over short distances and is characterized by low power consumption is quite right to exist.
The starting point in the history of the development of NFC can be taken in 2004, when Nokia, Philips and Sony announced the creation of a touch-based interface for the development and standardization of interaction between various devices. However, the first versions of the specifications were created a little earlier. Perhaps, by modern standards, the technology can be considered very young (if you do not take into account the history of RFID), but it is already quite common in real products and services. In particular, at the Mobile World Congress 2013 held at the end of February, many stands and demonstrations were devoted to this topic.
This sign can be found on devices with NFC technology.
The formal characteristics of the interface are as follows: work at a distance of several centimeters, the maximum information exchange rate is about 400 Kbps, full-duplex data exchange is supported, the operating frequency is 13.56 MHz, the connection establishment time does not exceed 0.1 s, the operation mode is point-to-point. It can be seen that these parameters fundamentally distinguish NFC from other popular wireless interfaces.
If we talk about devices, then in addition to active controllers in NFC, there are also passive options (they are usually called tags), which receive power wirelessly from the active controller. One example is modern maps for public transport. Labels are simply data storage, typically less than 4 KB in size. Most often, only read mode is provided for them, but there are options with write support.

One of the simplest options for a passive NFC tag
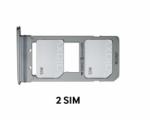
The compact size of the controller and its low power consumption make it possible to implement NFC even in small designs such as SIM cards or microSD memory cards. However, for full operation, the use of a special antenna is required. In phones, it is usually located on the back of the battery cover or built into the back panel if the device does not require a removable battery.

The NFC antenna is often placed on the back of a smartphone.
The short range can be detrimental when using tablets - finding the right place to "attach" may not be as easy as we would like. To solve this problem, some manufacturers mark the location of the antenna with a special sign. As for the range, in our case, the connection worked at a distance of no more than four centimeters - both between phones and with a passive tag.
From a security point of view, the developers did not implement elements of protection against interception and relay attacks. This of course makes it difficult to implement secure solutions, since it requires the applications themselves to protect themselves at a higher level. Note that in fact, such a well-known protocol as TCP / IP behaves similarly. So, from a practical point of view, it seems more dangerous to lose a phone without additional protection with customized payment systems programs than to intercept communications.
Perhaps the most important thing to know about NFC today is that the interface itself does not provide any real practical use cases or solutions. Unlike, for example, Bluetooth, whose profiles clearly describe how to transfer a file, how to connect a headset or provide network access, NFC is only a base, and direct work scenarios are provided by additional software that works through it. On the one hand, this opens up wide opportunities for developers, and on the other hand, it is a problem for them when ensuring the interaction of different applications and devices.
Interestingly, any programs installed on a smartphone or tablet can register in the operating system as NFC-related event handlers, and then when you externally “call”, you will see the standard menu “how do you want to perform this action?”. Since some scenarios for using NFC involve convenient automation of actions, it is advisable not to overload the device with such utilities.
The NFC forum tries to help with this uncertainty by offering to standardize protocols for certain scenarios (notably NDEF for storing short messages on tags and SNEP (Simple NDEF Exchange Protocol) for exchanging information between devices), but practical determination of the compatibility of specific devices is usually difficult due to the lack of detailed information from the manufacturer and diagnostic tools. Another assistant here is Google, which has offered its own development of Android Beam in the latest versions of Android. It allows certain types of information to be exchanged between compatible devices.
Android Beam
First you need to make sure that both devices have NFC enabled, Android Beam active, and their screens are unlocked. On the models we tested, NFC only works if the screen is on and the device is fully unlocked. But it is possible that another algorithm will be used in other devices. In any case, the active interface requires very little battery power to operate, and so far the approach described seems to be quite reasonable. One of the options to simplify the work is to turn off the lock screen. In this case, to recognize the tag, it will be enough just to turn on the smartphone. Another inconvenience is the need to confirm the operation by touching the screen after the devices find each other. This is not always easy to do without breaking the connection, especially when both devices are in the hands of two different people.

The next step is to select one of the applications on the device from which the transfer is planned. In particular, these may be:
- Google Chrome - transfer of the current open link;
- YouTube client - transfer of a video clip (as a link);
- Google Maps - transfer of a place or route;
- Contacts - send a contact card;
- Google Play - application transfer;
- Gallery - transfer photos.
Next, bring the devices closer to each other. When a partner is found, you will hear a tone on the sending device and the desktop image will shrink. At this point, you need to touch the screen image and hold your finger until you hear the second signal - about a successful transfer.

We have tried the options in the list, and almost all of them really work. Even the fact that our devices were produced by different manufacturers did not prevent them from finding a common language. But a few comments are still worth making. There are no problems with routes in Google Maps, and the location option is not very interesting, because only the current map display is transmitted. The point marked on the screen of the source phone does not reach the recipient. The situation is corrected by using the "Addresses" application, which transfers the data correctly. When sending contacts, a photo is lost, because from a technical point of view, the transfer format corresponds to vcf text files. If we talk about applications, then you can send not only those installed on your phone, but also just open cards on Google Play. Similarly, books and other content from the store are supported. Naturally, we are talking about the transfer of links, and not the downloaded or purchased elements themselves. There was a problem with sending photos: the Sony device was unable to work with this type of data. The official wording is "The recipient's device does not support large data transfers via Android Beam." Here you have the first sign of the youth of the interface or the lack of detail in the technical specifications of the devices. Formally, we have both NFC and Android Beam in two devices, but in practice their real capabilities differ significantly, and you can find out about this only as a result of verification. What can we say about less famous manufacturers - their implementation of this technology can be completely unpredictable.
By the way, as for the very operation of Android Beam. The description of the technology indicates that for data transfer, the establishment of a connection via Bluetooth is used after the initial negotiation of settings via NFC. Considering that all working formats assumed a really small amount of transmitted data, NFC speed was quite enough for them, but for photos it would be clearly not enough. So we can assume that Sony just did not implement switching to a faster interface. It is not possible to understand whether this problem is software (recall that Android 4.0.4 is installed on this device) or hardware.
We also tried to send our own music and videos in the same way from the respective apps, but nothing appeared on the receiver.
Reading and writing labels
The described Android Beam uses the ability to transmit and process short information messages. However, in reality, they can not only be transmitted from the phone, but also read from passive tags. In a sense, this technology is similar to the well-known QR codes that are read by the phone's camera. At the same time, useful information (for example, a link to a website page) takes just a few tens of bytes. Tags can be used by companies, for example, to promote their products or services. Given the compact size of the passive tag (more precisely, the thickness comparable to a sheet of paper - because of the antenna, the area will still be significant, no less than a five-ruble coin), it can be placed almost anywhere: on a box with a product, in a magazine, on an information rack and other places.

Passive NFC tags can be made into key fobs
If we talk about hand-made labels, then this is a completely feasible scenario. To do this, you need to purchase blank blanks and, using a special program for the phone, write down the required information on them. For example, we bought several different options: a sticker with a minimum thickness, a protected plastic circle and key chains. All of them had a very small amount of memory - only 144 bytes (there are options on the market for 4 KB). The number of rewrite cycles was not specified, but for most application scenarios this parameter is not critical. To work with tags, NXP Semiconductors programs - TagInfo and TagWriter - can be recommended.


The first will allow you to read the data from the tag and decrypt the information according to the NDEF standard, and the second will help you create your own tags. Several sub-variants of NDEF are supported: contact, link, text, SMS, mail message, phone number, Bluetooth connection, geographic location, local file link, application launch, URI. Please note that when creating a record, you need to take into account the amount of data stored. For example, a contact photo can take up several kilobytes, messages or text can also easily go beyond 144 bytes. By the way, the NFC TagInfo program from the NFC Research Lab with a special plug-in can read and show you a color photo from a biometric passport. With a data volume of one and a half dozen kilobytes, reading them via NFC takes about 20 seconds. An additional level of protection in this case is provided by the need to specify some details of the passport for reading data from the chip.


Note that the automatic processing of read tags depends on the content. In particular, sometimes additional confirmation is required to carry out the action itself. For example, in the case of SMS, a completed message form opens, but the actual sending must be confirmed by the user. But the recorded web link can immediately open in the browser. Any automation is associated with a loss of control, so the described features should be used with caution, because by simply replacing or reprogramming labels, attackers can redirect you to a fake site instead of the original one. We did not find regular OS settings to limit such autorun (unless you disable NFC itself).
Another important point when using labels in public places is overwrite protection. When writing a label, you can set a protection flag that will block all attempts to change information, but it will be impossible to remove it. So the label will continue to be used in read-only mode. For home use, this is in most cases not very critical.
Let's mention a few more programs for writing labels:

Using predefined tags to manage a device
One of the active participants in the implementation of NFC is Sony. Its devices are pre-installed with the Smart Connect program that supports work with original Sony tags. If you wish, using the SmartTag Maker utility, you can create them yourself from blank blanks. The system uses the NDEF URI format with the tag number/color encoded in the text link. In total, the system provides up to eight labels, which are designated as “home”, “office”, “car”, “bedroom”, “listen”, “play”, “activity”, “watch”.

Variant of original Sony SmartTags
The Smart Connect program itself works not only with NFC tags, but also with other devices connected to the phone, including headsets, power supply, Bluetooth devices. Conveniently enough, the standard settings already correspond well to the above scenarios. In this case, the user can reprogram all circuits; each of them specifies a set of conditions and actions.


As a condition, you can use tag recognition or device connection, in addition, you can limit the operation time of the circuit. The set of actions is quite wide, it includes launching an application, opening a link in a browser, launching music, adjusting the volume and mode, connecting a Bluetooth audio device, sending SMS, making a call, managing wireless interfaces, adjusting brightness, and other actions. Moreover, they can also be assigned to exit this mode, which is carried out by re-identifying the tag, by a new event / tag, or by the expiration of the specified time interval.
But in fact, it is not necessary to use Sony branded tags - you can also find use for ready-made tags that do not allow information to be overwritten. For example, it can be used transport cards. The fact is that each of them has its own unique identifier, which can be tied to certain actions with special programs. As a possible reaction, such operations as changing the profile, enabling / disabling interfaces, and many others can act.
The Play Store has several utilities for this scenario, to mention a couple of them:

Recall that you should not install several such programs at once. Convenience from this mode will not be added, since when a label is detected on the phone screen, a dialog box will appear with the choice of a program for processing it.
While searching for programs to work with labels, we also came across another class of utilities that may be of interest in the case of writable labels. These programs use their own original recording format, which only they themselves can work with. In this case, the set of possible actions is almost the same as those described above:

Recall that at the moment the label is read only when the device is unlocked. So the scenario “came home, put the phone on the nightstand - automatically switched the profile, turned off the call and Bluetooth, set the alarm” will require some actions from the user. This behavior still limits the possibilities of programs a little.
Exchange of information between devices
With the exception of Android Beam, the scenarios described above assume the operation of one phone with a tag or specialized terminal. If we talk about the direct connection of the devices to each other, then the main issue here is compatibility. Of course, in the case of products from one manufacturer, especially a large one, it is possible to simply install the appropriate program into the firmware. But if the devices are produced by different manufacturers, everyone will have to use the same utilities. And it’s not at all a fact that your partner will have the same program installed as you.
Considering that the native speed of NFC is very slow, Bluetooth or Wi-Fi is usually used for fast file transfer, and NFC only works during the connection negotiation and pairing phase. To test this scenario, we tried several file transfer programs that claim to support NFC on our devices.
send! File Transfer (NFC) in the free version allows you to share files of photos, music and videos. You can use NFC or QR codes to establish a connection. The transmission is carried out via Bluetooth or Wi-Fi (in case both devices have Wi-Fi Direct support, which was not found in the Sony phone used). As a result, we managed to see a speed of 65 KB / s, which, of course, is too low even for photos.


Blue NFC, as the name suggests, also simplifies Bluetooth file sharing by replacing the power, search, and pairing steps with touch and NFC sharing. The speed of work is not very high - at the level of the program mentioned above.


File Expert HD also uses Bluetooth, but the speed is already 100-200 KB/s. True, in fairness it is worth noting that this program has many other file sharing modes.


Conclusion
As of the spring of 2013, we can say that NFC technology is already confidently taking its place in modern top-end and mid-range smartphones. Indirectly, interest in it can be estimated by the number of programs in the Play Store: there are already several hundred free projects alone. Given the dominance of the market (especially in terms of the number of models) of the Android platform, it is today the most popular for NFC devices. iOS does not provide native NFC tools, and Windows Phone 8 has significantly limited NFC capabilities for third-party applications.
By itself, NFC technology has several features that allow it to occupy a unique position:
- contactless data transmission;
- work only at short distances;
- the ability to exchange information with other devices or passive tags;
- low cost solution;
- low power consumption;
- low data rate.
At the moment, for smartphones and tablets, there are three most relevant options for using NFC: data exchange between devices (contacts, applications, links, photos and other files), reading tags with special information and changing device modes / settings / profiles, quick pairing with peripherals (such as headsets). In the first case, you can try to work with the standard Android Beam program or install alternative options. They can be useful when you need a high exchange rate (over Wi-Fi), but require the same program on each device.
Passive tags can be used almost anywhere, from posters to magazines and product tags. They can record product information, a website link, Wi-Fi settings, contact information, geographic coordinates, or other small amount of data. The spread of this method of information exchange directly depends on the number of compatible devices users have. This scenario can be compared to common QR codes, which today are perhaps easier to implement and more popular.
Even non-writable labels can be used with some programs to change system settings, so many users will be able to try this scenario. True, it should be noted that in this case, the set of options will be recorded in a specific device, and it may be difficult to transfer it to another device. Most utilities of this purpose still require their own recorded tags, which allows them to store all the required information in an encoded form directly in the tag (or cloud), so that in order to use these settings on another device, it will be enough to have the same program on it.
We have not considered in this article such NFC use cases as payment systems, electronic wallets and micropayments, tickets and coupons, transport cards and passes. These topics, especially the first one, deserve separate consideration. We will try to return to them in the presence of reader interest and the dissemination of such solutions.
We tell you how to quickly and easily raise your NFS server on Ubuntu Linux Server 14-04.1, as well as understand the principles of the NFS protocol and consider the theory.
Theory
Abbreviation NFS stands for Need for Speed - Network File System. This is a protocol for accessing distributed network file systems, with which you can mount remote directories to your server. This allows you to use the disk space of another server for storing files and regularly write data to it from several servers.
The protocol has a client-server model, that is, one server (also called a “ball” from the word share), with the NFS package installed, will provide access to its directories and files, and client computers will connect to it over the network. Let's fix what we read with a diagram:
NFS server requests are made in the form of protocol packets RPC(Remote Call Procedure), which allows you to perform various functions or procedures in another network space, that is, on a remote server.
Authorization of users who connect to the server is carried out by IP address, as well as by special user identifiers UID and groups GID. This is not the best way regarding the security of stored files, in comparison with the classic "login / password" model. But, thanks to this architecture and the fact that NFS used the UDP protocol without establishing a session, it is practically immune to network failures and client computers themselves. So, in case of any failure, the file transfer will simply pause, and when the connection is established, the transfer will resume without the need for any reconfiguration.
Setting
I think the theory is clear, so let's move on to practice. As it was said, all settings will be carried out on Ubuntu 14.04.1
First of all, on the computer that will act as an NFS server, you need to install the necessary components.
So, we download the nfs-kernel-server package, with which we can distribute access (“share”) directories. To do this, on the future NFS server, enter the commands:
sudo apt-get update sudo apt-get install nfs-kernel-server
Now we create the actual directory to which we want to distribute access. It is worth noting that you can also “share” directories already on the server, but we will create a new one:
sudo chown nobody:nogroup /var/nfs
Enter this command only for those directories that you created yourself, you do not need to enter it for existing directories, for example /home .
The next step is to change the configuration of NFS itself, it lies in the /etc/exports file, open it for editing with your favorite editor:
Sudo nano /etc/exports
You will see a configuration file with commented lines that contain configuration examples for different versions of NFS.
Commented out ones are those that start with the symbol # , which means that the parameters specified in them have no effect.

We need to add the following uncommented lines to this file:
/var/nfs 10.10.0.10/24(rw,sync,no_subtree_check)
- /var/nfs- The directory we want to share
- 10.10.0.10 - IP address and mask of the client computer to which you want to distribute access to the directory
- rw- Allows the client to read (r) and write (w) files in the directory
- sync- This option causes NFS to write changes to disk before responding to the client.
- no_subtree_check- This option disables checking that the user is accessing a file in a specific subdirectory. If this check is enabled, then problems may arise when, for example, the name of a file or subdirectory has been changed and the user tries to access it.
After that, you need to create a table of correspondence between shared directories and clients, and then start the NFS service. To do this, enter the following commands.
The essence of the problem: at one time, Samsung began to produce TVs that support the DLNA technology developed by leading manufacturers of household appliances, based on the principle of "digital home". This technology made it possible to integrate TVs into a local home network, which made it possible to exchange media content between a TV and a computer, and in particular, to watch movies stored on a computer on a local network or via WiFi on TV. However, the multimedia solution proposed by Samsung to implement this technology, to put it mildly, leaves much to be desired. So, films viewed over the network in the media player built into the TV are not rewound in most cases. In addition, while watching movies over the network, unlike watching movies from a flash drive or a portable hard drive connected to a TV via a USB port, the continuous playback function (blue button on the remote control) is not supported. Finally, the very need to run Samsung PC Share Manger on your computer every time and make corrections after each deletion or addition of video files to the disk is a little annoying.
Not only to eliminate the existing problems with watching movies on TV over a local network, but also to increase the data transfer rate (which can be an important factor when watching large HD movies), the inclusion of the NFS (Network File System) network protocol will help us. After we have made the necessary installation and configuration of the NFS server, our computer will be perceived by the TV as if we connected a portable hard drive to the TV via a USB port (the only difference will be only in the data exchange speed, which is determined by the maximum bandwidth your local network or WiFi connection).
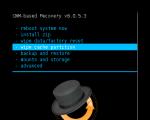
NFS is a network protocol organized on a server-client basis. We will have a computer as a server, and a TV as a client. We have already covered the inclusion of NFS support on the TV in the previous section during the setup and installation of the SamyGO Auto application on the TV. If you remember, in the settings of the SamyGO Auto configurator, we checked the box next to the NFS section and also registered the IP address of the NFS server (192.168.xxx.xxx), that is, the address of our computer:
In this section, we will look at installing and configuring an NFS server on our computer. There are many different programs on the Internet for installing and configuring an NFS server. We will use the application haneWIN NFS Server(it is shareware, and after a certain period it requires registration of a serial number, but, as you understand, there are always craftsmen on the Internet who can solve this problem). So let's get started:

Note: Sometimes the Windows firewall or the firewall built into the antivirus can block the operation of the NFS server. To prevent this from happening, in the Windows firewall (or if you have another firewall, then in it) you must allow access to the network to two applications: nfsd.exe and pmapd.exe (they are located in the server installation folder C:\Program Files\ nfsd).
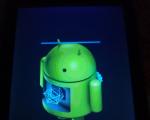
Finally, let's turn on the TV and make sure our NFS server is running. In the previous section, when we installed the SamyGO Auto program on the TV, we specified the parameter for autorun in it. Therefore, when you turn on the TV, it should automatically detect our NFS (this does not happen immediately, but approximately 20 seconds after turning on the TV). So, turn on the TV, then go to the media player and see a new device there - NFS Server.

If you pay attention, there is a USB connection icon next to NFS. This is what we talked about earlier, now your TV will treat the computer as a hard drive or USB flash drive. You can go to the Movie section and enjoy watching movies online. You no longer need to run Samsung PC Share Manger on your computer. Just add the movie to your movie folder on your computer and it will automatically "load" into your TV's media player.
In the next section, we will talk about how to record TV programs to a USB flash drive or, since we now have NFS, then to the movie folder on the computer.
Network File System NFS, or Network File System, is a popular network file system protocol that allows users to mount remote network directories on their machine and transfer files between servers. You can use disk space on another machine for your files and work with files located on other servers. In fact, this is an alternative to Windows sharing for Linux, unlike Samba, it is implemented at the kernel level and works more stable.
This article will cover installing nfs on Ubuntu 16.04. We will analyze the installation of all necessary components, setting up a shared folder, as well as connecting network folders.
As already mentioned, NFS is a network file system. To work, you need a server that will host the shared folder and clients that can mount the network folder like a regular drive in the system. Unlike other protocols, NFS provides transparent access to remote files. Programs will see files as in a regular file system and work with them as local files, nfs returns only the requested part of the file, instead of the whole file, so this file system will work fine on systems with fast internet or a local network.
Installing NFS Components
Before we can work with NFS, we will have to install a few programs. On the machine that will be the server, you need to install the nfs-kernel-server package, which will open the nfs balls in ubuntu 16.04. To do this, run:
sudo apt install nfs-kernel-server
Now let's check if the server is installed correctly. The NFS service listens for connections for both TCP and UDP on port 2049. You can see if these ports are really in use at the moment with the command:
rpcinfo -p | grep nfs
It is also important to check if NFS is supported at the kernel level:
cat /proc/filesystems | grep nfs

We see that it works, but if not, you need to manually load the nfs kernel module:
Let's also add nfs to autoload:
sudo systemctl enable nfs
On the client computer, you need to install the nfs-common package in order to be able to work with this file system. You do not need to install the server components, just this package will be enough:
sudo apt install nfs-common
Setting up an NFS server in Ubuntu
We can open NFS access to any folder, but let's create a new one for this purpose:
folder_address client (options)
The folder address is the folder that you want to make available on the network. Client - ip address or network address from which this folder can be accessed. But the options are a little more complicated. Let's consider some of them:
- rw- allow reading and writing in this folder
- ro- allow read only
- sync- respond to the following prompts only when the data is saved to disk (default)
- async- do not block connections while data is being written to disk
- secure- use only ports below 1024 for connection
- insecure- use any ports
- hide- do not hide subdirectories when accessing multiple directories
- root_squash- replace requests from root to anonymous ones
- all_squash- make all requests anonymous
- anonymous And anonymous- Specifies the uid and gid for the anonymous user.
For example, for our folder, this line might look like this:
/var/nfs 127.0.0.1(rw,sync,no_subtree_check)
When everything was set up, it remains to update the NFS export table:
sudo exportfs -a
That's it, opening nfs shares in ubuntu 16.04 is complete. Now let's try to configure the client and try to mount it.
NFS connection
We will not dwell on this issue in detail in today's article. This is a rather large topic that deserves a separate article. But I will say a few words.
To mount a network folder you don't need any ubuntu nfs client, just use the mount command:
sudo mount 127.0.0.1:/var/nfs/ /mnt/
Now you can try to create a file in the attached directory:
We'll also look at mounted filesystems with df:
127.0.0.1:/var/nfs 30G 6.7G 22G 24% /mnt
To disable this file system, it is enough to use the standard umount:
sudo umount /mnt/
conclusions
In this article, setting up nfs ubuntu 16.04 was discussed, as you can see, everything is done very simply and transparently. Mounting NFS shares is done in a few clicks using standard commands, and opening nfs shares in ubuntu 16.04 is not much more difficult than connecting. If you have any questions, write in the comments!
Related posts:

NFS (Network File System)- a network access protocol for accessing files and the file system of an NFS server, popular in the Linux / UNIX family of operating systems, as well as various storage systems. Microsoft also, not wanting to lag behind competitors, introduced the basic functionality of an NFS server back in Windows Server 2003 R2. In subsequent versions of Microsoft server platforms, the capabilities of the built-in Windows NFS server were expanded, new functionality and management tools appeared. The NFS server in Windows Server 2012 is another milestone in the development of this technology.
What new Microsoft developers offer us in this product? New NFS server features in Windows Server 2012:
- NFS v4.1 support. Support for the latest version of NFS 4.1 is one of the major new features of Windows Server 2012. Compared to NFS v3, this protocol provides improved security, performance, and compatibility by fully implementing all aspects of RFC 5661.
- Performance out of the box. By using the new RPC-XDR transport infrastructure, optimal NFS server performance can be achieved out of the box without the need for fine-tuning system settings. Optimal performance is achieved through autotuning cache, pooling of worker processes, and dynamic pool management based on workload.
- Simplified deployment and management. This fact has been achieved through:
- - 40+ PowerShell cmdlets to configure NFS server and manage shared folders
- - a simple graphical management interface that allows you to simultaneously manage both SMB and NFS shares, as well as file screening settings and .
- - fixing the RPC port (port 2049) for easy firewall configuration
- - new WMI provider v2
- - simplified identification due to a flat mapping file
- Improvements in NFSv3. By sending NSM (Network Status Monitor) failure notifications to clients quickly, older NFS clients handle failover better and faster, which means less downtime.
So, the NFS server in Windows Server 2012 has been greatly improved in terms of ease of deployment, scalability, stability, availability, reliability, security, and compatibility. Shared folders can be simultaneously accessed via SMB and NFS protocols, which means that Windows Server 2012 can be used as storage in heterogeneous networks.
NFS server in Windows Server 2012 can be installed using GUI and Powershell. To install an NFS server using the GUI, open and inside the file server role (File and Storage Services) check the component Server for NFS.
After the installation of the NFS component is completed, the server must be rebooted.
Installing the same role using Powershell is also easy, just run the command:
Add-WindowsFeature "FS-NFS-Service"

Configuring an NFS Share in Windows Server 2012
Next, we will show how to create an NFS share (shared folder) on a Windows server using the role we have installed. You can again create an NFS share in several ways: using the graphical interface or Powershell.
Creating an NFS Share Using the Server Manager Console
Open console server manager, go to section share management(located inside the role File and Storage Services).
From the context menu, run the New Shared Directory Creation Wizard- New Share…

Choose the type of balls NFSshare-Quick


Then you need to set the type of authentication for NFS clients: perhaps use both Kerberos authentication and anonymous.
Suppose that the consumer of the created NFS resource will be the ESXi virtualization server, in which there is no possibility to authenticate NFS connections (ESXi does not support NFSv4). So the authentication type will be No Server Authentication, note also the options Enable unmapped user access And Allow unmapped user access by UID/GID.

To slightly secure the created NFS share from third-party access, we will restrict access to the NFS resource by the client's IP address.
host: 192.168.1.100
Language Encoding: BIG5
Share Permissions: Read/Write
Allow root access:Yes

Next, it remains to check that at the NTFS level the user into which the connecting user maps has read / write access (if you decide to use anonymous access, you will have to give the Everyone user full r / w rights at the NTFS level).
How to create an NFS share using Powershell
Let's create a new NFS share:
New-NfsShare -Name "NFS " -Path "d:\shares\nfr" -AllowRootAccess $true -Permission Readwrite -Authentication sys
Let's allow access to the share for the IP address 192.168.1.100 and set the BIG5 encoding (the ability to view the contents of NFS shares for the ESXi client).
Grant-NfsSharePermission -Name "NFS" -ClientName 192.168.1.100 -ClientType host -LanguageEncoding BIG5
The created NFS share can be used, for example, as an NFS-datastore in a virtualization environment, or to access data from other Unix-like clients. How to mount an NFS share in Windows clients is described in the article.