Connect to a virtual server via SSH and SFTP. Connecting to the server via SSH and SFTP Connecting via ssh via putty
What is SSH and why do you need it?
Secure Shell (SSH) is a network protocol that provides shell functions to a remote machine through a secure channel. SSH comes with various security enhancements, including user/host authentication, data encryption, and data integrity, making popular attacks like eavesdropping, DNS/IP spoofing, data forgery, and connection hijacking impossible. etc. Ftp, telnet or rlogin users who use a protocol that transfers data in clear text are highly recommended to switch to SSH.
OpenSSH is an open source implementation of the SSH protocol that allows you to encrypt your network connection through a set of programs. If you want to have SSH on Linux, you can install OpenSSH, which consists of an OpenSSH server and client packages.
OpenSSH server/client packages come with the following utilities:
- OpenSSH server: sshd (SSH daemon)
- OpenSSH client: scp (secure remote copy), sftp (secure file transfer), slogin/ssh (secure remote login), ssh-add (private key completion), ssh-agent (authentication agent), ssh-keygen (authentication key management ).
If you want to install the OpenSSH server/client and configure the OpenSSH server to start automatically, follow the following instructions, which vary depending on the distribution.
Debian, Ubuntu or Linux Mint
$ sudo apt-get install openssh-server openssh-client
On Debian based systems, once installed, OpenSSH will start automatically on boot. If for some reason the OpenSSH server does not start automatically at system startup, you can run the following command to explicitly add ssh to the boot at system startup.
$ sudo update-rc.d ssh defaults
Fedora or CentOS/RHEL 7$ sudo yum -y install openssh-server openssh-clients $ sudo systemctl start sshd service $ sudo systemctl enable sshd.service
CentOS/RHEL 6$ sudo yum -y install openssh-server openssh-clients $ sudo service sshd start $ sudo chkconfig sshd on
Arch Linux$ sudo pacman -Sy openssh $ sudo systemctl start sshd service $ sudo systemctl enable sshd.service
Setting up an OpenSSH serverIf you want to configure the OpenSSH server, you can edit the system-wide configuration file located in /etc/ssh/sshd_config.
There are a couple of OpenSSH options that may be of interest:
By default, sshd listens on port 22 and listens for incoming ssh connections. By changing the default port for ssh, you can prevent various automated hacker attacks.
If your machine has more than one physical network interface, you may want to check which one is associated with sshd, for this you can use the ListenAddress option. This option helps improve security by limiting incoming SSH to only a specific interface.
HostKey /etc/ssh/ssh_host_key
The HostKey option determines where the personal host key is located.
PermitRootLogin no
PermitRootLogin option – whether root can log into the system via ssh.
AllowUsers alice bob
Using the AllowUsers option you can selectively disable the ssh service for certain Linux users. You can specify multiple users, separated by spaces.
After /etc/ssh/sshd_config has been changed, make sure to restart the ssh service.
To restart OpenSSH on Debian, Ubuntu or Linux Mint:
$ sudo /etc/init.d/ssh restart
To restart OpenSSH on Fedora, CentOS/RHEL 7 or Arch Linux:$ sudo systemctl restart sshd.service
To restart OpenSSH on CentOS/RHEL 6:$ sudo service sshd restart
How to connect to SSHConnecting to SSH from Linux
Linux users do not need to install additional programs.
Connecting to SSH from Windows
Hidden from guests
.Cygwin is more than just an SSH client. It is a powerful combiner that supports many Linux commands. For example, Cygwin makes it very easy to create SSL certificates (just like Linux). In Windows, to create self-signed certificates you need to dance with a tambourine. Cygwin is very convenient to use cURL (no need to install anything separately), etc. Those who lack the command line and Linux programs on Windows will find an outlet in Cygwin.
Installing Cygwin is easy. Let's go to
Hidden from guests
And download
Hidden from guests
Hidden from guests
A tiny file will download - this is the installer. Graphical installer. Although it contains a large number of options, they are all quite simple and many are familiar from other graphical installers. If something is not clear, just click “Next”. Perhaps only the following window can lead to confusion:
All elements available for installation are presented here. We don't need to understand them right now. Because the most popular ones are already marked for installation. And if something is missing in the future, you can easily install what you need.
SSH connection (common to Linux and Windows)
Linux users open the console, Windows users type in Cygwin.
SSH needs the following information to connect:
- IP or hostname
- port number
- Username
- user password
Ssh 192.168.1.36
I see the following
Alex@MiAl-PC ~ $ ssh 192.168.1.36 The authenticity of host "192.168.1.36 (192.168.1.36)" can"t be established. ECDSA key fingerprint is SHA256:sIxZeSuiivoEQ00RXAQHxylxuEA8SC5r/YPhL8wfp8s. Are you sure you want to continue connecting ( yes/no)?
Since I am connecting to the host for the first time, it is an unfamiliar host. They ask me if I want to continue. I'm dialing yes:
Warning: Permanently added "192.168.1.36" (ECDSA) to the list of known hosts. [email protected]"s password:
Okay, host 192.168.1.36 has been added to the list of familiar hosts. I am being asked for a password for user Alex. Since there is no such user on the server with SSH, but I click Ctrl+C(to break) and enter the command along with the username of the remote system. The user is entered before the address of the remote machine and is separated from the address by the @ symbol. The @ symbol in English is read as at and can be translated as “in”. Those. recording [email protected] can be interpreted as "mial user on machine 192.168.1.36".
The Alex@MiAl-PC invitation was replaced by the mial@mint invitation. This means that we are already on the remote machine, i.e. we have already made a connection. If you need to specify a port (if it differs from the standard one), then the port must be specified after the -p switch. For example like this:
Ssh [email protected]-p 10456
After connecting, we are greeted with something like this:
Linux mint 3.16.0-4-amd64 #1 SMP Debian 3.16.7-ckt11-1 (2015-05-24) x86_64 The programs included with the Debian GNU/Linux system are free software; the exact distribution terms for each program are described in the individual files in /usr/share/doc/*/copyright. Debian GNU/Linux comes with ABSOLUTELY NO WARRANTY, to the extent permitted by applicable law. Last login: Tue Jun 16 15:32:25 2015 from 192.168.1.35
It follows that the remote machine is Linux Mint, with kernel 3.16, 64-bit version. Also important information is the time of the last login and the IP address from which the connection originated. If the time and IP are unfamiliar to you and you are the only user, then your system is compromised and you need to take appropriate action.
Let's type a few commands to make sure where we are and who we are: pwd, [B]uname -a etc.:
To end the session (log out), dial
Or click Ctrl+D.
Login to SSH without entering a password
Firstly, it's just more convenient. Secondly, it's safer.
First, we need to create rsa keys. If you are a Linux user, then you are fine. If you are a Windows user, but you did not listen to my advice and chose PuTTY, then you have a problem and think for yourself how to solve it. If you have Cygwin, then everything is also in order.
If you managed to log in to the remote system, log out. After that, type
Ssh-keygen -t rsa
We are asked for a file name, we do not need to enter anything, the default name will be used. It also asks for a password. I don't enter the password.
Now on the remote machine we need to create a .ssh directory. Executing the command on a remote machine will be discussed below. For now, just copy the command, not forgetting to change the IP address and username to your own:
Ssh [email protected] mkdir.ssh
Now we need to copy the contents of the id_rsa.pub file to the remote machine. This is very easy to do (don’t forget to change the data to your own):
Cat .ssh/id_rsa.pub | ssh [email protected]"cat >> .ssh/authorized_keys"
Now we just log in and they don’t ask us for any password anymore. And it will always be like this now.
Executing commands on a remote server without creating a shell session
In addition to opening a shell session on a remote system, ssh also allows you to execute individual commands on the remote system. For example, to run the tree command on a remote host named remote-sys and display the results on the local system, you would do this:
Ssh remote-sys tree
My real example:
Ssh [email protected] tree
Using this technique you can do interesting things, like running an ls command on a remote system and redirecting the output to a file on the local system:
Ssh remote-sys "ls *" > dirlist.txt
Real example:
Ssh [email protected]"ls *" > dirlist.txt cat dirlist.txt
Note the single quotes in the above command. This is because we don't want path expansion to be done on the local machine; because we need this execution on a remote system. Also, if we want to redirect standard output to a file on the remote machine, we can put the redirection statement and the file name inside single quotes:
Ssh remote-sys "ls * > dirlist.txt"
Transferring standard output from local machine to remote machine via sshAn equally interesting option for executing commands is given a little higher:
Cat .ssh/id_rsa.pub | ssh [email protected]"cat >> .ssh/authorized_keys"
- The cat command reads and displays the contents of the .ssh/id_rsa.pub file, located on the local machine, line by line.
- | (pipe) passes what would appear on standard output to another command.
- Instead of a command that would process the strings passed to it, a connection is made to the remote system (ssh [email protected]).
- The remote system receives lines for which the cat >> .ssh/authorized_keys command is provided. Those. the contents of the standard output are written line by line to the .ssh/authorized_keys file located on the remote machine.
The next trick requires two Linux computers. Unfortunately, even Cygwin can't handle this trick. Moreover, both Linux systems must have a graphical user interface.
Tunneling with SSH
Among other things that happens when a connection is established with a remote host via SSH is the creation of an encrypted tunnel that is formed between the local and remote systems. Typically, this tunnel is used to ensure that commands typed on the local machine are securely transmitted to a remote machine, and the result is also securely sent back.
In addition to this basic functionality, the SSH protocol allows most types of traffic to be sent over an encrypted tunnel, creating a kind of VPN (virtual private network) between the local and remote systems.
Perhaps the most commonly used of these features is the ability to broadcast X Window systems traffic. On a system running an X server (these are machines that have a graphical user interface), it is possible to run an X client program (a graphical application) on a remote system and see the results of its operation on the local system. It's easy to do. For example, I want to connect to the remote host remote-sys and on it I want to run the xload program. At the same time, I will be able to see the graphical output of this program on the local computer. This is done like this:
Ssh -X remote-sys xload
Real example:
Ssh -X [email protected] gedit
Those. SSH starts with the -X switch. And then the program simply starts. Look at the screenshot.
I'm on Kali Linux. I successfully log in to a remote computer via SSH. After that I ran the gedit program. This program may not even be on Kali Linux, but it definitely is on Linux Mint, which is what I connected to. I can see the result of this program on the screen as if the program were running locally. But again, I want you to understand this, there is no gedit program running on the local computer. If I want to save the result of gedit (or any other program opened in this way), it turns out that it works in the environment of the remote computer, sees its file system, etc. This is convenient when you want to configure the remote computer using a graphical interface .
You will learn how to transfer an image from the entire desktop in the same article later, in the section “How to configure VNC via SSH”.
On some systems, this trick requires using the -Y option instead of the -X option.
Copying from/to a remote computer (scp and sftp)
scp
The OpenSSH package also includes two programs that use an encrypted SSH tunnel to copy files over the network. First program - scp(“secure copy”) - used more often, like the similar cp program for copying files. The most noticeable difference is that the source of the file can be the remote host followed by a colon and the location of the file. For example, if we wanted to copy a document called document.txt from our home directory to remote-sys in the current working directory on our local system, we could do this:
Scp remote-sys:document.txt . document.txt 100% 177 0.2KB/s 00:00
Real example:
# delete the file on the local machine if it exists rm dirlist.txt # create a file on the remote machine ssh [email protected]"ls * > dirlist.txt" # check for its presence ssh [email protected]"ls -l" # copy it to the local machine scp [email protected]:dirlist.txt. # check its contents cat dirlist.txt
sftpTo copy a file from B to A when logged into B:
scp /path/to/file username@a:/path/to/destination
Copying a file from B to A when logged in to A:
scp username@b:/path/to/file /path/to/destination
The second program to copy files over SSH is sftp. As its name suggests, it is a secure ftp program replacement. sftp works like the original ftp program. However, instead of sending in clear text, it uses an encrypted SSH tunnel. An important advantage of sftp over ftp is that it does not require a running FTP server on a remote host. It only requires an SSH server. This means that any remote machine that is connected via an SSH client can also be used as an FTP-like server. Here's an example session:
Alex@MiAl-PC ~ $ sftp [email protected] Connected to 192.168.1.36. sftp> ls dirlist.txt newfile.txt nfile.txt temp Videos Documents Downloads Images Music Public Desktop Templates sftp> lls dirlist.txt nfile.txt sftp> ls temp temp/TakeMeHome sftp> cd temp/ sftp> get TakeMeHome Fetching /home /mial/temp/TakeMeHome to TakeMeHome sftp> bye
The SFTP protocol is supported by many graphical file managers that can be found in Linux distributions. Using both Nautilus (GNOME) and Konqueror (KDE), we can enter URIs (links) starting with sftp:// in the jump bar and work with files located on a remote system running an SSH server.
Hello! I'm interested in the question: how to connect via SSH to your home computer via the Internet. I have a FreeSSHd server installed at home. As I understand it, I need to somehow open port 22 on the external IP? Alex
Yes, the need often arises. I talked about a lot of things in that article, but here we will talk exclusively about SSH, since Alex kindly provided us with this opportunity. Besides, I myself am incredibly interested in SSH, and here it’s also on Windows... mmm.
What is SSH and why is it needed?
The point is that SSH is S secure SH ell. Protocol for secure access to the control shell. Therefore, it provides access specifically to the command line, because Shell is translated as shell and here in the meaning text control shell. But in general, this protocol is notable for the fact that it allows any other traffic to pass within it, and in encrypted form. Thus, the secure file system connection protocol is called SFTP and runs on top of SSH. But it can tunnel absolutely any other connections - be it HTTP or even RDP. In essence, it turns out to be a “VPN on the knee”.
Here Alex has already done half the work; he installed and launched FreeSSHd on his home computer. This allows you to connect to Windows via SSH. In this case, “allows” is said very strongly. Because this solution works on Windows somehow. Firstly, it does not have a decent text interface - a command line, for control.
At least the regular one - cmd - allows you to do little with the remote machine. There is also Powershell - this is a more modern and powerful solution. Freesshd allows you to change the console to powershell, but I could not connect to it. I connected to CMD - but it is completely unusable:
Secondly, in the case of FreeSSHd, I was unable to connect to a Windows computer even via a local network, not to mention connecting via the Internet. Or rather, it’s possible to connect, but the service freezes and crashes; you won’t be able to manage the Windows host this way.

Therefore, I assume that Alex needed an ssh server on Windows to connect to the file system or use it as a VPN, proxying something over SSH. Although I doubt that FreeSSHd will allow this. Because thirdly: it doesn’t even save the settings; when you restart the service, everything goes wrong. In general, I really hope that Alex will tell us in the comments why he needed this.
How else can you run SSH on Windows?
There is a more workable solution - Powershelserver. Although it also has bugs, at least it doesn’t crash. Therefore, I would recommend using it to connect via SSH to Windows servers.
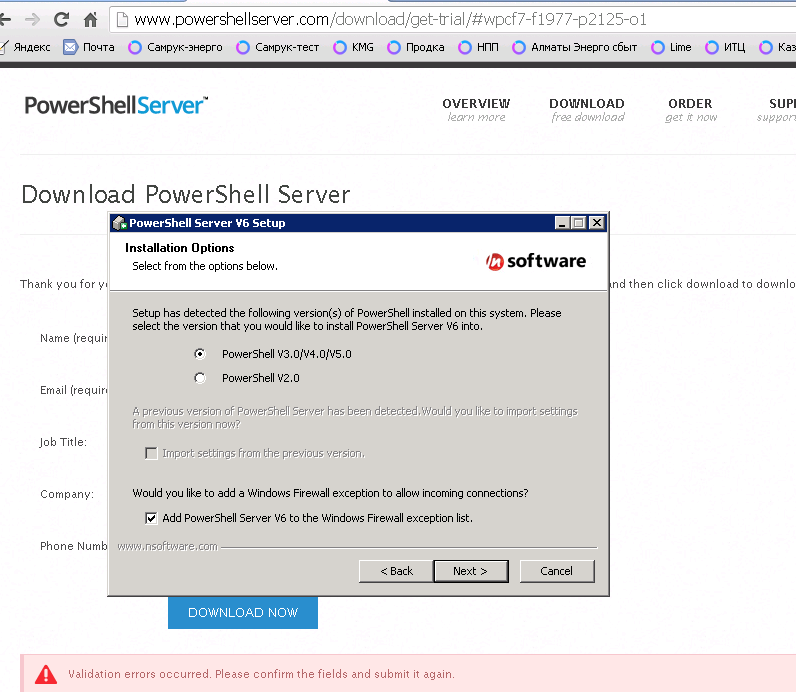
Firstly, it works stably without crashes. And through it you can really control windows via powershell.

All settings are saved normally. The same functions are available as in FreeSSHd and even more - you can use SCP - this is copying files over SSH.
But the most chic thing is the console! It works, gentlemen!

I connected easily, without any fuss with adding users (this needs to be done in freesshd). And that simple command to view the routing table worked perfectly and provided the necessary information. Frisssh “fell” for me precisely when I tried to view netstat -rn
Here you can really see that Russian characters are not displayed. So it’s easy to set up with us, I just set the encoding I need on powershellserver, restart, reconnect...

Setting Encoding in Powershellserver

Now we have full SSH and can fully manage Windows via the console.
Microsoft will create its own SSH solution
By the way, Microsoft announced back in the summer that it was going to develop native SSH support for Powershell in new versions of Windows. There are news announcements on Habré and on pcweek (and more). Therefore, we can only look forward to this landmark event, since it will truly be a breakthrough for work in heterogeneous networks.
I did not check the other functions - sftp and scp, but for some reason I am sure that they will also work great.
How to open an SSH port from outside?
So, we have come to the secret thing for which this article was started in the first place. I will answer the reader's question.
Port forwarding on a router or modem
To connect to a computer from the outside, you really need to do NAT, or, in a particular case, . How to do this depends on the device that is used as the gateway. This could be an ADSL modem or . In most cases, detailed instructions for your device can be easily found by queries like “port forwarding device_model" or "port forwarding device_model»
This is what it looks like on my Zyxel Keenetic Lite home router:

And this is how it looks on an ADSL modem with the functionality of the Linksys WAG200G router at hand:

In addition, with some providers this may not be technically possible because they do not provide "white" .
Forwarding a port to a remote server using an SSH tunnel
In this case, the only way available for connecting via SSH is from a local Windows machine (the same one to which we want to connect via SSH) to a remote server. In this case, you must have SSH access to some server on the Internet.

Setting up a "reverse" SSH tunnel
Such forwarding can be easily done using a simple SSH client Putty (there is also) Then you can connect to this very remote server via the forwarded port.

Well, if you need to share the Windows SSH port with the world, it is enough to specify ip_server:3322 as the destination in the reverse tunnel settings. You will be able to connect to Windows via SSH from anywhere where there is access to this very server.
How to check if the port is forwarded correctly?
Very simple. You need to check if it is open. In the case of SSH, the open port will respond with a message about its version. The simplest way to check a port is the telnet utility.
Just type on the command line, separated by spaces:
telnet domain_or_IP port
If the port is available, you will see something like this:

SSH response if port available
If the port is unavailable for some reason, you will see either “connection refused” or “connection timeout”. In the first case, it will be instantaneous, and means that the port is closed by a firewall.
In the second case, it will look like a “hang” and can last up to several minutes - the telnet client will try to establish a connection. This may also mean blocking by a firewall, but of a different type. Either simply that the specified host is unavailable or the port on it is closed.
If you were able to connect via telnet, then press the key combination Ctrl+] and enter quit, then Enter. Otherwise, you won’t be able to interrupt the session and will have to open a new console window if you still need it.
This article is marked as unfinished. See note at the end of the article.
This article is devoted to the client and server of a secure terminal (secure shell) in Ubuntu, their configuration and use. SSH is a special network protocol that allows you to gain remote access to a computer with a high degree of connection security. You can read more about the ssh protocol.
Description of operating principles and applications used
Basically, SSH is implemented in the form of two applications - an SSH server and an SSH client. Ubuntu uses a free implementation of an SSH client and server - OpenSSH. When connecting, the client undergoes an authorization procedure with the server and an encrypted connection is established between them. The OpenSSH server can work with both the ssh1 and ssh2 protocols. The ssh1 protocol is currently considered insecure and its use is highly discouraged. I deliberately omit various technical details of the protocol, since the main purpose of this guide is to describe its configuration and use. There are many articles on the Internet about the protocol itself, the principles of its operation, encryption algorithms, etc., for example, you can read about it in detail.
Installation
Install OpenSSH You can use the command from the terminal:
sudo apt-get install sshThe ssh metapackage contains both a client and a server, but this will most likely install only the server, since the client is already included in Ubuntu by default.
Server Tuning
When installing, the SSH server is automatically added to startup. You can control its start, stop or restart using the commands:
sudo service ssh stop| start| restartThe main configuration file for an SSH server is the /etc/ssh/sshd_config file, which can only be read or edited by the superuser. After each change to this file, you must restart the ssh server to apply such changes.
Example of default SSH server configuration in Ubuntu:
# An example of an open-ssh server configuration with Russian # # comments..2010. # # # # # # Conventions: # # By "default" we mean the behavior of sshd when # # the directive is not explicitly specified. It's worth noting that in Ubuntu # # the sshd_config file already contains a number of settings that # # are the default settings for Ubuntu specifically. # # Such settings are specified in this file. # # # ############################################### ############# ################ Address/port settings, etc. ########### ######################################## ###################### # # ## Port ######################### ############################# # # # Port used. You can specify several, for example: # # Port 22 # # Port 23 # # Port 24 # # It is recommended to use a non-standard port, because # # standard is often scanned by bots for potential # # holes. Can be omitted if specified # # via an address. See also the ListenAddress parameter. # # # Port 22 # # ## ListenAddress ######################################## ### # # # Network address on which the server is listening. The address can # # be written like this: # # ListenAddress host|IPv4_addr|IPv6_addr # # ListenAddress host|IPv4_addr:port # # ListenAddress :port # # If no port is specified, sshd will listen on this address and # # on the port specified in the option Port. If you will # # use ListenAddress without specifying a port, then the # # Port option must precede the ListenAddress option. If not # # specified, then by default listens on all local # # addresses. You can specify multiple addresses. # # # ## AddressFamily ############################################ # # # Specifies which IP address family should be # # used by sshd. Possible options: # # “any” - any # # “inet” (IPv4 only) # # “inet6” (IPv6 only) # # Default - “any”. # AddressFamily inet # # ## UseDNS ########################################### ######## # # # Specifies whether sshd should check the hostname and # # use that hostname to check the IP address sent by the client against # # received from DNS. # # The default value is “yes”. # # # ############################################### ############# ############# User access settings ############## ####### ################################################## ### # # # Allowing/not allowing a user is determined by the # # DenyUsers, AllowUsers, DenyGroups, and AllowGroups directives. # # in this case, the check goes from top to bottom along the chain: # # ## DenyUsers ## # # || # # ## AllowUsers ## # # || # # ## DenyGroups ## # # || # # ## AllowGroups ## # # Only user and group names are accepted, numeric # # identifiers (UserID) are not recognized. Correct # # recording of several users/groups in turn, separated by # # spaces. If written in the form user@host, then # # the user and the host are checked separately, this allows # # to limit access to certain users from # # certain hosts. It's worth remembering that the # # DenyUsers and AllowUsers directives take the user's # # name as a parameter, while DenyGroups and AllowGroups take the # # group name. See PATTERNS in man ssh_config for more # # information about the forms for recording user and group names. # # # ## DenyUsers ############################################ ### # # # List of USERS who CANNOT use sshd. # # Default - not specified = no one is banned. Those. if # # a user is specified here, then he will be denied access # # to the ssh server. # # # ## AllowUsers ############################################ ## # # # List of USERS that CAN use sshd, # # By default - not specified = allowed to everyone. Those. if # # at least one user is specified, ssh access to the server # # is only available to that user. # # # ## DenyGroups ############################################ ## # # # List of GROUPS that should NOT be used by sshd. # # Default - not specified = no group is prohibited. # # That is if at least one group is specified, then users # # included in this group will be denied access to the ssh # # server. # # # ## AllowGroups ############################################ # # # # List of GROUPS that sshd CAN use. # # Default - not specified = allowed to everyone. Those. if # # at least one group is specified, then only those users# # included in it will be allowed access to the ssh server.# # # #################### #################################################### Options determining the connection status ############# #################################### ######################### # # ## TCPKeepAlive ###################### ######################### # # # Indicates whether the system needs to send TCP messages to the client # # in order to maintain the connection. If you send these packets, # # you can determine if the connection is broken. However, this also # # means that the connection may be broken in the event of a # # momentary routing outage and # # this is very annoying for some. On the other hand, if # # such messages are not sent, sessions on the server can # # last indefinitely, creating “ghost” users # # and devouring server resources. The default value is “yes”,# # i.e. send such messages. To disable sending # # such messages, set the value to “no”. Previously this # # option was called KeepAlive. It's worth noting that # # there are more secure ways to check the status of # # a connection (see below). # # # TCPKeepAlive yes # # ## ClientAliveCountMax ###################################### # # # Sets the number of messages to clients that sshd # # sends in a row without receiving any response from # # the client. If the threshold is reached and # # the client does not respond, sshd will disconnect the client, terminating the # # ssh session. It is worth noting that the use of such # # messages is completely different from the TCPKeepAlive directive. # # Messages to/from clients are sent over an encrypted # # channel and are therefore not susceptible to spoofing. Messages # # TCPKeepAlive are susceptible to spoofing. The client alive # # mechanism is especially valuable in cases where the server and client need # # to know when the connection has become inactive. The default # # value is 3. In case ClientAliveInterval # # is set to 15 and ClientAliveCountMax is left at the # # default, unresponsive clients will be disconnected after approximately # # 45 seconds. This directive only works for # # the ssh2 protocol. # # # ## ClientAliveInterval ######################################## # # # Sets the time interval in seconds. If there is no communication with the client during # # this interval, sshd # # sends a message over an encrypted channel requesting # # a response from the client. The default is 0, i.e. # # do not send such messages. This directive works # # only for the ssh2 protocol. # # # ############################################### ############# ################ General authentication options ################ ## ################################################## ######## # # ## AuthorizedKeysFile ##################################### # # # # Specifies a file that contains public keys # # used to authenticate users. The # # directive may contain tokens of the form %M, which are inserted during the # # connection establishment process. # # The following tokens are defined: # # %% - replaced with the literal "%" # # %h - replaced with the home directory # # of the authenticated user # # %u - replaced with the name of the authenticated user # # Thus, the key file can be specified as # # in an absolute way (i.e. one shared file with keys), and # # dynamically - depending on the user (i.e. one # # file for each user). # # Default is “.ssh/authorized_keys”. # # Example for a key file in the user's home folder: # # AuthorizedKeysFile %h/.ssh/authorized_key # # Example for a shared file: # # AuthorizedKeysFile /etc/ssh/authorized_keys # # See the description of the authorized_keys file for more # # information. # # # ## ChallengeResponseAuthentication ############################ # # # Specifies whether to allow challenge-response authentication # # ). All # # types of authentication from login.conf are supported. Default is “yes”, # # i.e. allow. # # On Ubuntu - disabled for security reasons. # # # ChallengeResponseAuthentication no # # ## HostbasedUsesNameFromPacketOnly ######################### # # # Specifies how the server should obtain the client's hostname # # when an authentication scheme based on host verification. # # If set to "yes", sshd will # # use the hostname provided by the client when checking for a match in the files # # ~/.shosts, ~/.rhosts or /etc/hosts.equiv. # # (performing reverse DNS resolution) If set to "no"# # - sshd will resolve the name from the TCP connection itself. # # Default is "no". # # # ## IgnoreRhosts ############################################ # # # Prevents the use of .rhosts and .shosts files # # in host-based authentication. # # (RhostsRSAAuthentication or HostbasedAuthentication). # # The /etc/hosts.equiv and /etc/ssh/shosts.equiv files are still # # in use. # # Default is “yes”. # # # IgnoreRhosts yes # # ## IgnoreUserKnownHosts ##################################### # # # Indicates whether sshd should ignore user # # "known hosts" file ~/.ssh/known_hosts during # # host based authentication process # # (RhostsRSAAuthentication or HostbasedAuthentication). # # Default is “no”. # # # ## PermitBlacklistedKeys ################################### # # # Indicates whether sshd should be accepted keys blacklisted # # as compromised (known-compromised # # keys (see ssh-vulnkey)). If set to “yes” - # # authentication attempts with such keys will be logged # # and accepted, if set to “no” - # # authentication attempts will be rejected. # # Default is “no”. # # # ## PermitEmptyPasswords ######################################## # # # In case of allowed authentication with using a password, # # indicates whether login with a blank password is possible. # # Default is “no”. # # # PermitEmptyPasswords no # # ## PermitRootLogin ######################################## # # # # Indicates whether ssh login as superuser # # (root) is possible. Can take the following values: # # “yes” - the superuser can log in. The # # current global authentication scheme is applied. # # # # “without-password” - the superuser can log in. # # Password authentication will be disabled for it. # # # # “forced-commands-only” - the superuser will be able to log in using # # authentication based on a public key and # # only if he passes the command required to be executed. # # This is useful for making backups, # # even when normal (i.e. not via ssh) # # superuser login is disabled. All other # # authentication methods for the superuser will be blocked.# # # # “no” - the superuser cannot use ssh to # # login. # # # # The default value is “yes”. # # # PermitRootLogin yes # # ## Protocol ######################################## ######## # # # Specifies which protocol sshd should use. # # Possible values of '1' and '2' are ssh1 and ssh2 # # respectively. Simultaneous writing is possible, in which case # # the values should be separated by commas. # # Default is “2.1”. # # It is worth noting that the order of the protocols in the # # entries does not determine the priority, because the client chooses which # # of several protocols proposed by the server to # # use. The "2,1" entry is absolutely identical # # to the "1,2" entry. # # # Protocol 2 # # ## UsePAM ######################################## ########## # # # Enables the PAM interface (Pluggable Authentication Module # # interface). If set to "yes", all authentication types # # besides session and account module processing # # PAM authentication will be used based on # # challenge-response (ChallengeResponseAuthentication and # # PasswordAuthentication) Because # # challenge-response authentication in PAM generally serves the same role # # as password authentication, you should disable # # either PasswordAuthentication or # # ChallengeResponseAuthentication. It's worth noting that # # if the UsePAM directive is enabled, you will not be able to run # # sshd as a user other than root. # # The default value is “no”. # # # UsePAM yes # # ## PasswordAuthentication ################################### # # # Indicates whether enabled whether authentication using # # password. # # Default is “yes”. # # # ## HostKey ############################################ ##### # # # Specifies the file containing the private host key # # used by SSH. The default is /etc/ssh/ssh_host_key # # for the ssh1 protocol and /etc/ssh/ssh_host_rsa_key and # # /etc/ssh/ssh_host_dsa_key for the ssh2 protocol. It's # # worth noting that sshd will not use a file # # that is accessible to anyone other than the user. You can # # use multiple files with keys, the keys are “rsa1” - # # for the ssh1 protocol and “dsa”/“rsa” for the ssh2 protocol. # # # HostKey /etc/ssh/ssh_host_rsa_key HostKey /etc/ssh/ssh_host_dsa_key # # ################################## ############################# ########## SSH protocol version 1 (ssh1) options ### ########## ######################################## #################### # It is STRONGLY NOT RECOMMENDED to use the ssh1 protocol.# # The ssh2 protocol is much more secure than ssh1 # ########### ################################################# # # ## KeyRegenerationInterval ################################# # # # For the ssh1 protocol - once at a certain time # # a new temporary server # # key is automatically generated (if one has been used). This is done to # # prevent intercepted sessions from being decrypted in order to # # later log into the machine with the parameters of these sessions and # # steal the keys. Such a key is not stored anywhere (it is stored in # # RAM). This directive specifies the # # lifetime of the key in seconds, after which it will # # be generated again. If the value is set to 0 - # # the key will not be generated again. # # The default value is 3600 (seconds). # # # KeyRegenerationInterval 3600 # # ## RhostsRSAAuthentication ################################## # # # Indicates whether authentication based on # # rhosts or /etc/hosts.equiv files in conjunction with successful # # host authentication via RSA. # # Only relevant for the ssh1 protocol. # # Default is “no”. # # # RhostsRSAAuthentication no # # ## RSAAuthentication ########################################## # # # Indicates whether "pure" RSA authentication is allowed. # # Only relevant for the ssh1 protocol. # # Default is “yes”. # # # RSAAuthentication yes # # ## ServerKeyBits ######################################## ### # # # Defines the number of bits in the server's temporary key for # # the ssh1 protocol. Minimum value is 512. # # Default value is 1024. # ServerKeyBits 768 # # ################################## ############################ ########### SSH protocol version 2 (ssh2) options #### ######## ########################################### ################### # # ## Ciphers ######################### ###################### # # # Indicates the encryption algorithms allowed for # # the ssh2 protocol. Multiple algorithms must be # # separated by commas. Supported algorithms: # # “3des-cbc”, “aes128-cbc”, “aes192-cbc”, “aes256-cbc”, # # “aes128-ctr”, “aes192-ctr”, “aes256-ctr”, “ arcfour128”, # # “arcfour256”, “arcfour”, “blowfish-cbc”, “cast128-cbc”. # # By default: # # aes128-cbc,3des-cbc,blowfish-cbc,cast128-cbc,arcfour128, # # arcfour256,arcfour,aes192-cbc,aes256-cbc,aes128-ctr, # # aes192-ctr, aes256-ctr # # # ## HostbasedAuthentication ################################### # # # Indicates whether authentication is enabled , based on # # host verification. rhosts or /etc/hosts.equiv is checked, # # and if successful, combined with a successful check # # of the public key, access is allowed. This directive # # is the same as the RhostsRSAAuthentication directive and # # is only suitable for the ssh2 protocol. # # Default is "no". # # # HostbasedAuthentication no # # ## MACs ######################################## ############ # # # Indicates a valid MAC algorithm (message # # authentication code). The MAC algorithm is used # # by the ssh2 protocol to protect data integrity. Multiple # # algorithms must be separated by commas. # # Default: # # hmac-md5,hmac-sha1, [email protected] ,hmac-ripemd160, # # hmac-sha1-96,hmac-md5-96 # # # ## PubkeyAuthentication ########################## ########## # # # Indicates whether authentication based on # # public key is allowed. Only relevant for the ssh2 protocol. # # Default is “yes”. # # # PubkeyAuthentication yes ############################################## ################ #################### GSSAPI Options ############# ############# ##################################### ######################### # # ############ Applicable only for ssh2 protocol ######## ### # # ## GSSAPIAuthentication ######################################## # # # Indicates whether or not Is user authentication # # based on GSSAPI. The default is "no", i.e. prohibited. # # # ## GSSAPIKeyExchange ######################################### # # # Indicates whether key exchange based on # # GSSAPI is allowed. Key exchange using GSSAPI does not rely on # # ssh keys to verify host identity. # # The default is "no" - i.e. exchange is prohibited. # # # ## GSSAPICleanupCredentials ################################ # # # Specifies whether to automatically destroy # # user cache of authentication credentials when # # session ends. # # The default is "yes" - i.e. needs to be destroyed. # # # ## GSSAPIStrictAcceptorCheck ################################ # # # Specifies how strict the identity check should be # # client when authenticating via GSSAPI. # # A value of "yes" causes the client to authenticate to the # # receiving host service on the current host. The value "no" # # allows the client to authenticate using any # # service key. # # The default is "yes". # # It's worth noting that setting this to "no" may # # only work with rare Kerberos GSSAPI libraries. # # # ############################################### ############# ################### Kerberos Options ################ ########## ########################################### ################### # # ## KerberosAuthentication ########################## ######## # # # Indicates whether the password # # provided by the user for authentication # # (PasswordAuthentication) requires validation in the Kerberos KDC. # # To use this option, the server must # # verify that the KDC is true. (The server needs a # # Kerberos servtab which allows the verification of the # # KDC’s identity) # # Default is “no”. # # # ## KerberosGetAFSToken ######################################### # # # If AFS is active and the user has received a Kerberos 5 TGT, # # whether to attempt to obtain an AFS token before the user # # can access their home folder. # # Default is “no”. # # # ## KerberosOrLocalPasswd ################################### # # # Indicates what to do in case of if authentication # # via Kerberos fails. If # # value = "yes", the password will be verified using # # any additional local authorization mechanism, # # for example /etc/passwd. # # Default is “yes”. # # # ## KerberosTicketCleanup ################################### # # # Indicates whether to automatically kill file with # # user ticket cache at the end of the session. # # Default is “yes”. # # # ############################################### ############# ################# Redirection options ################### ## ################################################# ############# # # ## AllowAgentForwarding ################################## ### # # # Indicates whether to allow or disable redirection # # ssh-agent. The default is “yes”, i.e. allow. # # It is worth noting that disabling redirection will not # # increase security until users also # # shell access will be denied, since they can always install # # their own agent analogs. # # # ## AllowTcpForwarding ###################### ################ # # # Indicates whether to enable or disable TCP redirection. # # The default is “yes”, i.e. allow. It is worth noting that # # that both in the case of AllowAgentForwarding, disabling # # redirection will not increase security as long as # # users have console access, because they can # # install their counterparts. # # # # # ## GatewayPorts ######### ################################### # # # Specifies whether to allow remote hosts access to # # forwarded ports . By default, sshd listens # # for connections to forwarded ports only on the local # # loopback interface. This prevents other remote # # hosts from connecting to the forwarded ports. You can # # use GatewayPorts to allow sshd to # # do this. The directive can take 3 values: # # "no" - loopback only. # # "yes" - any addresses. # # "clientspecified" - addresses specified by the client. # # # ## PermitOpen ############################################ ## # # # Indicates where TCP port forwarding is allowed. # # Specifying a redirection must take one of # # the following forms: # # PermitOpen host:port # # PermitOpen IPv4_addr:port # # PermitOpen :port # # Multiple entries can be specified by separating them with spaces. # # The “any” argument can be used to remove all # # restrictions on port forwarding. By default, any # # redirection is allowed. # # # ## PermitTunnel ############################################ # # # Indicates whether redirection of tun devices is allowed. # # Can take values: # # “yes” # # “point-to-point” (3rd network layer) # # “ethernet” (2nd network layer) # # “no” # # Value “yes” allows both “point-to-point” # # and “ethernet” at the same time. The default is “no”. # # # ############################################### ############# ################## Logging options ################# ### ################################################# ############# # # ## SyslogFacility ################################ ########## # # # Sets the log object code for writing messages to # # syslog from sshd. Possible values: # # DAEMON # # USER # # AUTH # # LOCAL0 # # LOCAL1 # # LOCAL2 # # LOCAL3 # # LOCAL4 # # LOCAL5 # # LOCAL6 # # LOCAL7 # # The default is AUTH. # # # SyslogFacility AUTH # # ## LogLevel ########################################### ######## # # # Sets the verbosity level of the sshd log. # # Possible options: # # SILENT # # QUIET # # FATAL # # ERROR # # INFO # # VERBOSE # # DEBUG # # DEBUG1 # # DEBUG2 # # DEBUG3 # # Default is INFO. # # DEBUG and DEBUG1 are equivalent to each other. # # DEBUG2 and DEBUG3 set the highest levels of debug # # output. Logging at DEBUG level threatens # # user privacy and is not recommended. # # # LogLevel INFO # # ########################################### ################# ################### X11 redirection ############ ######## ########################################### ################### # # ## X11Forwarding ############################ ################ # # # Indicates whether X11 graphics subsystem # # redirection is enabled. Can take the values “yes” or “no”. # # Default is “no”. # # Attention - enabling simple X11 redirection is # # a big risk for both the server and clients, because In # # such a redirection, the sshd proxy display # # accepts connections from any addresses. Use # # the X11UseLocalhost directive to restrict access to the # # X's redirect server. It is worth noting that # # disabling redirection will not guarantee that # # users will not be able to redirect X11, because having # # console access they always install their own # # redirector. X11 redirection will be # # automatically disabled if the UseLogin # # directive is enabled. # # # X11Forwarding yes # # ## X11UseLocalhost ######################################## # # # # Indicates whether sshd should limit the scope of # # X11 forwarding to a local loopback address, or # # should allow any addresses. By default, sshd # # sets the X11 redirect server to a local address # # and sets the hostname portion of the DISPLAY environment variable # # to “localhost”. It's worth noting that # # some older X11 clients may not work with these # # settings. The default is "yes", i.e. redirection # # is limited by the localhost, the value - “no” - disables # # restrictions. # # # ## XAuthLocation ############################################ # # # Specifies the full path to the xauth program. # # Default is /usr/bin/X11/xauth. # # # ## X11DisplayOffset ######################################### # # # Indicates number of the first display available to sshd as an # # X11 redirect. This is done so # # that redirected Xs do not overlap with # # real ones. Default is 10. # # # X11DisplayOffset 10 # # ######################################### ###################### ################### Various options ####### ################### ################################## ############################ # # ## LoginGraceTime ################### ######################### # # # Time after which the server disconnects # # the user if he was unable to log in # # satisfactorily. Value 0 - allows the user # # to log in indefinitely. Default is 120 (seconds). # # # LoginGraceTime 120 # # ## MaxAuthTries ########################################### #### # # # Indicates the maximum number of authentication attempts # # allowed per connection. # # Once the number of failed attempts exceeds half the # # specified value, all subsequent attempts will # # be logged. The default value is 6. # # # ## MaxSessions ###################################### ####### # # # Specifies the maximum number of simultaneous connections # # for each network connection. Default is 10. # # # ## MaxStartups ######################################## ###### # # # Specifies the maximum number of simultaneous # # unauthorized connections to sshd. If # # the number of connections exceeds the limit, all additional # # connections will be dropped until the current # # connections are completed either with successful authorization # # or the time period specified in the # # LoginGraceTime directive has expired. The default value is 10. # # Optionally, you can set connections to reset early by # # specifying three values as a parameter, separated # # by a colon “start:rate:full” (for example: "10:30:60"). # # sshd will reject a connection attempt with a probability equal to # # “rate/100” (i.e. in our example - 30%) if there are already # # “start” (10) unauthorized connections. # # The probability increases linearly and any # # connection attempts will be rejected if the number of unauthorized # # connections reaches “full” (60). # # # ## Compression ############################################ # # # # Indicates whether data compression is enabled. Can be # # "yes" - compression is enabled. # # "delayed" - compression is delayed until # # the user is successfully authenticated. # # "no" - compression is disabled. # # Default is "delayed". # # # ## UseLogin ############################################ #### # # # Indicates whether login should be used for an # # interactive session. The default value is “no”. # # It's worth noting that login has never been used to # # execute remote commands. Also note that # # using login will make it impossible to use # # the X11Forwarding directive, because login doesn't know what to # # do with xauth. If the # # UsePrivilegeSeparation directive is enabled, it will be disabled after # # authorization. # # # ## UsePrivilegeSeparation ###################################### # # # Specifies whether sshd should separate privileges . If yes # # then an unprivileged child # # process will be created first for incoming network traffic. After successful # # authorization, another process will be created with the privileges # # of the logged in user. The main purpose of # # privilege separation is to prevent abuse of access rights. # # The default value is “yes”. # # # UsePrivilegeSeparation yes # # ## StrictModes ########################################### ##### # # # Indicates whether sshd should check the access and # # ownership modes of user folders and files before # # allowing the user to login. This is usually because # # newbies often make their files writable # # by everyone. The default is “yes”. # # # StrictModes yes # # ## AcceptEnv ######################################## ####### # # # Specifies which environment variables passed # # by the client will be accepted. See the SendEnv option in the client. # # It's worth noting that passing variables is only possible # # for the ssh2 protocol. Variables are specified by name, # # masks can be used ('*' and '?'). You can specify # # multiple variables separated by spaces, or split AcceptEnv into # # multiple lines. Be careful - some # # environment variables can be used to bypass # # prohibited user environments. Use this # # directive carefully. By default, no # # user environment variables are accepted. # # # AcceptEnv LANG LC_* # # ## PermitUserEnvironment ################################### # # # Specifies whether sshd should accept # # ~/.ssh/environment and the environment= option in # # ~/.ssh/authorized_keys. The default is “no”. It's # # worth noting that enabling environment processing may give # # users the ability to bypass restrictions in some # # configurations that use mechanisms such as # # LD_PRELOAD. # # # # # ## PidFile ########################################### ####### # # # Specifies a file containing the process ID # # (process ID, PID) of the SSH daemon. # # Default - /var/run/sshd.pid # # # # # ## PrintLastLog ############################# ############### # # # Specifies whether sshd should display the date and time # # of the last session when the user logs interactively. # # Default is “yes”. # # # PrintLastLog yes # # ## PrintMotd ######################################## ####### # # # Specifies whether sshd should display /etc/motd # # when a user logs in interactively. On some # # systems (for example Ubuntu) this information is also # # displayed by the shell. # # The default value is “yes”. # # # PrintMotd no # # ## Banner ######################################## ########## # # # Indicates which file contains a text banner that # # will be shown to the user BEFORE the # # authentication procedure. The option is only available for the ssh2 protocol.# # By default - does not show anything. # # On Ubuntu, the issue.net file contains the phrase Ubuntu (version), # # for example, for karmic it is "Ubuntu 9.10". Can # # be used to disorient possible attackers, # # by writing there, for example, "My D-Link Interet Router" =) # # # Banner /etc/issue.net # # ## ChrootDirectory ########### ############################### # # # If specified, provides the path to # # be chrooted after authentication. The path and all its # # contents must correspond to folders # # owned by the superuser and not be # # writable by other users. # # The path can contain labels that are substituted during the # # authentication process: # # %% - replaced with the literal "%" # # %h - replaced with the home directory # # of the authenticated user # # %u - replaced with the name of the authenticated user # # chroot -the folder should contain all the necessary files and # # folders for the user session. An interactive # # session requires at a minimum: # # a shell, usually sh # # basic devices in /dev such as: # # null, zero, stdin, stdout, stderr, arandom and tty # # for a data transfer session using sftp no # # additional settings are needed if the internal # # sftp server process is used. See Subsystem for # # more information. By default, chroot is not performed. # # # ## ForceCommand ############################################ # # # Causes the specified command to be executed. Ignores # # any commands sent by the client or written to # # ~/.ssh/rc. The command is called from the user's # # shell with the -c option. Suitable for launching a shell, # # command, or subsystem. Most useful inside a # # Match block. The command originally issued by the client is stored # # in the SSH_ORIGINAL_COMMAND environment variable. If you # # specify the "internal-sftp" command, the # # internal sftp server will be started, which does not need the additional # # files and folders described in the ChrootDirectory directive. # # # ## Subsystem ############################################ ### # # # Defines and configures an external subsystem (for example # # file transfer daemon). # # The arguments are the name and command (with possible # # arguments) that will be executed when requesting # # subsystems. The sftp-server command starts the “sftp” - # # file transfer subsystem. Additionally, you can specify # # “internal-sftp” as the subsystem - which will launch # # the internal sftp server. This can greatly simplify # # configuration when using the # # ChrootDirectory directive. By default, no subsystems # # are called. Only relevant for the ssh2 protocol. # # # Subsystem sftp /usr/lib/openssh/sftp-server # # ################################# ############################ ##################### Match Block ############################ ####################### ##################################### # # # I specially moved it to the end of the file to make it more convenient # # write Match rules. # # MadKox. # # # # The Match directive represents the start of a conditional # # block. If all criteria specified in the # # Match line are met, the directives on subsequent lines of the block are executed, # # allowing the values of the global directives in the # # sshd_config file to be bypassed for the case that is the criteria for the # # Match directive. A block is considered to be all lines coming after the line # # with the criterion (Match - lines) to the next match line # # or to the end of the file. The Match directive's argument is one or # # multiple pairs of criteria entries. Possible types of entries: # # User # # Group # # Host # # Address # # Entries can contain either single values # # (for example User=user) or multiple values # # separated by commas (User=user1,user2). Regular expressions described in the # # PATTERNS section of the ssh_config file can also be used # #. Entries in the # # Address criteria can contain addresses in CIDR # # (Address/Mask Length, e.g. “192.0.2.0/24” or # # “3ffe:ffff::/32”) notation. It's worth noting that the provided # # mask length must match the address, and too # # long/short for the address will not work. # # Match can only use # # a specific set of directives as directives: # # AllowTcpForwarding # # Banner # # ChrootDirectory # # ForceCommand # # GatewayPorts # # GSSAPIAuthentication # # HostbasedAuthentication # # KbdInteractiveAuthentication # # KerberosAuthentication # # MaxAuthTries # # MaxSessions # # PasswordAuthentication # # PermitOpen # # PermitRootLogin # # RhostsRSAAuthentication # # RSAAuthentication # # X11DisplayOffset # # X11Forwarding # # X11UseLocalHost #
You can copy the above text into your own sshd_config and use it later for configuration.
In itself, an incorrectly configured SSH server is a huge vulnerability in the security of the system, since a possible attacker has the opportunity to gain almost unlimited access to the system. In addition, sshd has many additional useful options that it is advisable to enable to improve usability and security.
Port, ListenAddress and AddressFamily
These three parameters determine on which ports and addresses your server will listen for incoming connections. Firstly, it makes sense, if possible, to limit the family of addresses being processed to those actually used, i.e. if you only use IPv4, disable IPv6, and vice versa. This can be done using the AddressFamily parameter, for example (to allow IPv4 and deny IPv6):
AddressFamily inet
Secondly, it is advisable to change the standard port (22) on which sshd listens. This is due to the fact that numerous network scanners are constantly trying to connect to port 22 and at least gain access by brute-forcing logins/passwords from their database. Even if you have password authentication disabled, these attempts heavily clog the logs and (in large quantities) can negatively affect the speed of the ssh server. If for some reason you do not want to change the standard port, you can use various external utilities to combat brute forcers, for example fail2ban, and built-in ones, such as MaxStartups.
You can set the port either as an absolute value for all interfaces using the Port directive, or as a specific value for each interface using the ListenAddress directive. For example:
Port 2002
ListenAddress 192.168.0.1:2003 ListenAddress 192.168.1.1:2004
Deny remote access for superuser
By default, root access is prohibited by password (by key it is possible) - the PermitRootLogin option is set to without-password . But, given that by default in Ubuntu the user added during system installation has the ability to solve all administrative tasks via sudo, creating the ability for root access to the system via ssh seems unreasonable (even with key authentication). It is recommended to turn it off completely. this option, or use it only in forced-commands-only mode. You can disable root access like this:
PermitRootLogin no
Password authentication
Password authentication, which is allowed by default, is practically the most primitive method of authorization in sshd. On the one hand, this simplifies the configuration and connection of new users (the user only needs to know his system login/password), on the other hand, the password can always be guessed, and users often neglect to create complex and long passwords. Special bots constantly scan ssh servers accessible from the Internet and try to log in to them by brute-forcing logins/passwords from their database. It is strongly recommended not to use password authentication. You can disable it like this:
PasswordAuthentication no
If for some reason you still want to use password authentication, make sure that no one can log in with a blank password. To do this, set the PermitEmptyPasswords directive:
PermitEmptyPasswords no
Protocols SSH1 and SSH2
As already mentioned, sshd can work with the SSH1 and SSH2 protocols. However, using insecure SSH1 is highly discouraged. You can force sshd to work only with the SSH2 protocol like this:
Authentication based on SSH2 RSA keys
The most preferred authorization method is authentication based on SSH2 RSA keys. With this method, the user generates a pair of keys on his side, of which one key is secret and the other is public. The public key is copied to the server and is used to verify the user's identity. For more information about creating a key pair and how to place them on the server, see the description of the SSH client. You can enable public key authentication like this:
PubkeyAuthentication yes
The server must know where to look for the user's public key. A special file authorized_keys is used for this. Its syntax could be as follows:
# Comments are written only on a new line # general appearance of entries in the authorized_keys file # [options] key_type (ssh-rsa or ssh-dss) very_long_string_incomprehensible to the common man [login@host] ssh-rsa AAAAB3Nza...LiPk== [email protected] from="*.sales.example.net,!pc.sales.example.net" ssh-rsa AAAAB2...19Q== [email protected] command="dump /home",no-pty,no-port-forwarding ssh-dss AAAAC3...51R== example.net permitopen="192.0.2.1:80",permitopen="192.0.2.2:25" ssh -dss AAAAB5...21S== tunnel="0",command="sh /etc/netstart tun0" ssh-rsa AAAA...== [email protected]
You can specify either one shared file with keys, or one file for each user. The latter method is more convenient and secure, because you can, firstly, specify different key combinations for each user, and secondly, limit access to the user’s public key. You can specify a file with keys using the AuthorizedKeysFile directive:
AuthorizedKeysFile %h/.ssh/my_keys
for the schema user - file
or
AuthorizedKeysFile /etc/ssh/authorized_keys
for a scheme with a shared file. By default, the SSH client looks for keys in the ~/.ssh/authorized_keys file.
More about safety
Additional settings
Users and groups.
If you have many users “living” on your server, and you want to allow access via ssh to only a few of them, you can use the DenyUsers, AllowUsers, DenyGroups, and AllowGroups directives. For more information about these directives, see the comments in the sshd_config example.
Connection Status Options
By default, among the methods for determining the connection state, only the TCP connection check method is enabled - TCPKeepAlive, however, sshd can determine connection states in more convenient and secure ways. See the corresponding section in the sshd_config example for more details.
Performance. MaxStartups
Port Forwarding
X11 redirection
On the server, in the /etc/ssh/sshd_config file, set the parameter (enabled by default):
ForwardX11 yes
On the client, set the parameters in the /etc/ssh/ssh_config file (disabled by default):
ForwardAgent yes ForwardX11 yes
You can run it on the client like this: ssh yurauname@serverip firefox . Or first go to ssh yurauname@serverip and then run, for example, sudo synaptic .
SFTP
sshd has a built-in SFTP server by default. SFTP (SSH File Transfer Protocol) - SSH protocol for transferring files. It is designed to copy and perform other file operations over a reliable and secure connection. As a rule, the SSH2 protocol is used as the base protocol providing the connection. To enable SFTP support, add the line to sshd_config
Subsystem sftp /usr/lib/openssh/sftp-server
By default, SFTP support is enabled.
Using criteria. Match directive
Setting up an SSH client
Login using a key is considered the most secure, and in most cases this feature is enabled on the server side, so no superuser rights are required to use it. On the client machine we generate a key:
ssh-keygen -t rsaWe are prompted to enter a password to protect the key file (it turns out to be useful if the file falls into the wrong hands). If we are going to execute scripts via SSH, then we leave it empty. We transfer the public key to the server with the command
Ssh-copy-id -i ~/ .ssh/ id_rsa.pub user@ server
That's it, you can come in.
When ssh is running on a non-standard port:
Ssh-copy-id -i ~/ .ssh/ id_rsa.pub "-p port user@server"
If an error occurs: Bad port "umask 077; test -d .ssh || mkdir .ssh ; cat >> .ssh/authorized_keys"
try putting the parameters in quotes:
Ssh-copy-id "-i /home/user/.ssh/id_rsa.pub "-p port user@server""
It is convenient to use the screen utility when connecting to a remote system.
Setting up a remote ssh directory in Nautilus
Mounting a remote directory using sshfs
Mounting a remote directory to a local directory
sshfs user@ hostingserver.ru:/ home/ userdir ~/ sshfsdirUnmounting
Fusermount -u ~/ sshsfdir
SSH aliases
When using several servers with different access parameters (non-standard port, long host name, login other than the local one, etc.), it is sometimes tedious to enter all the connection settings again each time. To make this easier, you can use aliases.
Settings are stored in ~/.ssh/config for a single user and in /etc/ssh/ssh_config globally for all users.
Example config. Multiple servers may be described. More details in man ssh_config(not to be confused with sshd_config)
Host AliasName # Arbitrary host name HostName 1.2.3.4 # You can specify both IP and hostname (if DNS is running) User YourUserName # If the user does not match the local user Port YourSSHPort # If a non-standard port
After this you can connect to the server with the command
ssh AliasNamessh-agent
Diagnosing connection problems
Connection log analysis:
Analysis of client and server configuration files.
The location of the configuration files can be found in
Man ssh man sshd
Using smart cards
1. Creating a certificate and exporting a public key, as well as the client part on Windows + Putty SC, is described on the website: http://habrahabr.ru/post/88540/ The Key Manager add-on described there is available only in older versions of Firefox. Tested on version 3.5 for Windows. Direct link to the add-on: https://addons.mozilla.org/ru/firefox/addon/key-manager/
2. Preparing the server. You need to make sure that your sshd configuration allows authentication using public keys. To do this, you need to specify the value of the “PubkeyAuthentication” parameter to “yes” in the “sshd_config” file. Then we add our public key obtained earlier (in one line) to the file “~/.ssh/authorized_keys”. Please note that the “.ssh/authorized_keys” file is located in the home directory of the user who will then log in using the public key.
3. Client part on Linux. You will need to rebuild the OpenSSH package without parameters. It is only recommended to specify directory prefixes, for example –prefix=/usr. You should also note that the config files will be in /usr/etc. Before you start, you need the following packages: opensc-lite-devel, zlib-devel, openssl-devel. Install the smart card driver. For convenience, in the ssh_config config (not to be confused with sshd_config), specify the path to the pkcs library: PKCS11Provider=<путь к библиотеке>
4. On the client, run ssh user@host If the smart card (token) is connected, you will be prompted for a password and logged into the SSH session.
Possible problems during use
The usual key combination Ctrl + S, used in many editors to save corrections, when working in a terminal with an ssh server, will lead to the execution of the XOFF command, which superficially resembles a session freeze. However, it is not. The server continues to accept input characters and commands, but does not display it on the screen. To get out of this predicament, just use the combination Ctrl + Q, thereby turning on the XON mode back.
Links
That is, user1 can be registered both for himself - in the file /home/user1/.ssh/keys) and for another user, which will allow him to log in from his computer both “under himself” and under “another”
SSH (Secure Shell) is a network protocol designed for remote server management and data transfer over TCP encrypted connections. Most hosting services, even virtual ones, today provide access via both FTP and SSH. In my opinion, this is great, SSH is much more convenient and safer to use.
Setting up SSH
The setup will take place for a dedicated server, VDS, VPS on Debian, Ubuntu. The configuration file is located here: /etc/ssh/sshd_config.
If you have regular hosting, everything should be configured as it should, go to the section.
By default, the SSHD daemon (which is what we are making changes to) does not need any settings and works fine. We will only make a couple of small changes in order to limit the access of unwanted persons to the server.
As a result of making incorrect changes to the configuration file, you may lose access to the server via ssh, so make sure you have alternative options to access it, for example using the ISPManager control panel.
How to restrict SSH access
All changes are made to /etc/ssh/sshd_config
For the changes to take effect, you must
Change port
Port 9724Now, when authorizing, you need to specify 9724 instead of the standard 22 port.
The method is very simple and effective against most simple hacker bots that knock on standard ports. The main thing here is not to create a conflict with other services and choose a number that is obviously unused.
Disable communication using the old protocol
Here we define that communication is only possible using the v2 protocol
If you are not logged in root, before all console commands you need to add sudo - it stands for Substitute User and DO- replace the user and do (under him). For example, it allows you to execute commands as a superuser root.
Reduce the number of authorization attempts
MaxAuthTries 2Number of password attempts. Default is 6. If the search fails, the communication session is terminated.
Reduce authorization waiting time
LoginGraceTime 30sBy default, an authorization session can last 120 seconds. After this time it ends. 2 minutes for authorization is overkill; all this time the server keeps the connection open, which is very irrational. Half a minute is enough.
Close IP access
Before setting up IP restrictions, make sure that in case of an error in the settings and subsequent ban of your own IP, you will have an alternative way to regain access to the server
If only you need access, the simplest and most reliable way is to block access from everywhere except your IP or, if it is dynamic, then the IP range.
- Open /etc/hosts.allow and add SSHD there: 192.168.1.1
where 192.168.1.1 is your IP. If you have a dynamic IP, define an IP with a subnet mask and write down your subnet instead of the IP, for example:
SSHD: 192.168.0.0/16
- Open /etc/hosts.deny and add there: SSHD: ALL
Another way to restrict access via IP
You can use the following directive:
AllowUsers = *@1.2.3.4
Here we only allow access for IP 1.2.3.4
SSH authorization by keys
It will be much safer, more convenient and correct to set up ssh authorization without a password. For this purpose, key authorization will be used.
So here are the instructions.
You purchased your first VPS, or maybe even a server right away. Surely you have a web panel to administer it. But hard admins always go through the console 😉 Therefore, we need to learn how to do this. In this lesson, we will install the PuTTY program, connect to the server via the SSH protocol, and learn how to determine the occupied and free space on the server.
Putty program for connecting to a server via SSH protocol
Download Putty from the site putty.org For myself, I download the version “For Windows on Intel x86 - PuTTY: putty.exe”
Unpack the archive and launch the program.
This is what the program window looks like after launch. I have already entered the IP address of my server in the “Host Name (or IP address)” field:
Enter the domain or IP address of your server and click the “Open” button. A command prompt window opens. It asks us for a username and password. First, enter your login, then your password. Attention, when entering the password, the characters are not printed on the screen, even the asterisks *** are not printed. Therefore, we enter the password as if blindly. Enter and press Enter. If the password was entered correctly, you will be logged into the server management console. A line with the last login time and information about the operating system is displayed.

Commands in the console
pwd
df
The df command shows the amount of free and used space on the server, across all mounted file systems
du
The du command shows how much space a folder or file takes up.
Example command:
Du -h /home/
This command will show how much space the /home/ directory takes up.
That's all. The first acquaintance with connecting to a server via SSH and the putty program is over. Using this information, you can go to the server and see how much space the data takes up on it.


