Global search and replace. Global Search and Replace Keyboard Shortcuts: Form Management
Tricks when working in 1C: Accounting 8.3 (edition 3.0) Part 2
2017-02-09T10:31:17+00:00With this article I continue a series of notes on effective techniques for working in 1C: Accounting 8.3. I’m talking about tricks that few people know and even fewer people use in their work. The techniques that will be discussed can significantly save time and improve your skills as a specialist. The first part is available.
n
Trick #4: Search in the current column immediately after you start typing.
How are you not already taking advantage of this amazing opportunity? In any magazine (be it a reference book or documents), select any line in any column and just start typing.
The system will automatically select rows that contain the value you enter in one of the columns:
If you need to cancel the filter, press the Esc button on your keyboard or the cross in the search field:
![]()
But what if we need to search not in all columns, but only in a specific one?
To search in the current (selected) column, use the combination Alt + F or the menu item "More" -> "Advanced search":

To instantly select (without displaying a dialog box) by the current column and the value selected in it, use the combination Ctrl + Alt + F or the menu item "More" -> "Find:...".
For example, let's select all documents whose number contains the number 8. To do this, select the "Number" column in any row and press Alt + F.
In the window that opens, enter the number 8 and click “Find”:

Great, the list contains documents whose number (in any position) contains the number 8:

To cancel the selection, press the combination Ctrl + Q or remove the selection from the top panel (cross):

Attention! If the search does not work (an empty selection is obtained), you probably have full-text search enabled and its index has not been updated.
Full-text search is configured in the "Administration" section, "Support and Maintenance" item:


Technique #5: Entering into the input field line by line.
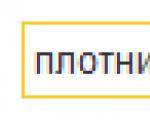
Suppose you need to fill in the counterparty field in the “Receipt of goods and services” document and you know that the counterparty is called something like “aero”.

And instead of selecting a counterparty from the list, just go and start typing the text “aero” in the counterparty input field. As you can see, the system itself suggests possible options for counterparties that begin with these letters. The desired Aeroflot has been found - all that remains is to select it.

And this can be done in any field!
Technique #6: Summarizing selected cells in reports.
Simply select the required cells with the mouse - the amount will automatically be displayed in the field indicated in the figure. And if you need to select cells that are not nearby, use the CTRL key. Hold it down and select the required cells in the report to get their sum.

Trick #7: Save any printed forms in any convenient format.
Any report or printed document can be saved in a suitable format to your computer. Simply create a printable form and click on the floppy disk icon at the top of the program window.

Now choose a name and format for the document. This can be excel, word, pdf, html and many other popular formats.

Print (Ctrl+P)
The global search and replace mode is designed to search for a specific string in all modules, dialogs, spreadsheet documents,
configuration descriptions and external files (external reports and processing, spreadsheet documents). The found text may be
replaced by another. This mode can be used, for example, to search for all calls to some global procedure or
accessing any details in different modules.
The search mode is called up by selecting the item Edit - Global Search, and the replacement mode – by selecting the Edit item –
Global replacement.
These modes use the same dialogue. If the search mode is selected, the replacement mode details become unavailable.
Therefore, for brevity, we will consider the global replacement procedure, and then we will indicate the features of the search mode.
A dialog will appear on the screen to set search parameters.
In the Search field of this dialog, you should enter a search pattern or select one of the patterns that were previously used in search operations from the history list.
In the Replace field, you need to enter the text with which you want to replace the found text, or select one of the samples that were previously used in replacement operations from the history list.
To distinguish between upper and lowercase letters when searching, you need to select the checkbox Match case. If the Search whole word checkbox is selected, only whole words will be found, not parts of words.
If you do not need to open editors during group replacement (click the Replace All button), then you need to check the Do not open editors during group replacement checkbox. In any state of the checkbox, the editor will open when you press the Search or
Replace .
Below is a panel whose tabs indicate where to look for the specified sample.
On the Text types tab, the types of objects in which the search will be performed are marked. If the configuration is edited for startup mode Managed Application, then user interfaces will be excluded from the list of objects.
On the Configurations tab, you can specify, down to the object, the configuration sections in which the search will be performed. In addition to the main one, the list of configurations includes the database configuration, storage configuration, extension configuration (if they are open) and configuration of extensions saved in the database (for open extensions). Storage configurations must be open before calling Find or Replace mode. Database configurations (main and extensions) are only available when using global search.
To specify a set of objects, you need to select the Selected objects radio button and mark those objects in which the search will be performed. When you first start it, all objects are marked by default in the list. To remove the installation, you should
uncheck the box in the line with the configuration name. You can then specify specific objects to search.
On the Files tab, you can specify the directory and file types that can be searched. The following types of browsing files can be viewed: configurations located in files (saved, delivery files), external reports and processing, text and spreadsheet documents. If the directory is not specified (the Directory attribute is not filled in), then the files are not searched. Searches can also be performed in open documents of the same types. To do this, check the Search in box.
open documents.
The selected set of settings can be saved for future use. To do this, you need to specify the name of the setting in the Search scope field. To use the previous setting, simply select the setting name in the drop-down list. Are saved
the following settings: settings on the Text types tab, the composition of objects only for the main configuration on the Configurations tab and settings on the Files tab.
If the search mode has been started, then to start the search you need to click the Search button.
In global search mode, you can interrupt the process by pressing Ctrl + Break.
On the screen in the window Search results a list of found occurrences of the source text will be displayed.
If any module has access restrictions (see here), then before searching for the source text in this module, the system requests an access password. You must enter the correct password or refuse to enter a password. If the password is not entered, then
viewing is not performed in this module.
The search result can be viewed, and you can go to each found value if you select the desired line from the search result and press the key Enter. To view the next or previous found value, you can use the items
Actions – Next Position and Actions – Previous Position.
The search result (the entire list) can be saved to the clipboard using the Copy command of the window context menu or using the corresponding button on the toolbar of the search results window, as well as displayed in a table or text
document.
The width of the columns can be changed using the standard method - using the mouse pointer while pressing the Ctrl key.
If the replacement mode was started, then in the To text field the sample text with which to replace the original text specified in the Replace field is indicated.
If you need to look at the source text before replacing, then to start the search you should click the Search button. The result of the first source text found is displayed on the screen. If you click the Search button again, the current text will be skipped and the next occurrence of the source text in the current window or another window containing the source text will be displayed.
Group replacement (without confirming each replacement) will be performed by clicking the Replace all button. If in this case you do not need to open objects in which an occurrence of the source text is detected, then you should select the Do not open checkbox
editors during group replacement.
ATTENTION! You cannot change your search terms while viewing search results.
The structure of the search area selection (text types, list of configuration objects, files and open documents) is remembered and restored the next time the dialog is opened. If you need to save several areas, then each area in the Search area attribute must be assigned a name. When you reopen the search window in the list of areas, just select the one you need and perform a search.
Full text search- will allow you to find text information located almost anywhere in the configuration used. In this case, you can search for the necessary data either throughout the entire configuration as a whole, or by narrowing the search area to several objects (for example, certain types of documents or directories). The search criteria themselves can vary over a fairly wide range. That is, you can find the necessary data without even remembering exactly where it is stored in the configuration and how exactly it was recorded.
Full text search provides the following capabilities:
- There is support for transliteration (writing Russian words using Latin characters in accordance with GOST 7.79-2000). Example: "Russian phrase" = "russkaya fraza".
- There is support for substitution (writing part of the characters in Russian words with single-key Latin characters). Example: “russrfz frapf” (the endings of each word are typed in Latin letters, for example, as a result of an operator error).
- There is a possibility of fuzzy search (the letters in the found words may differ) with indication of the fuzzy threshold. Example: by specifying the word “hello” in the search bar and a vagueness of 17%, we will find all similar words with and without errors: “hello”, “prevet”, “prived”.
- It is possible to specify the scope of the search for selected metadata objects.
- Full-text indexing of standard field names ("Code", "Name", etc.) is carried out in all configuration languages.
- The search is performed taking into account synonyms of Russian, English and Ukrainian languages.
- The morphological dictionary of the Russian language contains a number of specific words related to areas of activity that are automated using the 1C:Enterprise program system.
- As a standard, the supplied dictionaries include dictionary databases and dictionaries of thesaurus and synonyms of the Russian, Ukrainian and English languages, which are provided by the Informatik company.
- The search can be carried out using wildcard characters ("*"), as well as specifying search operators ("AND", "OR", "NOT", "NEXT") and special characters.
Full-text search can be carried out in any configuration on the 1C:Enterprise 8 platform
To open the full-text search control window, do the following:
Regular application- menu item Operations - Managing Full Text Search.
Managed Application- menu item Main menu - All functions - Standard -Full text search management.

- Update index– Index creation/Index update;
- Clear index– resetting the index (recommended after updating all data);
- item Allow index merging– is responsible for merging the main and additional index.
 Full-text search is carried out using a full-text index. Without an index, full-text search as such is not possible. For a search to be effective, all relevant data must be included in the full-text index. If the user enters new data into the database, it must be included in the index in question, otherwise it will not participate in the search. To avoid this, you need to update the full-text index. When updating, the system analyzes only certain types of data: String, Reference type data (links to documents, directories), Number, Date, Value Storage. If the user does not have access rights to certain information, then he will not be able to see it in the search results. You should also remember that in the properties of the objects for which the search will take place the value must be set Full Text Search – Use, which is set by default.
How can you notice the property Use set for the entire directory Counterparties, but this can be done for each of its attributes of the corresponding type.
Let's take a closer look at the full-text index, which consists of two parts (indexes): the main index and the additional one. High data retrieval speed is ensured by the main index, but updating it is relatively slow, depending on the volume of data. The additional index is the opposite of it. Data is added to it much faster, but searching is slower. The system searches simultaneously in both indexes. Most of the data is in the main index, and data added to the system goes into the additional index. While the amount of data in the additional index is small, searching through it is relatively fast. At a time when the system load is light, an index merge operation occurs, as a result of which the additional index is cleared and all data is placed in the main index. It is preferable to perform index merging at a time when the system load is minimal. For this purpose, you can create regulated tasks and scheduled tasks.
Special operators allowed when specifying a search expression
The full-text search mechanism allows writing part of the characters of a Russian word using single-key Latin characters. The search result will not change.

Two operators NEXT
- simplified. 8 words apart
- NEAR/[+/-]n – search for data in one attribute at a distance of n-1 words between them.
The sign indicates in which direction from the first word the second word will be searched. (+ - after, - before)
The wildcard "*" can only be used as a substitute for the end of a word
Fuzziness operator "#". If the exact spelling of the name, name is unknown.
Software and 1C tools: programming.
Synonym operator "!" Allows you to find a word and its synonyms
How to programmatically update a full text search index?
Code 1C v 8.x Procedure UpdateIndices() ExportFulltextSearch.UpdateIndex();
End of Procedure
Full text data search example
Defining the SearchList Variable
Code 1C v 8.x Variable Search List;
In addition, in the procedure for processing the When Form Opens event, we will determine that this variable will contain a full-text search list, with the help of which we will search the data
Code 1C v 8.x Procedure OnOpen()
SearchList = FullTextSearch.CreateList();
End of Procedure
Now, for the event of clicking on the Find button, we will write code that will allow us to perform a search in accordance with the expression specified in the SearchExpression field
Code 1C v 8.x Procedure FindClick(Element)
SearchList.SearchString = SearchExpression;
Attempt
SearchList.FirstPart();
Exception
Warning(ErrorDescription());
EndAttempt;
If SearchList.FullQuantity() = 0 Then
Form Elements.ResultMessage.Value = "Not found";
Form Elements.Search Result.SetText("");
Otherwise
OutputSearchResult();
endIf;
End of Procedure
First in this procedure, we set the search term entered by the user as the search string for full-text search. Then we execute the FirstPart() method, which actually launches a full-text search and returns the first portion of results. By default, a chunk contains 20 elements. After that, we analyze the number of elements in the search list. If it does not contain a single element, then we display a corresponding message in the form. Otherwise, the DisplaySearchResult() procedure is called, which displays the results to the user.
Let's create a procedure with the same name in the form module and write the code in it:
Code 1C v 8.x Procedure OutputSearchResult()
Form Elements.ResultMessage.Value = "Displayed" + Row(SearchList.InitialPosition() + 1) + " - " + Row(SearchList.InitialPosition() +SearchList.Quantity()) + " from " + SearchList.FullQuantity();
Result = SearchList.GetDisplay(FullTextSearchDisplayType.HTMLText);
FormElements.SearchResult.SetText(Result);
ButtonAvailability();
End of Procedure
The steps in this procedure are simple. First, we generate a message about which elements are displayed and how many total elements were found. Then we get the result of the full-text search in the form of HTML text and display this text in the HTML document field located in the form.
Finally, we transfer control to the Button Availability() procedure in order to make available or, conversely, deny access to the Previous Portion and Next Portion buttons (depending on which portion of the results obtained is displayed). The text of this procedure is presented in the Code
Code 1C v 8.x Procedure Button Availability ()
Form Elements.NextPosition.Availability = (SearchList.FullQuantity() - SearchList.StartPosition()) > SearchList.Quantity();
Form Elements.PreviousPosition.Availability = (SearchList.StartPosition() > 0);
End of Procedure
Now you need to create event handlers for clicking on the PreviousPart() and NextPart() buttons.
Code 1C v 8.x Procedure Previous Portion Pressing (Element)
SearchList.PreviousPart();
OutputSearchResult();
End of Procedure
Procedure Next Portion Pressing (Element)
SearchList.NextPart();
OutputSearchResult();
End of Procedure
The final “touch” is to create a handler for the onclick event of the HTML document field located in the form. The fact is that the result of a full-text search, presented in the form of HTML text, contains hyperlinks to the numbers of elements of the search list. And we would like that when the user clicks on this link, the system would open the form of the object that is contained in this list element. To do this, we will intercept the onclick event of the HTML document contained in the HTML document field, get the list item number from the hyperlink, and open the corresponding object's form. The text of the onclick event handler of an HTML document field is presented in code
Code 1C v 8.x Procedure Search Resultonclick(Element, pEvtObj)
htmlElement = pEvtObj.srcElement;
// Check element id
If (htmlElement.id = "FullTextSearchListItem") Then
// Get the file name (search list line number),
// contained in the hyperlink
NumberInList = Number(htmlElement.nameProp);
// Get the search list string by number
SelectedRow = SearchList[NumberInList];
// Open the form of the found object
OpenValue(SelectedRow.Value);
pEvtObj.returnValue = False;
endIf;
End of Procedure
In this article I will tell you about the quick search function of 1C Enterprise 8. What is quick search? Very simple. Quick search is one of the ways to navigate large lists of 1C records. These can be lists of documents, directories, registers - everything that is presented in tables.
What is quick search?
The quick search function in 1C Enterprise documents is extremely convenient and allows you not to scroll through huge amounts of data (for example, using the scroll bar), but to immediately go to the desired place in the list. Unfortunately, novice users of 1C Enterprise 8 (including 1C Accounting 8) at first do not use the quick search capabilities, preferring to scroll through lists of documents manually (and they can be Very large). This article will help you understand using quick search in 1C.
First of all, it should be noted that in 1C Enterprise 8 configurations built on managed forms, quick search works differently than in previous versions of 1C. Therefore, we will analyze separately the use of quick search in managed forms and in regular ones.
Quick search in 1C Accounting 8.2
In versions of 1C Accounting from 8.0 to 8.2 This function is intended specifically for transition to the desired part of the list. For example, look at the chart of accounts window shown in the figure.
A certain line is highlighted in the window. Pay attention to the subtle triangle of stripes, pointed to by the red arrow. As in other Windows programs where there are lists (for example, in Explorer), the position of this marker (triangle) determines the sorting of the list as a whole - In which column the marker is placed, the entire list will be sorted by that column. In the figure, the marker is in the Code column, therefore the accounts in the chart of accounts will be sorted by code.
The marker can be moved from one column to another by clicking on the desired column ( on the column HEADING!) with the mouse. If the marker is already in the current column, then clicking will change the sorting direction to the opposite (i.e. from large to small or vice versa). This is standard behavior for any Windows program. What is the peculiarity of this marker in 1C Enterprise and how does it relate to quick search?
A quick search in 1C Enterprise 8 lists is carried out by the column in which the marker is located. In this case, a quick search in the chart of accounts will be carried out using the Code column.
There was an important part of the article, but without JavaScript it is not visible!
How to use quick search in 1C? Easily! Just start typing what you want to find in THIS column, i.e. where the marker is. In the example in the figure above, you must enter the account number. For example, you want to find the account 50 Cash. In this case, enter ( No need to click anywhere!) number 50 from the keyboard and if there is an account with that number in this column (and, of course, there is one), then the list will scroll to this line, and the line itself will be highlighted. The result is shown in the chart of accounts screenshot below.

The text the arrow points to is no need to wash afterwards- he will disappear on his own.
In the example above, if you start typing the word “Cashier”, the text at the bottom of the window will be entered and then erased. This happens because as soon as start the entered quick search string no longer matches the beginning of at least one line in this column, 1C Enterprise concludes that the searched string was not found and automatically erases it. Due to this There are two rules to remember.
In 1C Enterprise 8, a quick search is performed at the beginning of the line, i.e. in a column, a match of the entered text with the beginning of one of the lines of this column is searched.
This leads to an important recommendation: when entering data into directories, name the elements so that they can be conveniently found using a quick search. For example, it is better to write the name of the counterparty as “Firm Name LLC” than “Firm Name LLC”. And even more so, you should not use quotes and other unnecessary symbols in the name (we are talking about filling out the Name field in forms).
If you start typing text and it gets erased, what you are looking for is not in this column! In this case, check the input language, as well as the column in which the quick search is performed. A typical mistake is that the wrong column is selected. For example, the marker is set in the Code column, and the search is performed by the account name.
Quick search in 1C Accounting 8.3
Now let's see how quick search differs in version 1C Enterprise 8.3. Usage is largely similar to version 8.2, but there is one major difference to remember.
In 1C Accounting 8.3, as well as in any other configurations on managed forms (the same new interface), it works as a filter. Simply put, as a result of the quick search function, part of the list hiding.
We will now find out how to use this. First, look at the screenshot of the 1C Accounting 8.3 chart of accounts window below.

As you can see, the same marker is in one of the columns. The search is also carried out in the column in which the marker is installed. This all remains unchanged. However, if you start entering text (in the example, the account number), the following will happen.

As you can see, the search window simply opened automatically. The exact same window will open if you click on the search button on the window toolbar (underlined in the figure). As a result, when you click the Find button in the search window (hidden behind the drop-down menu in the picture) or simply Enter, you get the following result.

From this it is clear that a quick search in 1C Accounting 8.3 simply leaves visible the part of the list that satisfies the search conditions. In this case, the Find button disappears, and instead a lens with a cross appears (underlined in the figure), when clicked, the list returns to its original state (the line found as a result of a quick search remains highlighted).
Another important feature of quick search in 1C Accounting 8.3— a match is not searched for at the beginning of the line, as in version 8.2, but a match is searched for a match with any part of the lines in the column. Thus, if you name the counterparty “Firm Name LLC”, and when searching, start entering “Firm Name LLC”, then the line will still be found!
Drawing conclusions
Thus, quick search in 1C Accounting 8.2 and earlier versions is intended to scroll the list to the desired line, and in 1C Accounting 8.3 quick search works like a regular filter, hiding the part of the list that you do not need.
Each 1C solution on the 1C:Enterprise 8 platform has a wide range of capabilities. However, there are universal techniques that can be used in any configuration. With this article we are opening a series of publications in which 1C methodologists will talk about the universal capabilities of the 1C:Enterprise 8 platform. Let's start with one of the most important methods for increasing work efficiency - with a description of “hot” keys (actions from the keyboard, as a rule, are performed faster than those through the menu using the mouse). Having mastered the hotkeys, you will simplify the execution of frequently repeated actions.
Table 1
Action |
Keyboard shortcuts |
How the program works |
Create a new document |
||
Open an existing document |
||
Open calculator |
Opens the calculator |
|
Show properties |
Alt+Enter |
|
Open message window |
||
Close message window |
Ctrl + Shift + Z |
|
Open scoreboard |
Opens the scoreboard |
|
Open help |
Opens help |
|
Call up help index |
Shift + Alt + F1 |
Calls up the help index |
Hotkeys: global actions
Global actions are actions that you can perform in any program state. It does not matter what is currently open in 1C:Enterprise. The main thing is that the application is not busy performing any task.
Global actions are actions that can be called anywhere in the running 1C:Enterprise 8 platform. Regardless of what exactly happens in the running configuration, the meaning of global actions does not change (for example, pressing Ctrl+N will always bring up the dialog for creating a new document).
Table 1
Hotkeys for global actions
Action |
Keyboard shortcuts |
How the program works |
Create a new document |
Opens a window asking you to select the type of new document to create in various formats - for example, text, spreadsheet or HTML |
|
Open an existing document |
Opens the standard "Open" dialog box, accessible through the "File/Open…" menu |
|
Activating the search field in the command bar |
Places the cursor in this field |
|
Open calculator |
Opens the calculator |
|
Show properties |
Alt+Enter |
Depending on what the cursor is placed on, it opens the corresponding properties palette for this object or element. Useful when working with tables, text, HTML, etc. |
Open message window |
Allows you to open a previously closed message window. It is often useful when a window is accidentally closed and you need a message from it. Please note: as long as the system has not entered anything into the message window again, old messages are retained even if the window is closed |
|
Close message window |
Ctrl + Shift + Z |
Closes the message window when it is no longer needed. Please note: the combination is chosen so that it can be easily pressed with one hand |
Open scoreboard |
Opens the scoreboard |
|
Open help |
Opens help |
|
Call up help index |
Shift + Alt + F1 |
Calls up the help index |
Hotkeys: general actions
General actions- actions that have the same meaning in different configuration objects, but the behavior of the 1C:Enterprise 8 platform changes depending on where exactly you use this or that general action. For example, pressing the "Del" key marks the current directory element for deletion if you are in the list of directory elements window. Or deletes the contents of the current cell of a spreadsheet document if you are editing it.
Table 2
Hotkeys for common actions
Action |
Keyboard shortcuts |
How the program works |
Deletes the element under the cursor (current element) or the selected group of elements |
||
Add |
Allows you to add a new element |
|
Saves the active document |
||
Print the active document |
Calls up the print dialog for the active document |
|
Printing to the current printer |
Ctrl + Shift + P |
Initiates direct printing of the active document to the default printer assigned in the system (without opening the print dialog) |
Copy to clipboard |
Ctrl+C |
Copies the required element or selected group of elements to the Windows clipboard |
Cut to clipboard |
Ctrl+X |
Cuts the required element or selected group of elements to the Windows clipboard. Differs from copying in that the copied element or group is deleted after entering the buffer |
Paste from clipboard |
Ctrl+V |
Pastes existing data from the Windows clipboard into the location marked by the cursor. |
Add to clipboard as number |
Shift + Num + (*) |
Used for numeric values |
Add to clipboard |
Shift + Num + (+) |
Used for numeric values. Addition operation with data on the clipboard |
Subtract from clipboard |
Shift + Num + (-) |
Used for numeric values. Subtraction operation with data on the clipboard |
Select all |
||
Undo last action |
Ctrl+Z |
|
Revert undone action |
Ctrl+Y |
|
Find next |
||
Find next highlighted |
||
Find previous |
||
Find previous selection |
Ctrl + Shift + F3 |
|
Replace |
||
Ctrl + Num + (-) |
||
Select all |
Selects all available elements in the active document |
|
Undo last action |
Ctrl+Z |
Undoes the last action taken |
Revert undone action |
Ctrl+Y |
Allows you to undo “Ctrl + Z”, in other words - to return what you did before pressing undo the last action taken |
Opens a dialog for setting search parameters in the active configuration object and performing this search |
||
Find next |
Finds the next element that matches the parameters specified in the search settings |
|
Find next highlighted |
Finds the next element that matches the one you selected (for example, where the cursor is placed) |
|
Find previous |
Finds the previous element that matches the parameters specified in the search settings |
|
Find previous selection |
Ctrl + Shift + F3 |
Finds the previous element matching the one you selected |
Replace |
Opens the Find and Replace Values dialog (where allowed) |
|
Collapse (tree node, spreadsheet document group, module grouping) |
Ctrl + Num + (-) |
Used where tree nodes marked with "+" or "-" are available |
Collapse (tree node, spreadsheet document group, module grouping) and all subordinates |
Ctrl + Alt + Num + (-) |
|
Collapse (all tree nodes, spreadsheet document groups, module groupings) |
Ctrl + Shift + Num + (-) |
|
Expand (tree node, spreadsheet document group, module grouping) |
Ctrl + Num + (+) |
|
Expand (tree node, spreadsheet document group, module grouping) and all subordinates |
Ctrl + Alt + Num + (+) |
|
Expand (all tree nodes, spreadsheet document groups, module groupings) |
Ctrl + Shift + Num + (+) |
|
Next page |
Ctrl + Page Down |
Quickly scroll through the active document |
Previous page |
Ctrl + Page Up |
|
Enable/disable fat content |
Used where text formatting is supported and possible |
|
Enable/disable italics |
||
Enable/disable underlining |
||
Go to previous web page/help chapter |
Used in HTML documents |
|
Go to next web page/help chapter |
||
Abort execution of a data composition system report |
Hotkeys: window management
This section combines hotkeys common to all windows and forms of the 1C:Enterprise platform.
Table 3
Hotkeys for managing windows
Action |
Keyboard shortcuts |
How the program works |
Close an active free window, modal dialog, or application |
This combination can quickly complete the entire configuration on the 1C:Enterprise platform, so use it carefully |
|
Close active regular window |
Closes the current normal window |
|
Close active window |
Closes the currently active window |
|
Activate the next regular window |
Ctrl+Tab |
Allows you to activate the following window among those open within the configuration. Pressing in a cycle while holding the Ctrl key allows you to scroll through open windows “forward” |
Activate previous normal window |
Ctrl + Shift + Tab |
Allows you to activate the previous window among those open within the configuration. Pressing in a cycle while holding the Ctrl key allows you to scroll through open windows “back” |
Activate the next section of the window |
Activates the next section of the current window |
|
Activate previous window section |
Activates the previous section of the current window |
|
Call the system menu of an application or modal dialog |
Allows you to see the system menu of operations (minimize, move, close, etc.) above the program window or open modal dialog |
|
Call the window system menu (except for modal dialogs) |
Alt + Hyphen + (-) |
Allows you to see the system menu of operations (minimize, move, close, etc.) above the active window |
Call main menu |
Activates the main panel with buttons for the current window. This way you can select actions without using the mouse |
|
Call context menu |
Displays a context menu above the currently active element. Same as right clicking on it |
|
Return activity to normal window |
Returns activity to the normal window after working with the context menu. Attention! In any other case, Esc initiates closing of the active window |
Hotkeys: form management
Here are collected "hot" keys that simplify and speed up work with various forms that were created in configurations written on the 1C:Enterprise platform.
Table 4
Hotkeys for managing forms
Action |
Keyboard shortcuts |
How the program works |
Move to next control/call default button |
Move between controls on the form "forward" (see Tab) |
|
Calling the default button |
As a rule, different forms have a default button assigned (it is different from others - for example, it is highlighted in bold). Using this key combination allows you to activate the default button from anywhere in an open form |
|
Move to next control |
Navigate between controls on a forward form |
|
Go to previous control |
Moving between controls on the form "back" |
|
Activates the command bar associated with the active control/form |
Activates the main panel with buttons for the current form. This way you can select actions without using the mouse |
|
Navigate through controls grouped together |
Up |
Using the cursor keys you can quickly move between grouped controls |
Close form |
Closes the current form window |
|
Restore window position |
If some form window parameters are lost, this combination allows you to return everything back |
Hotkeys: working with lists and trees
The hotkeys in this section will help you work effectively without using a mouse in numerous lists and trees that are actively used in various configuration objects on the 1C:Enterprise 8 platform.
Table 5
Hotkeys for working with lists and trees
Action |
Keyboard shortcuts |
How the program works |
Opens the element on which the cursor is placed for editing. The key is similar to the "Edit" action on the standard form button bar |
||
Update |
Ctrl + Shift + R |
Updates data in a list or tree. This is especially true for dynamic lists (for example, a list of documents) when auto-update is not enabled for them |
Copy |
Creates a new list item using the current item as a template. Similar to the "Add by copying" button |
|
New group |
Creates a new group. Similar to the "Add group" button |
|
Delete a line |
Directly delete the current element. Attention! Use this combination with great caution in dynamic lists, as deletion cannot be undone |
|
Move a line up |
Ctrl + Shift + Up |
In lists where line ordering is allowed, allows you to move the current line up. Similar to the "Move Up" button |
Move a line down |
Ctrl + Shift + Down |
In lists where line ordering is allowed, allows you to move the current line down. Similar to the "Move Down" button |
Move element to another group |
Ctrl + Shift + M |
Allows you to quickly move the current element (for example, a directory) to another group |
Go one level down while simultaneously expanding the group |
Moves inside the folder where the cursor was placed |
|
Go up one level (to "parent") |
Goes to the top of the folder you were in |
|
Finish editing |
Completes editing a list item and saves the changes. |
|
Stop searching |
Aborts the search |
|
Expand tree node |
Used where tree nodes marked with "+" or "-" are available |
|
Close tree node |
||
Expand all tree nodes |
||
Changing a checkbox |
Inverts the value of the current element's checkbox (turns it on or off) |
Hotkeys: input field
Input field- an actively used control element in many places in configuration forms. Hotkeys for an input field allow you to quickly perform frequently used actions on it. It is especially useful to use these keys where the configuration developer has not provided the input field control buttons you need.
Table 6
Hotkeys for the input field
Action |
Keyboard shortcuts |
How the program works |
Similar to the behavior when editing regular text, it allows you to either add new characters to the old ones when entering, or overwrite the old ones with new ones |
||
Select button |
Selecting the appropriate object associated with the input field (for example, selecting the desired document from a list). Similar to the "Select" input field button |
|
Open button |
Ctrl + Shift + F4 |
Opens the form of the selected object in the current input field. Same as clicking the "Open" input field button |
Clear field |
Clear an input field from its current value |
|
Working with typed text in an input field |
||
Ctrl + BackSpace |
||
Go to the beginning of the line |
||
Go to end of line |
||
Clicking the Mouse Pointer on the Up Button for an Adjustment Button |
Use adjustment if enabled in the input field. For example, changing dates, counters, etc. Similar to pressing the "up" button of the input field regulator |
|
Clicking the Mouse Pointer Down on an Adjustment Button |
Use adjustment if enabled in the input field. For example, changing dates, counters, etc. Similar to pressing the "down" button of the input field regulator |
Hot keys: image field
Picture field- this is a standard element of the 1C:Enterprise 8 platform for displaying graphic images. Hot keys will help, for example, to comfortably view an image located in the picture field.
Table 7
Hotkeys for the image field
Action |
Keyboard shortcuts |
How the program works |
Zoom in |
Scales the picture |
|
Zoom out |
||
Scroll |
Up |
Moving around the picture |
Scroll up window size |
||
Scroll down window size |
||
Scroll window size left |
||
Scroll one window size to the right |
Hotkeys: Spreadsheet Document Editor
This section contains hotkeys for a variety of spreadsheet documents. They can be very useful if you frequently edit data in such documents.
Table 8
Hotkeys for the spreadsheet editor
Action |
Keyboard shortcuts |
How the program works |
Go to cell |
Opens a dialog box to move to a cell with column/row coordinates |
|
Moving through cells |
Up |
Moves the cursor through table cells |
Move through cells to the next filled or empty one |
Ctrl + (Up, Down, Left, Right) |
Moves the cursor through filled table cells |
Selecting cells |
Shift + (Up, Down, Left, Right) |
Selects an area of cells starting with the current one |
Scroll up page |
Flips through a spreadsheet document |
|
Scroll down page |
||
Scroll left one page |
||
Scroll right one page |
||
Go to editing cell contents |
Enables cell content editing mode |
|
Switching edit/input mode in a cell |
||
Go to the beginning of the line |
Moves the cursor to the beginning of the line |
|
Go to end of line |
Moves the cursor to the end of the line |
|
Go to the beginning of the text |
||
Go to end of text |
||
Setting the name of the current area |
Ctrl + Shift + N |
Sets the name of the current cell area |
Hotkeys: text document editor
Hotkeys when editing text in text areas and documents can significantly speed up and simplify the process.
Table 9
Hotkeys for the text document editor
Action |
Keyboard shortcuts |
How the program works |
Toggle insert/replace mode |
Allows you to either add new characters to the old ones when entering, or overwrite the old ones with new ones |
|
Go to the beginning of the line |
Moves the cursor to the beginning of the current line |
|
Go to end of line |
Moves the cursor to the end of the current line |
|
Select to start of line |
Selects text to the beginning of the line |
|
Select to end of line |
Selects text to the end of the line |
|
Go to the beginning of the text |
Moves the cursor to the beginning of the text |
|
Go to end of text |
Moves the cursor to the end of the text |
|
Select to start of text |
Ctrl + Shift + Home |
Selects from the cursor to the beginning of the text |
Select to end of text |
Ctrl + Shift + End |
Selects from the cursor to the end of the text |
Scroll up one line |
Flipping through a text document |
|
Scroll down one line |
||
Go to the beginning of the previous word |
||
Go to the beginning of the next word |
||
Select previous word |
Ctrl + Shift + Left |
Quickly highlight a word (characters separated by spaces) |
Select next word |
Ctrl + Shift + Right |
|
Scroll up page |
Flipping through a text document |
|
Scroll down page |
||
Select previous page of text |
Highlights text page by page |
|
Select next page of text |
Shift + Page Down |
|
Deselect |
Removes selection |
|
Go to line |
Moves the cursor to line number |
|
Delete the character to the left of the cursor |
Deletes the character to the left of the cursor |
|
Delete the character to the right of the cursor |
Deletes the character to the right of the cursor |
|
Delete the word to the left of the cursor |
Ctrl + BackSpace |
Deletes the word to the left of the cursor |
Delete the word to the right of the cursor |
Deletes the word to the right of the cursor |
|
Set/remove bookmark |
Marks the line you need |
|
Next bookmark |
Moves the cursor between bookmarked lines |
|
Previous bookmark |
||
Delete current line |
Deletes the current line |
|
Move block to the right |
Moves the selected block of text to the right |
|
Move block to the left |
Moves the selected block of text to the left |