Which folder is Windows 10 downloaded to. Video: uninstalling updates
Questions about installing updates tenth Windows versions, however, like any other from this family, concern many users, since the process of downloading and installing them does not always go smoothly. The appearance of many errors can sometimes be eliminated if you know exactly where the Windows 10 update files are saved. In the same way, you can simply reinstall some update packages manually or cancel their installation, so issues of managing such processes must be considered in the context of determining the location of downloaded files and how what actions can be performed with them.
Where are Windows 10 updates downloaded?
So, first, let's look at the questions regarding the direct location of saving files for downloaded update packages. Most ordinary users do not know where Windows 10 updates are downloaded. In fact, first of all, you need to pay attention to the fact that the downloads folder, which is available in user documents and is intended by default for downloading certain content from the Internet, is not involved in the process of downloading and installing system updates. So you don’t have to look for updates there. But then where are Windows 10 updates downloaded?
For this purpose, the system provides a special SoftwareDistribution folder located in the main directory of the operating system. True, it also contains a Download directory, intended for downloading the contents of packages, but after they are automatically unpacked, the downloaded files, combined into folders, can be located directly in the specified software folder. We’ll look at what actions you can perform with all these components a little later, but for now let’s briefly look at the packages that are loaded on HDD when switching to Windows 10 from systems of a lower rank.
Where are Windows 10 update files downloaded when upgrading to it from an older OS?
For these purposes, a special directory is created, which, like the directory described in the previous case, is not visible to the user because it is hidden. Where are Windows 10 updates downloaded in this case?

This is the Windows.~BT directory. In the event of a user-authorized transition from an outdated OS to the tenth version, the system provides the possibility of a rollback, and the old Windows.old system folder is stored for thirty days. But here’s what’s interesting: files for installing build updates (upgrades) of the tenth modification itself are also placed in the same directory. In other words, they are, in a sense, files new system. Therefore, it is better not to touch this directory unless necessary. On the other hand, if you completely disable the installation of updates even for assemblies (but after downloading necessary components), you can get rid of this folder quite simply, but it is advisable to perform this operation not manually, but using the C drive (system partition) cleaner with additional activation of cleaning system files, where the corresponding item is marked in the list. But it should be taken into account that critical updates in the form of Anniversary Update and higher will not be subsequently installed. And this may affect the performance of some installed programs, for which such updates are initially required.
Practical benefits of the ReportingEvents log file and the folder with downloaded updates
So, we figured out where Windows 10 updates are stored. Now let's look at the practical side of applying such knowledge. First of all, attention should be paid to the text file magazine, opened in the most common Notepad.

It contains all the information regarding the processes of downloading and installing update packages, with a description of the errors and failures that have arisen for each of them. Thus, if the report indicates that errors occurred during the installation of a certain package, knowing its number, you can install the update again yourself. To do this, go to the Internet resource of the Microsoft update catalog, search by the number of the faulty package (it is not necessary to enter the abbreviation “KB” before it, which marks all packages), and then download the desired package in MSU format and install it by running the downloaded file .
Note: from the directory with the saved data, execute manual installation impossible, because it contains not installation files, but cached data.
But if there is a need to reinstall the entire system, you can first copy the files from the SoftwareDistribution folder to removable media (and only those packages that you consider necessary), so as not to wait for all updates to be checked and installed after the installation of the system itself is completed. Pay special attention to the fact that if the package name contains the prefix “EXPRESS”, such files and directories can not be copied, but can be safely skipped (forced manual installation is not provided for them anyway).
How to cancel updates using the simplest method?
As for canceling the installation of updates, there should not be any particular difficulties. The most primitive, but not always appropriate, method is a standard rollback to a previous state.

The nuance is that when returning to a certain point (date), absolutely all updates that were installed after that will be deleted, that is, it will not be possible to selectively get rid of, for example, unnecessary or faulty updates.
Manual removal of updates
Such actions can be performed directly in the programs and components section, which is located in the standard (and not the new) “Control Panel” (control in the “Run” menu).

In it you should go to the item for viewing installed updates, highlight the one you need and click the delete button. In the same way, you can simply get rid of any package by using special uninstaller programs like iObit Uninstaller.

You can find them special section with a list of recently installed updates, in which, as in the previous case, you need to select a package and click the delete button. The use of uninstallers is advantageous in that they are able to get rid of all residual components, since built-in system tools very often leave a lot of unnecessary entries in the system registry, as well as files and directories associated with the main package or application being removed.
Actions with the update saving directory
But when deleting the folder itself, described above, knowing where Windows 10 updates are downloaded will come in handy. It goes without saying that when you try easy removal from Explorer you will see a message that you must first stop the process associated with using the directory. This applies to the Update Center service.

It can only be deactivated in the services section (services.msc) by first clicking the stop button and then setting the startup to disabled. If this is not done, even actions directly in the update management section will be ineffective. Terminating the process in the Task Manager will also lead to nothing, since after some period of time (very short) the process will start again on its own.
Description of how the Windows Update Service works. Location where cached components are stored. Practical use Windows Update log. Step-by-step user steps to force a rebuild of the update cache using Windows 7 as an example.
Technology automatic receipt updates were first used by Microsoft in the Millennium Edition. In all modern versions of operating systems it is enabled by default. Moreover, in Windows 10, in accordance with the license agreement, the user does not have the right to refuse to install them. This ensures that the OS is kept up to date and vulnerabilities are addressed in a timely manner. Let's take a look under the hood and figure out how Windows update technology works.
We will leave the subtleties of the process to the programmers and system administrators. For a regular user To control the correct operation of the OS, it is enough to know where updates are installed. Because everything current versions Windows run on the same core, the internal directory structure is practically the same.
Having moved along the path indicated in the frame, we see the folder into which the downloaded updates are placed. If desired, the user can examine its contents and measure the size.

It’s worth warning right away that you won’t find update files with the names KB0000001 and the extension “msu” in it. This folder is used to cache downloaded components, which are subsequently automatically deleted after installation. Those interested can watch the process “live” at the moment when updates are downloaded. By opening the Download subfolder in this directory, you can observe the operation of the operating system. The necessary folders are created and deleted before your eyes as the resulting “patches” are installed.
Application area
Now that the user knows where Windows 7 updates are stored, or rather, their components, a logical question arises. What good is this knowledge if the files can't be saved for reinstallation?
Pay attention to the only one located in this directory Text Document named ReportingEvents. This is a log file that opens in Notepad.

In it you can find detailed information About work Windows service Update. Launch dates, search results, downloads and installations of updates. In the above screenshot you can see an error in the operation of the service and a log of a correctly removed security patch.
Regular failures of Windows Update may indicate cache corruption. The reasons for this can be very different, but this is expressed in the download or installation process freezing.
After examining the work log and finding the “culprit” by number, you can go to the online Update Center.

Using the search field in the catalog, you can find required file. It is not necessary to enter the “KV” index; it is enough to indicate the correct number.

In the list, select your OS, taking into account its bit depth, and download the installation package with the “msu” extension. By running it on your computer, you can install it manually, thus eliminating failures in the automation.
In more serious cases, when the “culprit” cannot be determined or freezes have become regular, you will need to completely rebuild the cache. In other words, delete the folder in which the Windows 7 updates are located.
Cache rebuild
An attempt to directly delete this system directory will result in receiving the warning shown in the screenshot.

Its appearance is a consequence of the Windows Update service, which blocks its cache folder from unwanted interference. To perform the delete operation, you will have to disable it.

We use context menu to select the option shown in the screenshot and go to the computer control panel.

Select “Services” on the left side of the window and scroll down the list that opens to the end to find the Update Center. In the drop-down menu, select the startup type – “Disabled” and click the “Stop” button.

Having received such a picture in the service management window, we confirm our actions. After this, you can safely delete the folder with updates. Return the service to the initial state and restart your PC. At the time of loading remote folder will be created automatically by the system. Running the update will re-create the file cache, and you will solve two problems at once: restore the Update service and clear the system a little of “garbage”.
Since the folder where Windows updates are downloaded is located and named similarly, all the steps performed apply to this OS as well.

The only difference will be the default startup type. Here this option is set to “Manual”.
Finally
Using the above method for rebuilding the cache does not affect updates already installed on the system and is completely safe. Therefore, if you are not satisfied with the size of this system folder or are bothered by freezes when using the Update Center, you can safely delete its contents.
As practice shows, timely installation of security patches can protect the OS from infection in the event of virus epidemics.
Recently, more and more users have complained that files are being sent to their computer to update the operating system on Windows 10. Moreover, this happens without their knowledge, regardless of whether they reserved a new OS or abandoned this step. But you can overcome this, we will tell you how to do it.
Where to find downloaded files and delete them
Before deleting something from your computer, you need to find out where the installation files are located. Windows files 10. They are usually installed on the computer in hidden folder, that is, if showing hidden and system files is disabled in Explorer properties, then you won’t be able to see them that easily.
To determine the location where Windows 10 installation files are downloaded, you need to follow these steps:
- Using a conductor.
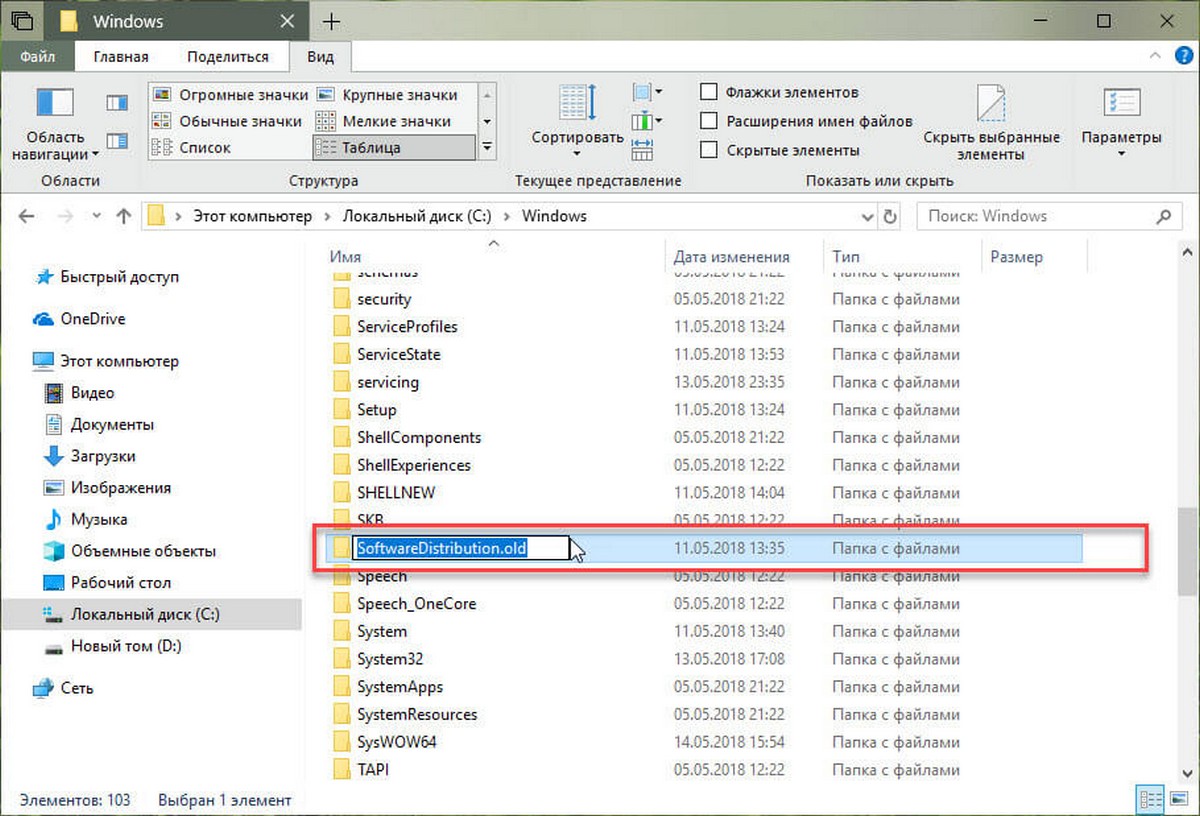
- Go to the system drive (usually the C: drive) and find a folder with the following name - “$Windows.~BT”, since it is hidden, its icon will be translucent.
This folder takes up 3–6 GB, which could be used for your own needs. Therefore, if you are not going to upgrade to Windows 10, you can safely delete this folder.
How to prevent installation files from being downloaded again
In order to prevent further problems with automatic downloading of Windows 10 installation files, you should remove the updates responsible for this and block their subsequent installation.
We remove updates responsible for installing Windows 10
For this operation we need:
- Go to Control Panel and find the “Programs and Features” section.
- Open the section with installed updates.
- In this section you need to find and remove several updates.
Important! For Windows 7 and 8.1, the updates to be removed are different.
For Windows 7 the following can be removed:
- KV 3035583;
- KV 2952664;
- KV 3021917.
For Windows 8.1 the following can be removed:
- KV 3035583;
- KV 297698.

After uninstallation, you need to restart your computer.
Block automatic installation of updates
- In Control Panel, open Windows Update.
- We find a section there with important updates.
- Right-click on the updates that we deleted and click “Hide”.
 After these steps, you don’t have to worry that the installation files for Windows 10 will be downloaded to your computer again.
Conclusion
Once you learn how to properly remove Windows 10 installation files from your system, you don’t have to worry about them being downloaded again. In addition, by deleting unnecessary updates, you free up up to 6 extra Gigabytes of memory on your computer.
a lack of free space downloading system updates is not a new problem. Most of us have access to the Internet and of course we download everything different files. We have games and other programs installed that can take up a lot of space on our hard drive. The biggest problem occurs when downloading updates to the system Windows disk, usually drive C, because there is no or little free space on the drive, updates stop downloading. Windows will not prompt you to change the update download location.
In this tutorial we will look at how to move the download folder Windows updates 10 to another drive. Before you begin, you should know that you will need administrator rights to do this.
Change the location of the Windows 10 update download folder.
By default, Windows Update uses the . That is, all downloaded files are located in the folder SoftwareDistribution and later installed by the system.
Step 1. Since our goal is to force the system to download updates to another drive, create a new folder on the drive for this D. You can name this folder as you like, for example, let's call the new folder WindowsUpdate. Let's assume that the path to it is
Step 2. Then using the Ctrl + Alt + Delete keys, open " Task Manager".
Step 3. In the manager, switch to the tab "Services", and then find and right-click on the service wuauserv and stop her. (see picture)

Step 4. Now rename to
Step 5.
To create a symbolic link, open a command prompt. From the Start menu, start typing CMD in the search results, right-click on Command Prompt and run it as administrator. Then type the following command and press Enter:
mklink /j c:\windows\softwaredistribution d:\WindowsUpdate
Now you can copy all the files from to the new download folder. This ensures that the download will continue; otherwise it will start from the beginning.
Step 6. Restart Windows Update Service
After this, you need to start the Windows Update service - wuauserv. You can use Task Manager to launch it like we did above, or run the following command in CMD:

Step 7 Check if Windows Update is working:
Open “Settings” → “Update & Security” → “Windows Update” → “Check for updates”. If the system starts/continues downloading updates and does not generate an error, you have done everything correctly.

We recommend using a disk for downloading system updates that has enough free space. Although you can choose SD card (NTFS format) or external drive, we advise doing this only if it always remains connected to your PC.
That's it, I hope the information is useful!
System update - necessity or excess? Well-functioning mechanism of a Swiss watch or a chaotic flow of data? Sometimes situations arise when it is necessary to remove updates that, in theory, should stabilize the operation of Windows 10 or other systems. The reasons may be different, be it an incorrectly installed upgrade or a reluctance to make changes to save space on the hard drive.
How to remove the latest installed updates on Windows 10
It often happens that a freshly installed OS update harms the performance of your computer. Problems can occur for a number of reasons:
- the update may have installed with errors;
- the update does not support the drivers that are installed for the correct operation of your PC;
- When installing updates, problems occurred that resulted in critical errors and disruption of the operating system;
- the update is out of date and did not install;
- the update was installed two or more times;
- errors occurred when downloading updates;
- there were errors hard drive, on which the update is installed, etc.
Photo gallery: errors when installing Windows 10 updates
Windows Update database corruption errors Duplicate Windows 10 update in Update History Updates fail due to hard drive failure
Uninstalling updates via Control Panel
- Open the “Control Panel”. To do this, right-click on Windows icon in the lower left corner of the screen and select “Control Panel”.
Right-click on the Start menu and open Control Panel
- In the window that opens, among the set of elements for managing your OS, we find the “Programs and Features” item.
In the "Control Panel" select the "Programs and Features" item
- At the top left we find the link “View installed updates”.
In the left column, select “View installed updates”
- Click on the update you need. The default is to sort by date, which means that necessary update will be among the top if several upgrades were installed at once, or the top when only one was installed. It needs to be removed if it is because of it that problems arose. Left-click on the element, thereby activating the “Delete” button.
Select the required update from the list and remove it by clicking on the corresponding button
- We confirm the deletion and restart the computer. Some updates may not require a reboot.
Uninstalling updates via Windows Update
- Open the Start menu and select the Settings item.
Select the “Settings” item by opening the “Start” menu
- In the window that opens, select the “Update and Security” environment.
Click on the item “Update and Security”
- In the “Windows Update” tab, click on “Update History”.
In Windows Update, look at the Update History.
- Click the “Uninstall updates” button. Select the upgrade you are interested in and remove it by clicking on the corresponding button.
Click “Remove updates” and remove incorrect upgrades
Uninstalling updates via the command line

Instead of [update number], enter the numbers from the second column of the list displayed command line. The first command will remove the update and reboot the computer, the second will do the same, only it will reboot if necessary.
All updates are removed in similar ways. You only need to choose which upgrade will incorrectly affect the operation of the OS.
How to delete Windows 10 updates folder
The magic folder is named WinSxS; all updates are downloaded to it. After a long service life of the operating system, this directory becomes increasingly overgrown with data that is in no hurry to be deleted. No wonder experienced people say: Windows takes up exactly as much space as it is given.
Do not delude yourself into thinking that the problem can be solved with one click on the Delete key. A simple, rough deletion of the folder with updates in any version of Windows can lead to deterioration of the OS, slowdown, freezing, refusal of other updates and other “joys”. This directory should be cleaned using operating system tools. This safe operation will free maximum volume memory.
There are several ways to optimize the updates folder:
- Disk Cleanup utility;
- using the command line.
Let's consider both methods in order.

The second method is even faster, but it does not clean the entire system or other disk and deals exclusively with OS updates.

How to cancel a Windows 10 update
Unfortunately or fortunately, canceling Windows 10 OS updates is not so easy. IN simple settings You will not find a clause about refusing to receive new upgrades. A similar function is not included in the “Ten”, because the developers promise lifelong support for this system, which means they guarantee its stability. However, threats, new viruses and similar “surprises” appear every day - accordingly, your OS must be updated in parallel with them. Therefore, it is not recommended to disable system updates, although this can be done in a workaround.
- Right-click on the “This PC” icon on the desktop and select “Manage.”
Using the context menu of the “This PC” icon, go to “Management”
- Select the “Services and Applications” tab. In it we enter “Services”.
Open the “Services” of the computer through the “Services and Applications” tab
- Scroll down the list to the required Windows Update service and launch it by double-clicking.
Open Windows Update properties by double-clicking
- In the window that opens, change the filter in the “Startup type” column to “Disabled”, confirm the changes with the OK button and restart the computer.
Change the “Startup type” of the service to “Disabled”, save the changes and restart the computer
Video: How to cancel Windows 10 update
How to delete Windows 10 update cache
Another option for cleaning and optimizing your system is to clear cached information files. A full update cache can affect system performance, leading to constant search new updates, etc.

Video: How to clear Windows 10 update cache
Programs to remove Windows 10 updates
Windows Update MiniTool is a free and easy-to-manage program that helps you customize the Windows 10 update environment to your liking.
Windows Update MiniTool - a program for working with Windows updates
This utility looks for the latest updates, can remove old ones, reinstall upgrades, and much more. Also this software allows you to refuse updates.
Revo Uninstaller is a powerful program similar to the Windows Add or Remove Programs service.
Revo Uninstaller - a program for working with software and OS updates
This is a functional application manager that allows you to track how and when the operating system or any individual application was updated. Among the advantages is the ability to remove updates and applications in a list, rather than one at a time, which significantly reduces the time it takes to clean your device. The disadvantages include a complex interface and a general list for programs and updates, which Windows service divided.
Why is the update not uninstalled?
An update cannot be uninstalled only because of an error or a series of errors that occurred during installation or operation of the patch update. Windows system is not ideal: every now and then problems arise due to the load on the OS, inaccuracies in the network, viruses, and hardware failures. Thus, critical errors when installing an update may be located in the registry in which the update data is recorded, or in the hard drive sector where the update files are stored.
How to remove uninstallable updates
There are no standard methods for removing the “unremovable”. The occurrence of such a situation means that your device has critical errors that interfere with the correct operation of the operating system. It is necessary to take a whole range of measures to solve this problem:
- check your computer for viruses with several defender programs;
- carry out comprehensive diagnostics of the hard drive using specialized programs;
- run the registry cleaning utility;
- defragment hard drives;
- start the service Windows recovery from the installation disk.
If all these measures do not lead to the desired result, contact a specialist or reinstall operating system. The last measure, albeit drastic, will definitely solve the problem.
Updating the system is not scary. However, to maintain your computer's performance, you must ensure that all updates are installed promptly and correctly.


