Installation and configuration of phpmyadmin ubuntu. Installing and configuring phpMyAdmin on Ubuntu, Linux. Installing phpMyAdmin using the program manager
phpMyAdmin is a LAMP application specifically written for administering MySQL servers. Written in PHP , and accessed through a web browser, phpMyAdmin provides a graphical interface for database administration tasks.
Installation
Before installing phpMyAdmin you will need access to a MySQL database either on the same host as that phpMyAdmin is installed on, or on a host accessible over the network. For more information see MySQL. From a terminal prompt enter:
sudo apt install phpmyadmin
At the prompt choose which web server to be configured for phpMyAdmin . The rest of this section will use Apache2 for the web server.
In a browser go to http://servername/phpmyadmin , replacing servername with the server"s actual hostname. At the login, page enter root for the username , or another MySQL user, if you have any setup, and enter the MySQL user "s password.
Once logged in you can reset the root password if needed, create users, create/destroy databases and tables, etc.
Configuration
The configuration files for phpMyAdmin are located in /etc/phpmyadmin . The main configuration file is . This file contains configuration options that apply globally to phpMyAdmin .
To use phpMyAdmin to administer a MySQL database hosted on another server, adjust the following in /etc/phpmyadmin/config.inc.php:
$cfg["Servers"][$i]["host"] = "db_server";
Replace db_server with the actual remote database server name or IP address. Also, be sure that the phpMyAdmin host has permissions to access the remote database.
Once configured, log out of phpMyAdmin and back in, and you should be accessing the new server.
The config.header.inc.php and config.footer.inc.php files are used to add a HTML header and footer to phpMyAdmin .
Another important configuration file is /etc/phpmyadmin/apache.conf , this file is symlinked to /etc/apache2/conf-available/phpmyadmin.conf, and, once enabled, is used to configure , directory permissions, etc. From a terminal type.
Today we will look at the installation process of a very popular web application phpMyAdmin, which is used for administration MySQL DBMS, we will install it in the operating room Linux system Mint 18.2.
Let me remind you that earlier in the material “Installing and configuring MySQL server and MySQL Workbench on Linux Mint 18.2” we looked at the installation of the MySQL DBMS and the client application MySQL Workbench, which has GUI, but many administrators use, as I already said, a very popular web application for working with MySQL, phpMyAdmin, so now, especially for beginners, I will describe in detail the process of installing phpMyAdmin on Linux Mint 18.2.
As always, we will look at installation using a graphical tool ( program manager), and using the Linux terminal.
phpMyAdmin is a free web application with a graphical interface for administering the MySQL DBMS ( MariaDB support is also available). phpMyAdmin was developed using the PHP language and since this is a web application, a web server is required for its functioning, for example, Apache or Lighttpd. The phpMyAdmin application is popular all over the world and it has currently been translated into 72 languages, including Russian.
With phpMyAdmin you can:
- View databases and tables;
- Create, copy, rename, modify and delete databases;
- Create, copy, rename, modify and delete tables;
- Add, edit and delete fields in tables;
- Execute SQL queries;
- Create, modify and delete indexes;
- Load text files into tables;
- Create and read dumps of tables and databases;
- Export data to SQL, CSV, XML, Word, Excel, PDF and LaTeX formats;
- Manage MySQL users and privileges;
- And also much more.
Installing phpMyAdmin on Linux Mint 18.2
As I already said, we will look at two ways to install phpMyAdmin, and we will start with a simple method suitable for beginners, i.e. using the program manager graphical interface.
Installing phpMyAdmin using the program manager
In order to install phpMyAdmin, you must first install a Web server, such as Apache. Therefore, now we will first install Apache and only then phpMyAdmin.
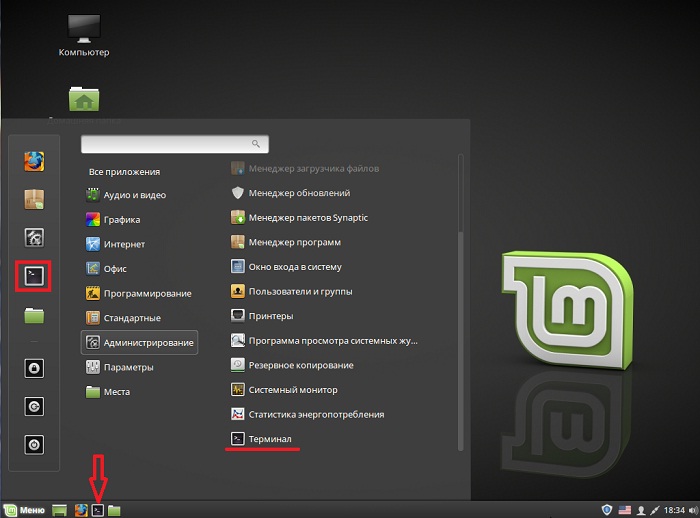
Open the program manager, for example, “ Menu->Program Manager" or " Menu->Administration->Program Manager».
Enter the computer administrator password.

Installing Apache web server
In the program manager, enter Apache in the search and press Enter. Then find Apache2 in the search results and double-click on it.


The installation is complete when the window displays “ Installed».

Installing phpMyAdmin
To install phpMyAdmin in exactly the same way, enter phpMyAdmin into the search and press Enter. Most likely, only one program will be found, which is what we need, double-click on it.


During the installation process you will be asked which web server you will use, since we have already installed Apache, accordingly we answer Apache and click “ Forward».

Then there will be a question about the phpMyAdmin database, i.e. if we want to configure it, we leave the checkbox and click “ Forward».

As a setup, we are asked to come up with and enter a password for the phpMyAdmin database, we enter and click “ Forward", then confirm it and also click " Forward» ( The password should be quite complex, although you will rarely need it).


The installation is complete when the message “ Installed" After this, you can immediately check the operation of phpMyAdmin.

Installing phpMyAdmin using terminal
To launch the Linux terminal, click, for example, on the link on the panel or launch it from the Mint menu.
Installing programs, including phpMyAdmin, must be done as root, so let's switch to this user right away. To do this, write the command sudo -i (or sudo su) and press Enter ( input), then enter the user password.
Then we need to update the list of packages, for this we write a command.
Apt-get update
Then, as in the case of the program manager, we need to first install the Apache web server, to do this we enter the following command.
Apt-get -y install apache2

Apt-get -y install phpmyadmin

During the installation process we will be asked which web server we will use, we select Apache and click " Enter».

Then we need to configure the phpMyAdmin database, select “ Yes" and click " Enter».

Then we come up with and enter a password for the phpMyAdmin database, click “ Enter", in the next window we confirm the password, i.e. enter it again and press “ Enter».


After this, the installation will be completed.
Configuring Apache to work with phpMyAdmin
If we install phpMyAdmin using the terminal, then in this case, unlike the graphical installation using the program manager, we need to manually connect the phpMyAdmin configuration file ( those. phpmyadmin settings file).
To do this, we write a command (with root rights), with which we will create a symbolic link in the directory with Apache configuration files.
Ln -s /etc/phpmyadmin/apache.conf /etc/apache2/conf-available/phpmyadmin.conf
Then we will enable this configuration file.
A2enconf phpmyadmin
Restart Apache
Systemctl restart apache2

That's it, after this you can proceed to checking the operation of phpMyAdmin.
If necessary, this configuration file can be disabled; for this purpose, there is the a2disconf command. After the Web server, Apache also needs to be restarted.
By the way, you can connect this configuration file in another way, for example, directly register the connection in the apache2.conf file, this method often found on the Internet, but the first option in this case is more correct. To edit apache2.conf, run the command (as root).
Nano /etc/apache2/apache2.conf
Add the following line to the end of the file.
Include /etc/phpmyadmin/apache.conf
We save the file with the keyboard shortcut Ctrl+O and press Enter, then close it also with the keyboard shortcut Ctrl+X only. Apache in this case also needs to be restarted
Systemctl restart apache2
Checking the operation of phpMyAdmin, connection to MySQL
In order to check the operation of phpMyAdmin, let's launch any browser and type the following address in the address bar ( This local address phpMyAdmin).
http://localhost/phpmyadmin
If you see the phpMyAdmin welcome page, then everything is fine, in other words, both the web server and phpMyAdmin are working.
To connect to the MySQL server, enter your username and password; for example, I will connect as root ( although as you know, working as root is not recommended).

After logging in you will be taken to home page phpMyAdmin, where you can see the list of databases on the server and the basic settings of the MySQL server.

Uninstalling phpMyAdmin in Linux Mint 18.2
You can remove phpMyAdmin either using the program manager or using the terminal. Let's look at both methods as well.
Uninstalling phpMyAdmin using Program Manager
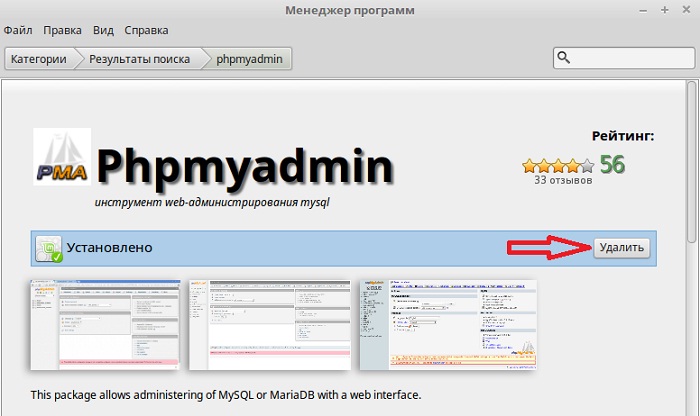
Open the program manager, and in the same way as during installation, find phpMyAdmin. After you open phpMyAdmin in the program manager, you need to click on the “ Delete».
During the removal process, we will be asked if we want to delete the phpMyAdmin database settings, we leave the checkbox, i.e. delete the settings, click " Forward».

Then there will be a question whether we want to delete the phpMyAdmin database, we check the box and click “ Forward", i.e. We will delete the phpMyAdmin database as we no longer need it ( If you need it accordingly, then you do not check the box).

The phpMyAdmin field will be removed. Now we can disable the phpMyAdmin configuration file in the Apache web server settings. To do this, in the terminal we need to run the command ( with superuser rights).
A2disconf phpmyadmin
And restart Apache
Systemctl restart apache2

If you do not need the Apache web server, then you, like phpMyAdmin, can remove it using the program manager.

During the Apache removal process, you will not have any additional questions.
Uninstalling phpMyAdmin using Terminal
To remove phpMyAdmin using terminal, we have to launch it accordingly. Then we get root rights using sudo -i (or sudo su), since the deletion must be done with superuser rights.
To remove only phpMyAdmin, we need to first disable the phpMyAdmin configuration file. To do this, as before, we write the following command and restart Apache.
A2disconf phpmyadmin systemctl restart apache2
To remove phpMyAdmin we use the following command.
Apt-get -y --purge remove phpmyadmin
Key --purge means that we want to remove packages along with their configuration files.
During the removal process we will be asked if we want to delete the phpMyAdmin database settings, we answer “ Yes" and click " Enter».

Then, when asked about deleting the phpMyAdmin database, we also answer “ Yes", as I already said, unless of course you need it.

As a result, phpMyAdmin will be deleted.

To remove the Apache web server, write the following command.
Apt-get -y --purge remove apache2
To remove all related packages that we no longer need, we need to use the following command, thereby we can free up disk space.
Apt-get -y autoremove

That's all, I hope the material was useful to you, good luck!
When working with databases MySQL data(o), phpMyAdmin is the most popular and accessible database management tool, especially for beginners.
phpMyAdmin - web application with open source, written in PHP and is a web interface for administering the MySQL DBMS. PHPMyAdmin allows you to administer the MySQL server through a browser, run SQL commands and view the contents of tables and databases.
Let's start the installation:
1. Enter the phpMyAdmin installation command:
sudo apt-get install phpmyadmin
The installation program will offer a list of additional packages required to install phpMyAdmin - agree and press Enter.
2. Select apache2 (move in the dialog box - "Tab" key, select - "Space"):
3. After installing the packages, the installation program prompts you to perform the initial setup of phpMyAdmin:

Enter the administrative password account:

Enter the password to connect to the database server:

Confirm the password:

The installation is complete. Launch the browser and enter http://[our domain address]/phpmyadmin:

Enter the root login and password that we specified in the settings:

Have a nice work).
This article will describe in great detail how to properly install and configure phpmyadmin, which will help us manage our website databases more efficiently and visually than through the terminal.
We will install on Ubuntu 14.10. But the article will also be relevant for others deb-base d distributions, in some cases with minor amendments. First, let's look at the installation and configuration phpmyadmin on the web apache server 2.
Installation via GUI
Open the Application Center of our distribution and enter phpmyadmin in the search bar. The application we need will immediately be displayed below. Select it with the mouse and click “Install”

Ubuntu Application Center
Before starting the installation, we will be asked to enter the administrator (superuser) password to continue the installation. Enter the password and press Enter

During installation we will need to answer some questions. In the first window, select the web server for automatic reconfiguration. Place a check mark next to it apache2 and press the button "Forward"

Next we are asked whether to configure the database for phpmyadmin using package dbconfig-common. The default is checked. We don't need to reconfigure the databases. Uncheck the box and click "Forward"

and wait for the installation to complete.
Installation via terminal/console
Installation through the terminal/console is similar to installation through the application manager.
Open the terminal with the combination CTRL+ALT+T and enter the command
sudo apt-get install phpmyadmin -y
sudo apt - get install phpmyadmin - y |
The installer will ask for a superuser password. Enter it and click Enter. The password will not be displayed when entered.
Next, as with the GUI installation, we need to select a web server for automatic reconfiguration. The mouse does not work in the pseudo-graphical interface. To select a checkbox, press the Spacebar. Celebrating apache2 and click Enter.

In the next window we answer in the same way as when installing in graphical mode. Select with the cursor " <Нет> " and press Enter.

We are waiting for the installation to complete.
Checking the operation of phpmyadmin
Check functionality phpmyadmin possible at the address http://localhost/phpmyadmin/ in a web browser. If we see the login form, then phpmyadmin installed successfully

Select the language, enter the login and password for the MySQL databases and confirm with the “OK” button. As a result, we should get to the interface phpmyadmin

Setting up phpmyadmin on a web server with nginx without apache2
For some server configurations that do not include a web server apache2, there may be a problem with phpmyadmin. We won't be able to get into the interface phpmyadmin. An example of a configuration would be the bundle nginx + php5-fpm. This problem can be solved quite simply.
Open in your favorites text editor site configuration file (configurations are usually located in the directory /etc/nginx/sites-available/) and to the section server add the following:
Location /phpmyadmin ( root /usr/share/; index index.htm index.html index.php; location ~ ^/phpmyadmin/(.+.php)$ ( try_files $uri = 404; root /usr/share/; # fastcgi_pass 127.0.0.1:9000; # uncomment when using php5-cgi # fastcgi_pass unix:/var/run/php5-fpm.sock; # uncomment when using php5-fpm fastcgi_index index.php; fastcgi_param SCRIPT_FILENAME $request_filename; include /etc/ nginx/fastcgi_params; ) location ~* ^/phpmyadmin/(.+.(html|ico|xml|css|jpg|png|js|txt|gif|jpeg))$ ( root /usr/share/; ) ) location /phpMyAdmin ( rewrite ^/* /phpmyadmin last; )
location/phpmyadmin( Root/usr/share/; Index index . htm index. html index . php; Location ~^/phpmyadmin/(.+.php)$( Try _ files $ uri = 404 ; Root/usr/share/; #fastcgi_pass 127.0.0.1:9000; # uncomment when using php5-cgi # fastcgi_pass unix:/var/run/php5-fpm.sock; # uncomment when using php5-fpm Fastcgi_index index . php; Fastcgi_param SCRIPT _ FILENAME$ request_filename ; Include /etc/nginx/fastcgi_params; Location ~ * ^ / phpmyadmin / (. + . (html | ico | xml | css | jpg | png | js | txt | gif | jpeg ) ) $ ( |
— local server for Linux. Unfortunately, the phpMyAdmin database administration tool is not included in the LAMP toolkit and must be installed separately. This article will teach you how to use phpMyAdmin.
Installing phpMyAdmin on Ubuntu
Very often, phpMyAdmin (PMA) is found on paid hosting services and is used to create and administer website databases. There is no need to install it on paid hosting - everything is already done there before you. Most often, you will encounter installing PMA on your computer to administer local server databases. As an example I'll look at installing phpMyAdmin on Ubuntu is one of the most popular Linux distributions.
Open a terminal and enter the following command:
| sudo apt-get install phpmyadmin |
After that, enter the administrator password and agree to continue with the installation.

Select a web server that will be automatically configured to run PMA. In our case it is apache2.
Agree to configure the database using dbconfig-common.

Enter the MySQL administrator password.

Set a password to register PMA on the database server and then confirm it. After installation is complete, phpMyAdmin will be available at http://localhost/phpmyadmin.
phpMyAdmin is not working
If you go to this address and see an error page, you can do the following.
- enter the command in the terminal:
sudo ln - s / etc/ phpmyadmin/ apache. conf /etc/apache2/conf. d - restart the apache server using the command:
sudo /etc/init. d/ apache2 restart - Revisit http://localhost/phpmyadmin and you should now see the phpMyAdmin admin login page.

The user will be root and the password you set during installation.
Creating a new database
After authentication, we get to the PMA start page, where you can select the interface language, if you have not done so before, view information about the MySQL database management system and the web server used. The left column shows all available databases.
What will come in handy first? Of course, the ability to create a database for a future website. To do this, go to the Databases tab.

Just enter the name of the new database and click on the “Create” button - phpMyAdmin will do the rest automatically.

A message indicating the successful creation of the database will appear and it will be added to the list below.
Adding a new database user
Having created a new database, you also need to add a user who could use it.

To do this, click on the inscription “Check privileges”. You will be redirected to the “Users with access rights to the database” page, on which you should click on “Add a new user”.
In the “Account Information” section, enter the username (in English letters), host (on the local server - localhost) and password.

Just below you need to set privileges for the new user. On a local server, you can tick all the boxes without hesitation. After this, click on the “OK” button at the very bottom and New user will be created.
Import and export of databases
To create a backup ( backup copy) of the database is the “Export” section.

In the case of the “fast” export method, backups of all available databases will be created at once in the format selected below.


