An application that reads aloud. Choosing the best programs for video dubbing. Application for reproducing text by voice on a mobile device
Instructions
Collect the text you are going to overlay onto into one file. Adjust the formatting of the document so that not a single replica breaks up into fragments located on different pages. Print the prepared file and secure the sheets so that you can easily see the text while recording.
Attach the microphone to a stand or place it so that it does not touch its body during operation. Place a pop filter in front of the microphone to help neutralize plosive consonants when recording. Such a filter can be made from thick tights, stretched in two layers over any frame of a suitable size, like a small hoop.
Connect the microphone to your computer. Run Adobe program Audition and select Edit View from the Workspace list. In the window that opens with the Windows Recording Mixer option from the Options menu, select the input through which the microphone is connected and adjust the volume. Using the Ctrl+N keys, create a new file in the editor and specify the sound parameters: sampling frequency and number of channels. To start recording, click on the Record button in the Transport palette.
Before you start reading the text, record a few seconds of silence. In subsequent audio processing, you use this fragment to capture the noise profile. Standing no closer than twenty centimeters from the microphone, read the text. It's best to do this while standing. If you mispronounce a phrase, read it a second time. When editing, the damaged take will be cut out.
Having finished recording, click on the Stop button of the Transport palette and save the file to HDD the Save option in the File menu.
Select a section of the recording before the start of the text and grab a noise profile from it using the Alt+N combination. Use the Noise Reduction option in the Restoration group of the Effects menu to remove background noise from the recording. Use the Normalize option in the Amplitude group of the same menu to equalize the sound volume.
Listen to the resulting recording. Select and delete the damaged fragments using the Delete key. Cut the recording into individual phrases by selecting the desired fragment and using the Cut option in the Edit menu. To paste audio into a new file, use the Paste to New option in the same menu.
In the Workspace field, switch to Video+Audio Session mode. Using the Import option in the File menu, load the film you are dubbing into the editor. If only files with icons like sound wave, use the Show video files button from the bottom of the palette.
Click on the file with the film icon to bring up the context menu and select the Insert Into Multitrack option. The original sound of the video will appear on one of the tracks in the editor window, and the image can be seen in the Video palette.
Place the cursor on the fragment from which the first voiceover phrase should begin, and insert the file with the desired text using the Insert Into Multitrack option into one of the audio tracks. To change the start time of a phrase, hold down the right mouse button and drag the file along the track. Insert the remaining fragments in the same way.
To combine the recorded sound with the original or background music included in sound accompaniment movie, you will need to change the volume on some parts of the tracks. This can be done by constructing an envelope curve based on key points. Hover your cursor over the line at the top of the track and click on it. By moving the created point down, you will get a smooth decrease in the volume on the selected track from the beginning to the inserted point.
If it turns out that the phrase was spoken too quickly, click on the desired track and call up the context menu. Selecting the Edit Source File option will return you to the editing window, where you can use the Stretch option of the Time/Pitch group of the Effects menu to change the speed of the fragment.
To save the video with the new audio, return to the Video+Audio mode and select the Video option of the Export group of the File menu. If you want to save only the audio and insert it into the movie using another program, use the Audio Mixdown option.
Nowadays, no one is surprised when they offer to watch home videos. A variety of modern gadgets with advanced functionality allows anyone to make a video report of interesting events, so that years later they can plunge into the past, experience the same bright and delightful emotions, and be imbued with unforgettable joyful feelings. However, many users are no longer satisfied with just the ability to record video; many are showing an active interest in creating audio accompaniment for video material.
Selecting a video dubbing program.
Also, such a need may arise when there is an incredible desire to demonstrate to your friends, but it is not possible to realize it, since playback is carried out on foreign language, which potential viewers do not own. At such moments, the owner of the video may come up with a brilliant idea: he decides to carry out the translation himself, and only then invite his friends to watch it together. So, if you are one of those who strive to “try on” the status of a video editor, we suggest you familiarize yourself with the best programs for video dubbing, select best option for yourself, to begin the practical realization of your desire.
Voice over programs
It's no secret that there are very sophisticated programs used by professionals. Unfortunately, their functionality is quite difficult for a beginner to understand. At the same time, we note that for an amateur there is absolutely no need to burden himself with such difficulties. There is a sufficient amount of interesting software product, using which you will be able to voice the video in an original way, without experiencing any difficulties during practical activities. By the way, some parents prefer to take advantage of these kinds of offers in order to get delightfully voiced cartoons that arouse great interest among their children.
The best options for voice-over programs
If you decide to create your own home video, initially prepare all the tools so that you do not experience discomfort during the work process. By the way, such tools include suitable voice programs, with the help of which the main characters are easily voiced and musical accompaniment is introduced. We offer you several options for such programs that are deservedly popular due to their functionality.
So, the leading position in solving such problems is occupied by Video Editor, which is a successful software product of the famous company Movavi. This program allows you to perform many interesting manipulations, but since we decided to deal with sound overlay, we will now consider only this side of the program.

After launching Movavi Video Editor, you will easily find an icon in the toolbar indicating how to work with audio. When you click on it, a new window will open in which you will be asked to specify the following parameters:
- specify the source of the sound recording;
- set the required volume level;
- select the desired recording quality settings.
After successfully recording sound, it will be displayed in a program that will allow you to cut fragments and apply effects.
Another great program is graphics editor VirtualDub. What's impressive is that this product is free. However, despite this, it is endowed with expanded functionality, the presence of a unique toolkit with the help of which it is possible to perform dubbing and independently voice-over video material.

For those who want to create their own cartoons and therefore need a program that can work with frame-by-frame animation, we suggest using the MultiPult program. Cartoons can be created using only pictures and adding sound to them. "MultiPult" is a free software product. Unfortunately, this program cannot boast of advanced functionality. You can create a soundtrack, but you can’t afford to edit it. Likewise, it is impossible to add a second audio track. However, most amateurs are willing to put up with such restrictions, since otherwise this sound editor they are completely satisfied.

Ardor is our next proposal; it is not just a program, but an entire digital audio workstation. All its functionality is aimed specifically at working with sound. Using the available tools, you can achieve an incredibly cool sound. Ardor is a program that allows you to work with a huge number of audio tracks; it also has the ability to group, sort, and distribute them in the editor. By giving preference to this particular program, it will be much easier for you to create real “masterpieces”, surprise your friends and relatives with them, and capture the best family events.

Thus, if you want to create your own films or dub existing video material, do not give up, do not think that such actions will be extremely difficult, act boldly, armed with our recommendations. Download, install the programs we offer and create an original soundtrack.
Some users may need to voice the text male voice online. This can be any advertising text, fiction, other text genres and styles that need to be transformed according to the “text into voice” principle, without resorting to downloading to a PC various programs. In this material I will tell you what online talkers with a male voice exist in Russian, I will give a description of the corresponding network resources, and I will also explain how to work with them.
The best online talkers in Russian
If you are interested in an online talker, then I will immediately note that in most cases the ability to reproduce text for free is limited to a few hundred characters in size, but for full functionality you will have to pay extra. This is due to the advertising nature of such resources, designed rather to demonstrate the capabilities of the voice engine, rather than to fully voice huge volumes of user text in a male voice.

So, let's move on to directly listing and describing the capabilities of the network announcer resources we need.
Linguatec resource for reading text by voice
The first online talker with a male and female voice that I want to talk about is the German resource Linguatec. Maximum volume The text that can be voiced is limited to 250 characters, which, however, is quite enough to demonstrate the capabilities of the specified voice engine. For full functionality without restrictions, you will have to pay real money.
To take advantage of the resources of the resource, go to it, in the “Voice Reader” sign, select the Russian language (Russisch), and just below, from the presented voices, select the male voice (Yuri). Below, enter the text you need (up to 250 characters) and click the arrow button (Play).

Oddcast - online speech synthesizer
The Oddcast resource can also act as an online talker, and the size of the spoken text is limited to 170 characters.
- To work with this resource, go to it, in the language selection window (Language) select Russian, and in the window for selecting a male or female voice, select male (Dmitri).
- In the “Enter text” window, enter your text, and then click on the “Say It” button.
- The “Effect” option included in the engine’s functionality will give you the opportunity to experiment with various sound effects (whispers, robotic voice, accelerated voice, and so on).

iSpeech - service reproduces text to speech
Another resource called iSpeech, which has a Russian voice engine of fairly good quality. At the same time, the volume of reproduced text is also limited to about 200 characters, allowing you to voice the Russian text in a male voice online.
To work with the resource, go to it, find “Russian Male” in the list of languages on the left, enter your text in the window on the right and click on the “Play” button (you will have to wait a few seconds while the system processes the text).

If the iSpeech service is not suitable for you, go to the article about or read further.
The IVONA resource reads any text out loud
Another online talker with a male voice in Russian is IVONA. This resource has one of the highest quality voice engines, and until recently, it was possible to speak a certain amount of free text on this moment not available (may be available later)
However, the opportunity to demonstrate the capabilities of the existing voice engine remains. To do this, you need to go to this resource Ivona, find “Russia” in the list of available languages, click on the button on the right, and, selecting the male voice (Maxim), click on the button with the arrow (Play).

A little more about voice engine standards
As for the main voice engine standards available today, the two most common today are SAPI 4 and SAPI 5 (“SAPI” is an abbreviation for “Microsoft Speech API” - translated as “Speech Programming Interface from Microsoft”). SAPI 4 is an outdated standard, created back in 1998, and is now little used, SAPI 5 is more modern, has better pronunciation, the latest modification is SAPI 5.4 (at the same time, SAPI has 5 free votes less than the outdated SAPI 4).
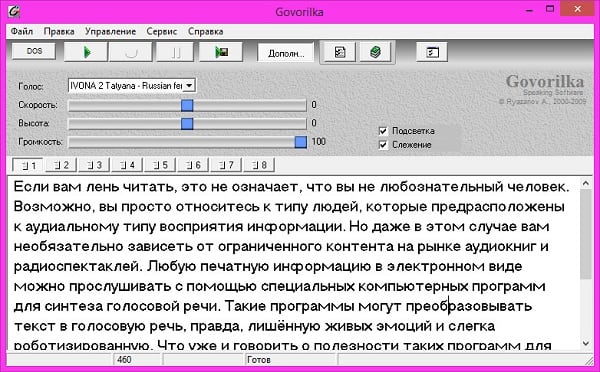
As for speech synthesis programs, one of the most popular of them is “Govorilka”, which allows you to voice voluminous texts quite efficiently, and with different voice options (both male and female). The installation version of the product usually contains a set of several built-in voices, but if these are not enough for the reader, then on the program’s website you can download additional voices for it (including high-quality paid options).
Conclusion
If you are interested in a speaker with a male voice in Russian, then I recommend paying attention to the list of online resources I listed above. At the same time, their disadvantages include the limited functionality of their free functionality, forcing the user to pay close attention to specialized programs (for example, “Govorilka”). The highest quality pronunciation among the listed resources is provided by the voice engine of the IVONA service, and it is precisely the phrases voiced by it that we quite often encounter in the Russian-language segment of the network.
I'll talk about how to make subtitles or voice-overs for a short video using tools that are found in almost every home.
In this article, you, dear reader, will not find advice on which microphone is best to choose. For this question, I recommend reading the posts Microphones, microphones and more microphones. Part #1, Microphones, podcaster's view #2 and Microphones, podcaster's 3rd view, which are on Habré.
If you liked a short video, but you can't show it to your friends because they still don't know English/Spanish/German/any other language, then this is where I'll tell you how to create subtitles for watching videos, and if you dare , then you can voice the video yourself, without having to spend 100 American rubles on a microphone, and even more of the same American rubles on sound processing software.
So, since you are here, my friend, it means you are interested in this topic, and I will start.
List of devices/programs that will be needed for voice acting:
Creation of subtitles.
As I already wrote, you can use the Aegisub program to create them. On the official download page there is an opportunity to download the Russification of the interface, but I was never able to configure it. But this will not prevent you from mastering the program - everything is intuitively simple.
First of all, you need to open the video file for which we will create subtitles. Select the “Video” item in the menu, and in it “Open Video...”, and in the dialog that opens, open our file.
Once selected, it appears in the upper left area of the window. But that is not all. If you now click on “Play” (i.e. turn on the video), it will be without sound. This is not convenient for us, so we need to add sound. This can be done through the menu item “Audio” -> “Open Audio from Video”.
Thus we will get the following window:

- red - start time of the current text
- green - end time of the current text
- yellow - displayed text
- blue - list of all texts, indicating expiration time
So, let's start creating subtitles. On the left, above the blue area, there are three keys. Click on the first one, “Play”. As soon as we hear the text, we press pause. Usually the speech does not start from the first second of the video - first there is a screensaver, or just music. That's why we don't start creating subtitles from the first second.
So, we pressed pause, and we see exactly what second the speech begins. We indicate this time in the red field. After this, you can continue playing the video and write down the text that should be displayed in the subtitles in the yellow area. When the phrase is logically completed, indicate in the red field the time when the phrase should be hidden from the screen.
Now you can move on to the second phrase. In the blue area of the screen, right-click on the current line of subtitles and select “Insert (after)” there. A second line will appear with a start time equal to the end time of the previous line.
We repeat entering text and adding lines until we have entered all the necessary subtitles.
I'll give you a screenshot of the project I did last.

If suddenly, during the process of creating a video, the timing of some subtitles overlaps with others, the program will highlight the “competing” lines in red, and you will need to align their display times.
In addition, the text is immediately displayed on top of the video, and you can evaluate the result of your work.
In general, the program has rich functionality, but I will not describe it - I indicated the main points, but I hope you can figure out the rest.
By saving a project in the format of this program, you will not be able to connect this file to all players, and you will not be able to upload it to YouToube. To do this, subtitles need to be exported. In the menu, click “File” -> “Export Subtitles...”, a window will open, in which we also press the “Export” key, and specify the file for subtitles (be sure to indicate the extension in the file name, I use subtitles in srt format, they load normally on YouTube).
Perhaps this is all I can tell you about creating subtitles.
Sound creation.
- noise removal
- normalization
- volume change
- auto-mute
But first things first.
First of all, you need to clear the room of all outside friends/relatives. The first 5-10 takes you'll probably laugh along with them, but then it's very annoying and makes it difficult to concentrate and record your voice properly.
Next, click on the red button on top panel programs - recording has begun. After that, we switch to the subtitle program, and there we also start playing the video. The current line of subtitles is highlighted in a yellowish color, and I always know exactly where I am in the text, what happened before and what will happen next. This is very important point, believe me.
Of course, you noticed that between turning on the recording and starting the video, there was a delay while switching between programs. This is completely unimportant, and later I will show you how to get rid of this gap of emptiness.
So, two screenshots. The first shows the position of the windows on the desktop before recording starts.

And the second one shows my screen immediately after the recording starts.

For now, we don't really care about what happens in the recorder. Let him write slowly. If your voice sounds too quiet, don’t try to change anything now. It will be possible to process the sound only after the entire audio track has been prepared, otherwise the gaps between takes will be too noticeable to the ear.
So, we recorded about 30 seconds of text, and the voice began to “sag” - stutter, confuse letters and the like. You don't have to start all over again; you can just continue recording.
For this:

After this, to continue recording, we will only have to repeat the steps from the beginning of recording. At the same time, I recommend placing the video at the beginning of the previous subtitles (from the 22nd second in the screenshot), and when the video reaches the 27th second, press the red button in the voice recorder.
As a result, we will get several tracks for the entire length of the video clip. (on the middle panel of the recorder there is a very useful extreme button with a magnifying glass, which allows you to fit the entire project into the width of the window)

However, we need to work with them as one, so we select “Tracks” -> “Mix to last track” from the menu.
Audio processing
So, we have a single audio track. We begin to comb her hair.
First of all, you need to normalize the sound.
“Effects” -> “Signal normalization”. We leave all the parameters as they are, just click “OK”.
It happens that after normalization, “roosters” remain, due to which the entire sound is heard quite quietly. The screenshot shows an example of such a “rooster”:
To combat such moments, you can use the tool from the “Effects” -> “Signal Boost” menu (you must select this fragment of audio so that the effect is applied only to it).
I specified the value “-3.8”, after which I removed the selection and applied normalization again.
I received this picture:

As you can see in the screenshot (or listen if you have already recorded a sample), the sound is full of extraneous noise.
This voice recorder has a function just for this situation.
First we need to create a sample of the noise that we will remove:
- select a fragment of the track where our voice is not present (only extraneous noise)
- select “Effects” -> “Noise Removal” from the menu
- In the window that opens, click the “Create noise model” button
- remove selections
- again select from the menu “Effects” -> “Noise Removal”
- click "OK"
As a result, we get a clean track like this:

Agree, now the sound is much nicer, and it looks better =)
However, there are still random clicks and noises (and before each phrase I can also hear aspiration, as I draw air into my lungs).
Getting rid of this is as easy as shelling pears. Select the fragment that needs to be removed and select “Creation” -> “Silence…” -> “OK” from the menu.
For example, at the beginning I removed the keyboard sound from switching between windows and pressing the “Play” button on the video.

We save the project in the recorder, we are done with it for now.
Getting an audio track from a video
However, I consider the sound of the original in the background to be a sign of good taste (only if it does not completely cover my voice), because I cannot convey all the emotions that the author of the video intended, and this recorder makes it very convenient to lower the volume level of the original track and return him in those places where I am silent.
I'm using the avitomp3 program to get an mp3 file from a video file. I am sure that in this part many can go their own way, the main thing is that as a result we get an audio track in an mp3 file.
Using the program is simple - click the “Add” button, select our file, indicate the parameters of the audio file (I recommend saving it immediately in a mono channel, for home video it will be quite normal), the save folder and click on the large round button with arrows at the bottom right.

Creating a mix of two tracks
So, back to our entry. In the screenshot, instead of an example, I took my real voice-over work. It is necessary to add to the existing track the recording that we just extracted from the video file.
This can be done by selecting the menu item “File” -> “Import” -> “Sound file...”
If you remember, I asked you not to focus on the fact that your voice recording starts before the video starts playing?
It's time to deal with this.
Usually, seeing two tracks at once, it is possible to determine directly by eye where our track lags behind the video.
The top track is from a video file, the bottom is the one I recorded on the microphone.

I've highlighted on the bottom track the time my voice lags from when the speech starts in the original video. Below you can see that the selection starts at the 6 seconds and 321 milliseconds position, and this chunk is 950 milliseconds.
Now we need to cut these 950 milliseconds from the beginning of the file. To do this, we simply write zeros instead of the number 6,321, and our selection moves to the beginning of the file.
Now, to delete this segment, it is enough to use the already familiar operation “Edit” -> “Remove Audio or Labels” -> “Delete”.
The track from the video file needs to be moved above our audio track and selected entirely. After that, apply “Effects” -> “Auto Mute...”
Specify the settings as they are on my screenshot:

And we get these changes in the track from the video:

This is the last stage of working with our audio track. Now you can save the project file itself (if you plan to change something in it in the future), and export these two tracks to an mp3 file.
You can export accordingly through the menu “File” -> “Export”.
Replacing a track in a video file
Finally the time has come latest application on my list. Open VirtualDubMod.
Open our video file. “File” -> “Open video file...”.
We indicate that we do not need to do anything with the video. We do this by selecting “Video” -> “Direct stream copy” from the menu.
And now we start working with audio tracks. Go to the menu “Streams” -> “Stream list”.
Now we have one track there, from a video file. Click the “Disable” button at the bottom right to disable it.
And add our mp3 file using the “Add” button.

Books carry centuries-old wisdom and the history of entire nations, which continues to be reflected on the pages of modern publications. This is a way to pass on accumulated knowledge to generations and instill in children a love of reading and cultural values. Today, more and more people prefer electronic or mp3 formats of literature to printed versions, practically replacing reading material on shelves with versions stored on devices. Of course, nothing can replace the smell of a new book, the rustle of turning pages and that feeling when you pick up your favorite book, the one you read for the first time in childhood or once borrowed from the school library and left to live on your shelf.
But the rhythm of modern life forces us to spend our time with maximum practicality, although reading people, even when they are very busy, do not stop immersing themselves in new worlds, using any existing book formats. It is very convenient to use computers, tablets, smartphones and other devices that have become a part of our everyday life for reading, especially since you can instantly find the literature of interest on the Internet, saving time and cash. Now organizing an entire library on your phone is not a problem, and for those who are especially busy, a program for voicing text will help. Simply put, while you are doing other things, a voice from the application reads out loud what you have written. Utilities for reproducing text can also help people with disabilities or attract the interest of children who do not yet read independently, while promoting the development of listening comprehension.
Speech synthesizers for reading text by voice perform dubbing using special engines, on which the quality of reading depends. Voice engines are capable of speaking in male, female or children's voices in different languages, and can be integrated into the program or installed additionally. They are distributed free of charge or on a commercial basis, which directly affects the quality of playback and the variety of voices that the user can choose to suit his taste. The following speech engine standards are used to voice text:
- SAPI 4 – outdated versions, no longer used on modern computers;
- SAPI 5 – used for Windows XP and higher versions. The lion's share of popular engines run on SAPI
The Microsoft Speech Platform is a set of tools for creating programs that support speech technologies. For the engine to function, you need to install Runtime components and Runtime Language packages, which are used for speech recognition or synthesis in various languages. Speech engines are not equipped with an external interface, for this reason, their mere presence in the system is not enough for the computer to speak; you also need special software that will serve as an interface and perform a lot of other functions.
Today there are a great many programs that allow you to reproduce text by voice. They all have a different set of options, can be installed on computers, phones and other devices or work online, many support the Russian language. In order not to download everything, it’s worth taking a look at the ratings of popular products that allow you to reproduce text in a high-quality voice and have already proven themselves among users.
The best programs for voiceover
It is impossible to say objectively which software will be the best, since everything depends on the requirements and the user’s own preferences. Below is a list of worthy software products, which are definitely worth paying attention to when choosing.
The Acapela speech synthesizer is one of the most popular in the world; it recognizes and voices texts of various formats in more than 30 languages, including Russian. The program allows you to select the reading speed and voice that the user will like, after listening to it on the developer’s website. Male (Nikolai) and female (Alena) voice engines are available for voicing text in Russian. The second appeared later and is an improved version, but many users prefer the timbre of Nikolai’s voice. Here again, everything is individual.

The product is produced commercially and can be downloaded from the official Acapela resource. Versions available for common operating systems Windows systems, Linux, Mac and Android mobile and iOS. Installation is not difficult and does not take much time. There is also a web version, but its functionality is quite limited, the maximum threshold for voice-over is set to 300 characters, but the sound is still performed at a high level.
Ivona Reader, a program for reading text by voice, will also be excellent option, in its arsenal there are quite realistic voices with natural sounding and good pronunciation, it is possible to convert text into MP3 format for creating audiobooks. Considered one of the best, it allows you to read any text, including news, RSS, web pages, books, electronic documents And so on. The program has a simple and intuitive interface, so mastering its functionality will not be difficult. Iwona Reader can be useful in learning languages, since professional speakers have worked on the quality of pronunciation. Of course, like other software, it can pronounce some rare words with incorrect stress or intonation, which is why sometimes the true character of the text is not conveyed, but this is rather a common problem for readers who do not have intelligence.

The most popular e-reader e-books with rich functionality, supports almost all possible book formats, and reproduces text by voice at the user’s request, although it is not an audio converter. Among the program's capabilities are converting books from one format to another, creating MP3/WAV files from a book, displaying data from archives without the additional use of archivers, setting options for comfortable reading, automatic scrolling and adjusting its speed, bookmarks, location memory function, which you closed the book, and many others useful tools. A big advantage of ICE Book Reader Professional is also the creation of a library, convenient navigation through books and authors. The program is freely available, which is good news, and is compatible with all popular versions of Windows.

Another middle-aged, but convenient program for reading books on a computer, which allows you to read texts using speech synthesis, which requires the presence of the Speech API and speech engine on the device. The application recognizes popular file formats TXT, DOC, HTML and others, creating a visual effect of book pages for comfortable reading. At any time, the user can switch from reading to text reading mode with the ability to connect pronunciation dictionaries for more successful reproduction.
It is possible to use bookmarks, search the text, adjust the font, page lighting, sound, reading speed and other effects. Functionality They also allow you to organize an electronic library with easy navigation.

The reader is a free multifunctional utility that speaks in a “live” voice, capable of recognizing an incredible number of formats, such as AZW, AZW3, DOC, DOCX, HTML, DjVu, MOBI, EPUB, PDF, PDB and others, which makes it stand out from other “readers” " Regardless of the reasons for using the program, be it laziness, busyness or poor eyesight, Balabolka will be useful to any user who needs voice-over of texts. For voice reading, various engines downloaded to the device can be used, but it is better to use paid options, they will provide best quality playback
The set of options includes flexible settings for sound and reading speed, so each user can adjust the voice acting to their own requirements. The reproduced text can be generated as audio files in MP3, MP4, WAV, OGG and WMA formats. Balabolka is also good because it can read from the buffer, and also speaks characters entered from the keyboard. A nice bonus is checking the spelling before reading. The utility has a user-friendly interface, supports the Russian language and operates on all versions of Windows OS.

The Govorilka utility, which is also used to speak test data by voice, opens files in various formats (TXT, DOC, HTML, etc.), speaks different languages depending on the connected speech engine. Despite its simplicity, it has decent functionality and can read text from fairly large files up to 2 GB in size. The program also allows you to adjust playback speed, volume and other effects, provides the ability to record text in MP3, WAV format, and remembers the place where reading was completed. The talker is presented in Russian, which makes it easier for Russian-speaking users to master, and works great on Windows 7, 8, 10.

A functional program with a simple interface that uses any SAPI engines available on the computer for speech synthesis. Govorun+ reads texts in TXT and RTF formats, works with the clipboard, minimizes to tray, and is also integrated into the shell and can be launched from context menu displayed when you right-click on text file. The scoring results can be saved to an audio file. The program has a built-in media player, reminder, and the interface can be customized by the user. In addition, you won’t get bored with Talker, the application is “seasoned” with jokes, anecdotes, aphorisms and other entertaining phrases.

The program allows you to reproduce fairly voluminous texts, recognizes TXT and RTF file formats, automatic mode recognizing the encoding. The results of your work can be saved as MP3, which is very convenient for later listening on any device. The Sakrament Talker application supports all known voice engines; the quality of playback will depend on the one you choose.

Spoken text can also be implemented using web services. Among the worthy options is From-text-to-speech, a Russian service with the poetic name 2yxa, capable of processing large volumes of text, which not every resource can boast of. Of course, all voice acting tools are not yet ideal, and even the best speech technologies today cannot replace human reading, but using modern voice engines, it is possible to bring the quality of reading as close as possible to live playback.


