Program for partitioning Windows 7 disks. Programs for working with hard drive partitions. Disk Management utility and its functions
While working with personal computer It may be necessary to change, add or delete hard disk partitions. If at the initial Windows installation 7, while the creation of sections takes place interactively and is intuitive, making changes to the created sections requires a certain skill. Due to the lack of any experience in these matters, the user may perform incorrect necessary actions, which will subsequently lead to complete loss of data or even failure of the hard drive. The Disk Management utility will help facilitate the process of creating and changing disk partitions.
Disk Management utility and its functions
The Disk Management utility is a tool for performing various operations with hard drives and their sections.
With its help you can:
- create, delete, merge volumes on a disk;
- compress volumes;
- format volumes;
- assign letters for volumes;
- add volumes without rebooting;
- manage local and remote disks on the network.
Opening Disk Management
There are several ways to launch the program.
Via the Start menu
- Click on the “Start” menu and right-click on “Computer”. Select "Management".
Right-click on “Computer” and select “Manage”
- In the “Computer Management” window that opens, click on “Disk Management”.
Select "Disk Management"
- The Disk Management window will open.
Disk Management window
Via command line

Via "Control Panel"
- Click on the “Start” menu and select “Control Panel”.
Click “Control Panel”
- IN search bar Enter “administration” and click on the “Administration” section that appears.
Click on the “Administration” section
- Select “Computer Management” from the list.
Select "Computer Management"
- In the “Computer Management” window that opens, click on “Disk Management”.
Click on “Disk Management”
Why doesn't Disk Management open?
There are situations when the Disk Management console does not open or opens but the console window is blank and the warning “Could not connect to the Logical Disk Manager service” appears.
The reasons that caused this problem to appear may be different. To eliminate their influence on the disk management process, you must perform the following steps:
- Conduct an anti-virus scan. Launch antivirus program It is recommended to do it from an optical disk or from a protected flash drive. After checking, open the “Quarantine” of the antivirus. If the dmdskmgr.dll library is in Quarantine, then return it to its place.
- Run the command Rundll32 setupapi, InstallHinfSection DefaultInstall 132 %windir%\inf\dmreg.inf through the Start menu and the Run window.
- Go to “Control Panel” - “Administration” - “Services” and make sure that “Logical Disk Manager” and “Logical Disk Manager Administrative Service” are running. If they are stopped, then enable them.
- Enter the Basic Input/Output System (BIOS) menu. To do this, when turning on the computer, press Del, F2 or Esc (the choice of key depends on the computer manufacturer). If the launch panel does not contain information about the connected HDD, then check the connecting cables at the points of connection to the drive.
How to create a logical drive
The very first hard disks, first created by IBM in 1973, contained 30 cylinders, each of which was divided into 30 tracks. By analogy with automatic rifles using the .30–30 Winchester cartridge, such discs were called “Winchesters”. Over time, in colloquial speech the word “Winchester” was transformed into “screw”.
Most hard drives are sold already prepared for installing Windows, i.e. the main partition has already been created on them. The remaining operations are carried out during the system installation process. Installation is carried out from a bootable optical disk or USB device. At one of the installation stages, a window will appear asking you to select a space to install the system.
If the hard drive was not prepared for immediate installation of the system before going on sale, then all operations will have to be done by the user. To do this, you will need a bootable optical disc or USB drive.
Before installation, configure the BIOS (basic input/output system) to boot from a DVD or USB drive:

When forming a partition on a hard drive, all free space is used, and additional partitions are created after installing Windows 7.
If possible, it is better to take advantage loading Windows PE, which has built-in Acronis Disk Director or Partition Magic programs. These utilities are designed to manage hard drive partitions.
Windows Preinstallation Environment (Windows PE) is used to prepare your computer for Windows installation. It is a built-in component of other system installation and recovery tools and is not intended to be used as a primary operating system.
In the absence of such boot disk, like Windows PE, you can:

The created logical drives must be formatted using the format.com utility. Now you can proceed to installing Windows 7.
Hard drive logical drive management
You can manage hard drive partitions through the context menu of each of them. They provide a set of commands necessary for work.
Compressing a Partition
The command to compress a logical drive is specified in context menu.

Creating a section
A new partition is created in a free area of the hard drive that is not yet part of a formatted volume. At the bottom of the Disk Management console, this space is highlighted in bright green, and in the legend line it is indicated as “Free”.
- Once the partition has been compressed, right-click on the unallocated space and select “Create simple volume” from the context menu.
Right-click on the unallocated space and select “Create simple volume” from the context menu
- The “Create Simple Volume Wizard” will launch.
After launching the “Create a Simple Volume Wizard”, click “Next”
- Specify the size of the new volume.
Specify the size of the new volume
- Assign a letter (letter) to the disk.
Assign a letter to the disk
- We decide on the file system, cluster size and volume label.
- We format the partition.
We format the partition
- In the last window, click on the “Finish” button and create a new logical drive.
Click on the “Finish” button

After reformatting, the volume is ready for use.
Changing the section letter

Merging sections
When there is a need to reduce the number of logical drives, two are merged into one joint logical drive. Before merging, the necessary information from the logical drive being removed is copied to another drive or removable media.
To merge one drive with another:
- Select the volume that we want to attach and call the context menu. Click on “Delete Volume”.
Select the volume, call the context menu and click on “Delete Volume”
- A message will appear in the window that appears indicating that all data on the volume will be deleted. Confirm deletion.
Confirm deletion
- A partition with the status “Free” will appear in place of the deleted volume. Select it and select “Delete partition” in the context menu.
- To attach an empty volume to the desired logical disk, right-click on the section to which the empty partition will be attached, and select “Extend volume” in the context menu.
Mark an empty volume and attach to the main volume
After the merger is complete, restart Windows 7 to avoid errors and information loss.
Video: Disk Management in Windows 7
Disk management programs
To manage disks, in addition to the standard Disk Management utility, there are several programs. They have become widespread due to their clear and user-friendly interface. Such programs include:
- Acronis Disk Director is a program that provides management of logical disks and is responsible for servicing “hard drives”;
Provides logical disk management and is responsible for maintaining hard drives
- Partition Magic is a program that has fewer functions compared to Acronis Disk Director. This utility is outdated and not supported by most manufacturers, but is included in the package software on old boot disks;
This utility is outdated and not supported by most manufacturers, but is included with the software on older boot disks
- AOMEI Partition Assistant is a lesser-known program for working with hard drive partitions. One of the advantages of this program is the ability to convert the master boot record from MBR format to GPT format without losing information. This feature can be useful when migrating from Windows 7 to Windows 8, and is necessary for users working with these systems.
One of the advantages of this program is the ability to convert the master boot record from MBR format to GPT format without losing information
In addition to these utilities, you can find other developments on the Internet designed to work with hard drive partitions.
Despite all the variety of utilities for working with hard drives, it is better to choose one, study it and use it in your work, since incorrect use of programs can lead to the deletion of important data accumulated over many years of work. Restoring lost information will take a lot of time and effort, but may not lead to the desired result.
The performance and ease of use of the system depend on the condition of the hard drive. Cluttered media reduces performance, slows down the system and is more susceptible to errors and failures. Adequate disk management and the use of custom partitions improve its performance, increase comfort and have a positive impact on the security of data and equipment. There are many tools and programs for working with a hard drive. Some of them are only different graphical interface and price.
Selecting a program for working with hard disk partitions.
GParted is an advanced program for working with hard disk partitions that does not interfere with the operating system. After downloading, the program is offered as an ISO disk image, which must be burned to a CD/DVD. After recording, restart your computer and select to run from CD/DVD. The program allows you to create, delete and resize an existing partition. A big advantage of the program is the ability to change the size of the partition on which the system is installed. The program supports most known types files including fat16, fat32, ntfs, ext2, ext3 and ext4. Before any operations on partitions, it is recommended to first defragment them and back up the most important files. Resizing partitions can take anywhere from a few minutes to several hours.
How to use the program:
- Back up your important files!
- Download the GParted program and burn it to disk.
- Insert the disc into the drive and restart your computer.
- When the motherboard manufacturer splash screen appears, press the F8 key (sometimes it can be the F9, F10, F11, F12 key, depending on the manufacturer) and select boot from CD/DVD.
- Once downloaded, select GParted Live from the list.
- Click "Don't touch keymap".
- Select a language (Russian – 24).
- “Which mode do you prefer?” – 0 and confirm with ENTER.
- The search for all available ones will begin. hard drives and sections that have already been created on them. This may take a few minutes.
- If you need to repartition the disk, first delete any previously created partitions. To do this, delete them one by one (the “Delete” trash can icon). If you don't have any sections yet, skip this step.
- In the list of partitions, click on the space with unallocated space. Then click on the white sheet icon (“New”).
- In the window that opens, you need to set the parameters for the new partition: size, partition type (primary, extended or logical) and its file system, partition name. Then confirm adding the section with the “Add” button.
- After creating the section, confirm the actions by selecting the green “tick” icon. The program will begin creating partitions. This may take a few minutes.
- The next step is to close the main window and double click on the “Exit” icon.
- Restart your computer.

After the reboot, the new disk partitions will be ready for use.
One of the most convenient programs for working with disks, EaseUS Partition Master, supports RAID devices. The application is equipped with a Wipe module, thanks to which the user can permanently erase files so that their recovery is impossible (especially useful before selling a hard drive). Each operation requires additional confirmation and comes first in the queue, so the risk of error is minimal. Let's see how to use this program To organize a disk that contains too many or too few partitions:
- Download the program and run the installation.
IMPORTANT. During installation, do not download additional tools.
- Once the application is installed, launch partition management to proceed to management.
- Select the drive you want to format, right-click on it and select the “Erase data” option.
- Set the number of times to repeat disk cleaning to 1, and click OK.

IMPORTANT. Formatting the drive means that all data will be deleted permanently.
- The task will be added to the list of pending operations in the window on the left.
- Next, select the “Create partition” option.
- Then you need to set up a new partition, select its size, enter a name and select a letter. After entering all the data, click "OK".
You can create multiple partitions on a disk, but remember that if you create a partition on a USB drive, Windows will only be able to read the primary partition.
- To complete all tasks in the Pending Operations list, simply click Apply Changes.
How to create a new partition:
- Select the system partition.
- The Actions panel displays the available functions.
- If you are using a hard drive, we recommend defragmenting the partition first. Select Defragment, then click OK.
- After defragmentation, select Resize/Move Partition.
In the next window, use the pointer to drag the borders to the left - this will reduce the size of the system disk.
- If you are performing SSD partitioning operations, check the "Optimize SSD" checkbox.
- Click "OK" to confirm the operation.
- In the Apply Changes window, click Yes. A message appears asking you to restart your computer. Click Yes. The disk will be partitioned and the computer will reboot.
- Launch EaseUS again. Click on the free space and in the Actions panel, select Create Partitions.
- If it is an SSD, then check the "Optimize SSD" checkbox. Click OK. The unallocated space will be formatted as a new disk.
Merging sections:
- In EASEUS Partition Master, select the partition on drive C. In the Actions panel, select Merge Partitions.
- Select the second section, it should be the adjacent section. Select the target drive from the list. Files from the second partition will be placed in a separate folder. Click OK, then Yes. Sections will be merged.
The program also has a diagnostic module that allows you to search for damaged sectors and manage the structure of the hard drive. An important feature is the pre-splitting before approving changes, which gives the user full control over the planned actions. The rest of the programs in the review work on the same principles as those described above.
One of best programs for working with a hard drive, supporting hard drives with a capacity of more than 2 TB. Each partition can be archived as a backup, allowing you to restore data after a possible failure. The user can also change the file system from FAT to NTFS, and after each change in the size of the NFTS partition, there is no need to reboot the system. The application is equipped with interesting modules, including a disk map, which shows a graphical view of the partitions on the disk, Disk Surface Test, which offers basic disk diagnostics, and the Partition Surfece Test, which analyzes a specific partition.

Free utility for Windows 7 and later operating systems Microsoft systems. Created on the Visual Operating System (ViOpSys) environment and runs from a boot CD/DVD when the system starts. Allows you to create new sections, divide, move and delete existing ones and copy their contents. In addition, the user has modules for defragmenting and formatting partitions. The program has small system requirements, so it can be used on older hardware (Pentium-class x86 processor, 32 MB RAM or 16 MB text mode).

A powerful and functional disk and partition management tool, equipped with diagnostic and repair modules for working in Windows 10 and earlier versions. In addition to the basic functions of creating, copying and deleting partitions, you can back up and restore data lost due to, for example, a hard drive failure. The application is equipped with a “tomofinder” that allows you to find and restore deleted data. The program supports the most popular file systems, such as FAT12, FAT16, FAT32, NTFS, EXT2 and EXT3, as well as media with DE, SCSI, SATA interfaces. Allows you to manage virtual storage media and RAID. The built-in diagnostic module allows you to analyze the state of the disk, find and correct any errors (including restoring a damaged MBR).

A program designed to create copies of system Windows partitions. Allows you to quickly clone a partition to a new drive, so you can work on new media without having to go through the operating system installation process. When moving a partition, you can change its size or leave it at its original size. The program supports files in FAT and NTFS, IDE, SATA, SCSII, USB and FIREWIRE interfaces.

An application designed to manage USB storage devices (cards, pendrives, external drives), supporting FAT16, FAT 32 and NTFS file systems. Allows you to create, copy and delete partitions, format memory and create bootable media, for example, with an operating system or another program. The program is equipped with a diagnostic module that checks the performance of the hard drive and the size of the media.

Allows you to analyze disk resources, provides detailed data about files and displays them in graphical form. For example, their size and location. The user can determine what data will be displayed and in what form. The application generates reports from collected data in HTML, ASCII and XML formats.

Conclusion
Thus, we introduced you to the best programs for working with hard drive partitions. You just need to try them and decide which one suits you best. And if after reading this article you still have questions, feel free to ask them in the comments.
Reasons why it is necessary to divide into several sections HDD, everyone is different. For some, this is an opportunity to systematize the necessary information and store it correctly; someone using multiple partitions uses multiple operating systems while working on your computer or laptop. Finally, if the hard drive is divided into several parts, then it is easier to defragment them separately.
Standard PC equipment: the simpler the better

This program is rightfully considered one of the best or even the best partitioning program hard drive.
This is the most simple program, which will help you effectively manage multiple systems and different programs.
Its main advantages are eliminating errors in partitions, converting file systems and data protection. Another advantage is that this utility is very popular, because there is a lot of reference information on it on the Internet.
2. Disk management in Windows
At any Windows versions there is a “Disk Management” function: this is the simplest, most accessible and sufficient effective remedy, which allows you to change partitions.
Each version of Windows OS has its own differences, but in the most popular ones (Windows Vista, Windows 7 and 8) there are no fundamental differences. Let's take a closer look at how to break a hard Windows disk using this utility.
The program opens through the Start menu, and in the “Disk Management” item, even a novice user with the help of three main points (Expand, Shrink and Delete volume) performs all the necessary actions in real time. No special knowledge is required for this - just give affirmative or negative answers and click the desired menu items.
Flaw regular program one - there are risks of failures that lead to the loss of certain partitions. Risk exists when there is a disc or mass unnecessary programs, or when trying to partition the partition of the hard drive in which Windows is running: the processor does not always respond unambiguously to an attempt to “experiment” with the system partition.
Free software for everyone
Two programs that can be downloaded absolutely free from the Internet - EaseUS Partition Master Home Edition and Paragon Partition Manager 11 Free - are also easy to learn and use, but require certain knowledge.
1. EaseUS Partition Master Home Edition

The program helps not only to partition a hard drive, but also to create, copy, resize or completely delete partitions; and also restore deleted partitions.
The disadvantage that affects the popularity of the program is that it is only available in English. But knowing in English you can evaluate the excellent functionality and predictability of the program, stability of operation and the ability to carry out all procedures in virtual mode - at any time you can correct a settings error, cancel the disk partition procedure and restore the original data.
2. Paragon Partition Manager 11 Free
The program again has an English-language interface, but for a beginner it is more interesting than the previous one - the main windows are quite clear and make it easier to navigate the functions. The disadvantages of the program include low speed work and unpredictability.
If funds allow, you can purchase a Russian-language version of this program for money, but it also retains the main disadvantages of the English-language product.
Programs for advanced users
These programs have advanced functionality - support for various disks and flash drives, the ability to convert file systems, create bootable media and much more. The fundamental differences lie in speed, functionality and special features.
5. Active@ Partition Manager

This program is free manager, which simplifies working with logical drives: a system reboot is not required when creating, formatting or deleting disk partitions.
Even if you accidentally delete important partition data, the program will help you restore it!
But the inability to change disk sizes (the partition must first be deleted and then another created in the same place) leaves no chance of recovering lost information.
6. MiniTool Partition Wizard Home Edition
Experienced users can use the equally simple and accessible MiniTool Partition Wizard Home Edition manager. The most important advantage of the program is the ability to work with both a separate hard drive and RAID arrays created on the basis of two or more disks.
Multilingual registered version!
Aomei Partition Assistant– a powerful program for working with a hard drive, administering partitions for PCs and workstations. The program will answer questions such as: “How to resize a partition or merge partitions without losing data? How to increase computer performance?” In addition, PA includes AOMEI Dynamic Disk Manager Pro (DDM), which means it has the ability to manage dynamic disk volume.
System requirements:
·Windows 10 | 8.1 | 8 | 7 | Vista | XP
·Windows SBS 2003 | 2008 | 2011
Windows Server 2012 and 2012 R2 | Server 2008 and 2008 R2 | Server 2003 and 2003 R2
Torrent Hard disk partitioning - AOMEI Partition Assistant Technician Edition 6.6 RePack by KpoJIuK details:
Main features:
·Ability to expand the NTFS system partition without rebooting the computer to maximize computer performance and minimize downtime;
· Merging adjacent partitions into one large one without losing data, or merging unallocated space into a partition;
·Splitting one large partition into two or more partitions;
·Create as many partitions as you need without using free space on disk;
·Copying partitions for migration Windows systems or when backup important data;
· Cloning a hard drive helps with updating it;
·Quickly distribute free space from one partition to another to fully utilize disk space.
New opportunities:
OS migration to SSD/HDD: For many SSD users, this simple technology can help you migrate your OS to SSD and keep the original system.
Partition recovery: Recover lost or deleted partitions in a few steps.
Partition alignment: acceleration of disks when reading and writing data, especially SSD disks.
·Creating bootable CDs: Performs secure management of disk partitions in WinPE mode and booting from CD/DVD, USB flash memory.
MBR Rewrite: Rewrite from master boot disk to damaged MBR hard drive for easy recovery.
·Conversion between GPT and MBR: Convert from GPT disk to MBR without data loss and vice versa.
Linux partition management: creating, deleting, formatting, copying, destroying, restoring Ext2/Ext3 partitions.
·Changing the partition type (ID) and changing the serial number.
Changes in version 6.6:
Fully support exFAT file system, including create, delete, format, move, and copy exFAT partition.
·The Windows PE bootable media created on 64-bit system support both UEFI and Legacy BIOS boot modes.
·Remove the limitation to resize/move system boot partition in Windows 10, version 1703 and later.
Version Features:
·Type: installation [official installer]
·Languages: multi, there is Russian
·Treatment: carried out
Command line switches:
Quiet installation: /S /Q
Select installation location: /D=PATH
The /D=PATH parameter is specified last
Often the standard tools offered by the system are not enough to work with the hard drive. And therefore we have to resort to more effective solutions to get detailed information about HDD and its partitions. The solutions discussed in this article will allow you to familiarize yourself with the operations applied to the drive and its volumes.
Thanks to its tools, AOMEI Partition Assistant is one of the best programs of its kind. Wide functionality will allow you to effectively configure hard disk volumes. In addition, the program makes it possible to check a specific section for errors. One of interesting features– this is transferring the OS with all installed software to another hard drive or SSD.

Writing an image file to a USB device is also supported. The interface is endowed with a pleasant graphical shell. Despite the large number of useful functions, the program is available for free use, which makes it even more popular. At the same time, it is possible to download the Russian version.
MiniTool Partition Wizard
This software has powerful functionality that allows you to merge, split, copy partitions, and a number of other functions. MiniTool Partition Wizard is completely free and available for non-commercial use only. The program provides the ability to change the disk label, and when creating a partition, the cluster size.

The surface test operation allows you to detect bad sectors on the HDD. The ability to convert is limited to only two formats: FAT and NTFS. All tools for working with disk volumes are placed in a very convenient way, so even an inexperienced user will not get confused.
EaseUS Partition Master
A program that opens up many possibilities when working with a hard drive. Among the main ones: disk cloning and importing the OS from HDD to SSD or vice versa. Partition Master allows you to copy an entire partition - this function is suitable if you need to create a backup copy of one partition to another.

The program has a convenient interface in which all operations are located in the left block - this allows you to quickly find the desired function. The peculiarity of EaseUS Partition Master is that it can be used to hide a specific volume by deleting a letter on it. Creating a bootable OS is another interesting and useful tool.
Eassos PartitionGuru
Convenience of working with Eassos PartitionGuru is achieved primarily due to its simple design. All instruments are located on top panel. A distinctive feature is the ability to build a virtual RAID array. To do this, the user just needs to connect drives to the PC, from which the program itself will construct a RAID.

The available sector editor allows you to search for the desired sectors, and hexadecimal values are displayed in the right block of the panel. Unfortunately, the software is supplied in an English trial version.
Macrorit Disk Partition Expert
A pleasant interface displays functionality, which is divided into sections. The program allows you to scan your PC for bad sectors, and you can configure the disk space to be scanned. Conversion of NTFS and FAT formats is available.

Macrorit Disk Partition Expert is free to use, but only in the English version. The software is suitable for people who need to conduct quick setup hard drive, but for more efficient work It is recommended to use analogues.
WonderShare Disk Manager
A program for performing various operations with a hard drive, allowing high-quality data recovery. Compared to other similar software, Macrorit Disk Partition Expert allows you to deeply scan partitions for lost information.

You can trim and merge hard disk volumes without losing files stored on it. Other tools will allow you to hide the partition if necessary or convert the file system.
Acronis Disk Director
Acronis Disk Director is one of the most powerful programs with a set of functions and operations for managing hard disk partitions and more. Thanks to the capabilities of this software from Acronis, users can recover lost or deleted data. Among other things, it is possible to defragment the volume and also check it for file system errors.

The use of mirror technology allows you to save backup copy section selected by the user. Acronis Disk Director offers the use of a disk editor, which makes it possible to find a lost cluster, taking into account the fact that the execution environment for this operation displays hexadecimal values. The program can be safely used to carry out the most efficient work with the HDD.
Partition Magic
A program that allows you to perform basic operations with a hard drive. The interface is very similar to standard application Windows Explorer. At the same time, among the tools located in the graphical shell, it is easy to find what you need. The advantageous feature of Partition Magic is that it allows you to select multiple active partitions, each of which has its own separate OS.
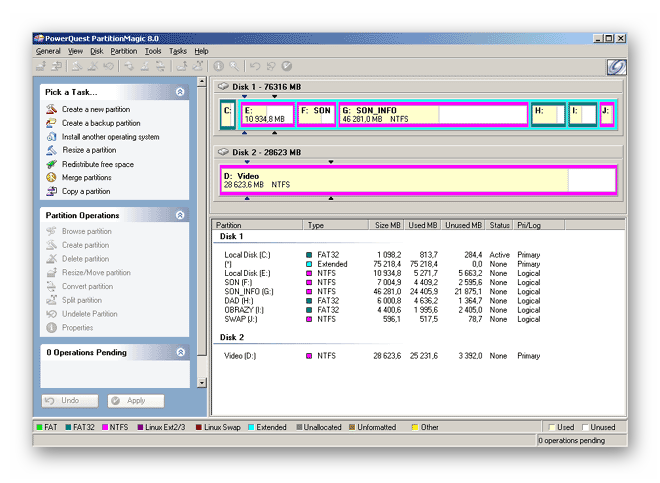
You can also use file system conversion services, two of which are supported: NTFS and FAT. You can resize the volume and merge partitions without losing data.
Paragon Partition Manager
Paragon Partition Manager pleases users with an interesting set of functions and purposes for their use. One of them is connecting the image virtual disk. Among them, image files of VirtualBox, VMware and other virtual machines are supported.

A noteworthy feature is that it allows you to convert HFS+ file system formats to NTFS and vice versa. Other operations are basic for partitions: trimming and expanding. A large number of settings provided by the program will allow you to customize all the functionality to your liking.
Reviewed software solutions have unique potential, each in its own way. The powerful tools of the developed software make it possible to save disk space and prolong the life of the hard drive. And the function of checking the HDD for errors allows you to prevent critical errors in the operation of the drive.


