Centos 7 initial setup. Creating a virtual machine container for CentOS in VirtualBox
CentOS is a free distribution based on source code Red Hat Enterprise Linux, in fact, it is created from these sources with virtually no changes, the developers only cut out all the Red Hat branding. But unlike Red Hat, CentOS is completely free and receives regular updates, a little time after they are released for Red Hat since they are also built from source code.
Very often CentOS is used as an operating system for servers. In one of the previous articles we looked at how it is done. Today we will look at setting up a CentOS 7 server after installation. We'll go over all the basic settings you'll need to change to get your server ready for use.
1. Setting up a static IP address
The first thing you need to do is set up your network. On personal computers we use DHCP to obtain an IP address, and the computer will have a different address every time it starts, the server must always run on the same address, so we assign it a static IP. You also need to configure DNS and default gateway. But first install the net-tools utility:
yum install net-tools
First, let's look at the available network interfaces and the current IP address:

Now you can proceed to configuring the interface through the file /etc/sysconfig/network-scripts/ifcfg-enp0s3, for example, using the vi editor:
vi /etc/sysconfig/network-scripts/ifcfg-enp0s3
IPADDR = your_ip
GATEWAY = gateway_for_network_access
DNS1 = IP_address_DNS1
DNS2 = IP_address_DNS2
After making changes, this file will look like this:

Then all that remains is to reboot the network to apply the new settings:
service network restart

Then, if necessary, you can change the IP address in the same way.
2. Computer name
The next thing we need to do is change the computer name. The current computer name is stored in the HOSTNAME variable:

To change it you need to edit the /etc/hostname file and replace the old name there with a new one.
vi /etc/hostname

You can also use the hostnamectl command:
hostnamectl set-hostname "hostname"
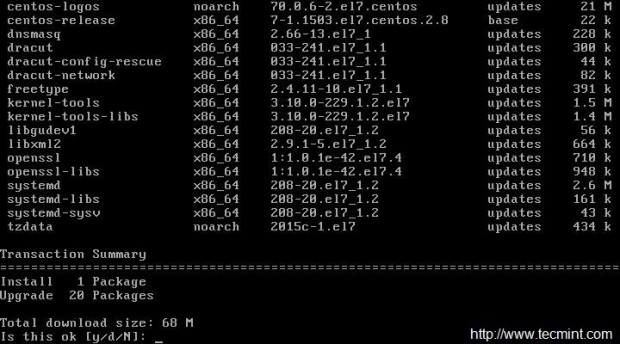
3. CentOS update
After installation it is customary to update software right up to new version to install all security updates. To update the list of packages in the repositories and install new versions, run the following command:
yum update && yum upgrade
4. Install a browser
In many cases you have to use CentOS from command line without a graphical interface, so you may need a browser to find something on the Internet or check the functionality of sites from the command line. To install the browser links, type:
yum install links

You can find other console browsers for Linux, such as Lynx or Elinks.
5. Setting the time zone
Correctly setting the time zone is very important for the server. This will clear up cluttered logs and allow your applications to display the correct date and time. The timedatectl utility is used for configuration.
First get a list of time zones:
timedatectl list-timezones
Then install the one you need, for example, Europe/Kyiv:
timedatectl set-timezone Europe/Kyiv
Then check:
7. Setting the locale
The locale determines the language and encoding that will be used on your system, for example, to enable the Russian language, set the value to ru_RU.UTF-8
localectl set-locale LANG=ru_RU.UTF-8
Then let's see what happened:
Then set the keyboard layout:
localectl set-keymap us
8. Disable SELinux
A set of SELinux policies are designed to control access to files in Linux system, but if you are not going to use them, then this feature can be disabled. To do this, run:
sed -i "s/(^SELINUX=).*/SELINUX=disabled/" /etc/selinux/config
Then restart your computer and check if the feature was actually disabled:
9. Create a user
It is unsafe to use the system as a superuser, and it is even more unsafe to leave open access to the root account via ssh. First create regular user and set a password for it:
useradd username
# passwd password
Then add the user to the wheel group to allow the user to run as administrator:
usermod -G wheel username
Now all that remains is to correct the sudo settings; to do this, add the following line if it is not already there:
%wheel ALL = (ALL) ALL
10. Enable third party repositories
Adding third party repositories to a production server is not a good idea and can lead to bad consequences in some cases. However, sometimes you may need programs that are not in the official repositories. Therefore, let's look at how to add several repositories.
To add the Enterprise Linux Repository (EPEL) run:
yum install epel-release
# rpm -Uvh http://www.elrepo.org/elrepo-release-7.0-2.el7.elrepo.noarch.rpm
10. SSH setup
Most often we have to work with servers not directly, but over the network, via SSH. Typically the SSH service is already installed and activated, but there are a few settings you need to make to get it working properly. First you need to configure the use of only a secure protocol; to do this, open the /etc/ssh/ssh_config file and delete the Protocol 2.1 line. And instead add:
You also need to disable login as superuser:
PermitRootLogin no
11. Install Apache Web Server
If you plan to use the machine as a web server, you will need Apache. With it you can host websites, multimedia content, client programs and much more. To install:
yum install httpd

Once the installation is complete, you will need to enable HTTP in your firewall before you can proceed:
firewall-cmd --add-service=http
# firewall-cmd -permanent -add-port=3221/tcp
# firewall-cmd --reload
Now all that remains is to add Apache to startup:
systemctl start httpd.service
# systemctl enable httpd.service

12. Install PHP
PHP is a modern web application and scripting language. It is often used as a general purpose programming language. To install:
After installation you need to restart Apache:
echo -e "" > /var/www/html/phpinfo.php
Then open the created file in your browser:
links http://127.0.0.1/phpinfo.php

13. Database installation
MariaDB is a database based on MySQL source code. Red Hat-based Linux distributions use MariaDB instead of MySQL. Databases are an indispensable thing on a server, so CentOS setup after installation should include its installation. For MariaDB installations dial:
yum install mariadb-server mariadb

Then run and add to startup:
systemctl start mariadb.service
# systemctl enable mariadb.service
And allow the service in the firewall:
firewall-cmd --add-service=mysql
All that remains is to run the setup script:
/usr/bin/mysql_secure_installation

14. Install GCC
GCC stands for GNU Compiler Collection, a set of compilers that are considered the standard for building programs on Linux. But it doesn't come with CentOS by default, so to install, type:

Then you can look at the GCC version:

15. Install Java
Java is a general purpose objective-oriented programming language. It is not installed by default, so configuring CentOS 7 after installation may include installing it. To do this, run:
yum install java

Then check the version:

conclusions
In this article, we looked at how to configure a CentOS 7 server after installation. As you can see, there are many basic steps that it is advisable to do before using the server in production. If you have any questions, ask in the comments!
Hi all! Today in the article we will look at the installation CentOS 7 Minimal, initial network setup and installation of a graphical interface called Mate. We already have an article and video about it, but there are several subtleties when installing Minimal, more on them below.
The first difference is that the image is slightly larger - 700 MB, but this is still incomparable with the volume of a DVD or Full edition. The next difference, which follows from the previous one, is that there is no option to select additional software for installation (screenshot below):
CentOS 7 also added the ability to enable the network interface directly during installation - this was not the case in version 6, however, I will additionally demonstrate the most visual way to configure the network interface in version 7.
Installation process
So, we perform all the steps sequentially, wait 15-30 minutes and enter your login/password (after connecting through the terminal).
My first instinct was to check if the network interface was working and if an address had been assigned to it - I entered the ifconfig command, and, as it turned out, this command on version 7 it is obsolete and instead you need to use the ipaddr command to display information about interfaces and the iplink command to display statistics on them.
But since everyone is accustomed to the standard commands of the net-tools package, it will need to be installed using the yum install net-tools command. However, remembering the first feeling of misunderstanding when my network did not work in the minimal installation on version 6, I want to additionally show a very simple way to configure it - more on that below.
Important! The ifconfig command is deprecated. For network interaction with the server, we recommend using the “ip” command (ip -a), which is superior in functionality (from the point of view of L2 and L3) to “ifconfig”.
Configuring network interfaces using nmtui
Enter the command nmtui - as a result, a simple one should start GUI to configure the network (screenshot below):

For example, I want to change the settings of a single interface - select the first option Edit a connection and we see the following picture:

Choose Edit... and do whatever we want with the interface :) As you can see in the screenshot below, our server received an IP address via DHCP - this suits me and I will leave everything as it is. The main goal was to demonstrate this utility – nmtui

Installing MATE and required packages
So why MATE? The answer is simple - it is much lighter, very undemanding of resources and extremely easy to install. So, we take a few simple steps to install packages (below):
- yum groupinstall "Development Tools" - installation of the necessary set of packages for the GUI to work (only if not already installed);
- yum install epel-release - installing the EPEL repository;
- yum groupinstall "X Window system" - installs the X Window System group package, this will take about 5 minutes. The package itself has a volume of 73 MB;
- yum groupinstall "MATE Desktop" - installation directly Mate - quite a large package - 506 MB;
When you first log into a new virtual private server, you need to perform several steps that will increase its security. In this manual we'll talk on how to create a new user, give it the appropriate privileges, and configure SSH.
1: Login as root user
Once you have your IP address and root password, log into the server as main user(root). To do this, use the command (replace the allocated IP with your IP address):
The terminal will return something like:
The authenticity of host "111.22.33.444 (111.22.33.444)" can"t be established.
ECDSA key fingerprint is 79:95:46:1a:ab:37:11:8e:86:54:36:38:bb:3c:fa:c0.
Are you sure you want to continue connecting (yes/no)?
Select yes and enter your root password.
Note: Using the root account on a regular basis is not recommended; This guide will help you create another user for permanent work.
2: Change your password
On this moment The root password is used, set by default and received after registering the server. The first thing to do is replace it with your own password.
When it comes to passwords that you set, CentOS is very careful. Therefore, after entering a new password, a BAD PASSWORD notification may appear. You can either set a more complex password, or ignore the message: in fact, CentOS will accept even a password that is too simple or short, although it will suggest using a more complex combination.
3: Create a new user
After logging into the server and changing the root password, you need to log in to the VPS as root again. This section will demonstrate how to create a new user and set a password for it.
So, create a new user; To do this, use the following command (replace demo with your username):
adduser demo
Now create a password for this user (again, replace demo with the name of the user you just created):
passwd demo
4: Root privileges
At the moment, all administrator rights belong to the root user. To be able to permanently use the new account, you need to transfer all root privileges to the new user (demo).
To perform tasks with root privileges, you need to start the command with sudo. This phrase is useful for two reasons: 1) it protects the system from destructive errors made by the user; 2) it stores all commands launched with sudo in the /var/log/secure file, which can be viewed later.
Now you need to change your sudo settings; for this use text editor CentOS default, which is called vi:
Find the User privilege specification section, which looks like this:
#User privilege specification
root ALL=(ALL) ALL
After the line with root privileges, enter the following line, which will transfer all privileges to the new user (to start typing in vi, press i):
demo ALL=(ALL) ALL
To finish entering text, press Esc; then type:, wq, Enter to save and close the file.
5: Set up SSH (optional)
Now we need to secure the server. This additional section will tell you how to protect your server by making the authorization process more difficult.
Open the configuration file:
sudo vi /etc/ssh/sshd_config
Find the following sections and make changes accordingly:
Port 25000
PermitRootLogin no
Port: Although the default port number is 22, it can be changed to any number in the range from 1025 to 65536. The SSHD port used in this tutorial is 25000. Please note: the new port number must be remembered/written down as you will need it to log into the server via SSH.
PermitRootLogin:Change yes to no to disable root login. Now you can log into the server only using a new user.
To ensure that only a specific user can use SSH, add this line at the bottom of the document (replace demo with your username):
AllowUsers demo
Then save your changes and close the file.
RestartSSH
To activate the changes made, restart the SSHD service:
sudo systemctl reload sshd.service
To test the new settings (don't exit yet) account root), open a terminal and login to the server as New user(don't forget to provide the correct IP address and port):
ssh -p 25000 demo @111.22.33.444
A notification should appear:
Installing the CentOS 7 operating system differs in many ways from that of other Linux kernel-based distributions, so even an experienced user may encounter many problems when performing this task. In addition, the system is configured during installation. Although you can configure it after completing this process, the article will provide instructions on how to do this during the installation.
Installation of CentOS 7 can be performed from a flash drive or CD/DVD, so first prepare a drive with at least 2 GB.
It is worth making an important note: closely follow the implementation of each step of the instructions, since in addition to the usual installation you will be configuring future system. If you ignore some parameters or set them incorrectly, then after starting CentOS 7 on your computer, you may encounter many errors.
First you need to download the operating system itself. It is recommended to do this from the official website to avoid problems with the system. In addition, unreliable sources may contain OS images that are infected with viruses.

When choosing, take into account the capacity of your drive. So, if it holds 16 GB, select "Everything ISO", thereby you will install the operating system with all components at once.
Note: if you are going to install CentOS 7 without an Internet connection, you must choose this method.
Version "DVD ISO" weighs about 3.5 GB, so download it if you have a flash drive or disk with at least 4 GB. "Minimal ISO"- the most lightweight distribution. It weighs about 1 GB, since it lacks a number of components, for example, there is no choice of graphical environment, that is, if you do not have an Internet connection, then you will install the server version of CentOS 7.
Note: after the network is configured, you can install a graphical desktop shell from the server version of the OS.
Once you have decided on the operating system version, click the appropriate button on the website. After this, you will be redirected to the page for selecting a mirror from which the system will be loaded.

Step 2: Create a boot drive
Immediately after the distribution image is downloaded to the computer, it must be written to a drive. As noted above, you can use either a flash drive or a CD/DVD for this. There are many ways to perform this task, you can find all of them on our website.
Step 3: Start your PC from the boot drive
When you already have a drive with a recorded CentOS 7 image in your hands, you need to insert it into the PC and launch it. This is done differently on each computer, depending on the BIOS version. Below are links to all the necessary materials, which tell you how to determine the BIOS version and how to start the computer from the drive.
Step 4: Pre-configuration
After starting the computer, you will see a menu in which you need to determine how to install the system. There are two options to choose from:
- Install CentOS Linux 7- normal installation;
- Test this media & Install CentOS Linux 7- installation after checking the drive for critical errors.
If you are sure that the system image was recorded without errors, then select the first item and click Enter. Otherwise, select the second option to ensure the suitability of the recorded image.


The entire system pre-configuration process can be divided into stages:
- Select a language and its variety from the list. Your choice will determine the language of the text that will be displayed in the installer.
- "Date and time".
- In the interface that appears, select your time zone. You can do this in two ways: click on your locality on the map or select it from the lists "Region" And "City", which is in the upper left corner of the window.

Here you can define the format of the displayed time in the system: 24 hour or AM/PM. The corresponding switch is located at the bottom of the window.

After selecting your time zone, click "Ready".
- In the main menu, click on the item "Keyboard".
- From the list in the left window, move the desired keyboard layouts to the right one. To do this, select it and click on the corresponding button at the bottom.

Note: The keyboard layout that is above is the priority one, meaning it will be selected in the OS immediately after it boots.
You can also change the keys to change the layout in the system. To do this you need to click "Options" and specify them manually (the default is Alt+Shift). After setting, click on the button "Ready".
- From the main menu, select "Network & Host Name".
- Set the network switch, which is located in the upper right corner of the window, to position "Enabled" and enter the hostname in the special input field.

If the Ethernet parameters you receive are not in automatic mode, that is, not via the DHCP protocol, then you need to enter them manually. To do this, click on the button "Tune".


On the tab "Ethernet" from the list, select your network adapter to which the provider cable is connected.

Now go to the tab "IPv4 Settings", define the setup method as manual and enter in the input fields all the data provided to you by the provider.

- Click on the menu "Program selection".
- On the list "Basic Environment" select the desktop environment you want to see in CentOS 7. Along with its name, you can read a short description. In the window "Add-ons for the selected environment" select the software you want to install on the system.


Note: All software listed can be downloaded after the operating system installation is complete.
After this, the preliminary setup of the future system is considered complete. Next you need to partition the disk and create users.
Step 5: Partitioning the Drives
Disk partitioning when installing an operating system is a critical step, so you should carefully read the guide below.
Initially, you need to go directly to the markup window. For this:

You are now in the markup window. The example uses a disk on which partitions have already been created; in your case there may not be any. If there is no free space, then to install the OS you must initially select it by deleting unnecessary partitions. This is done as follows:

After this, the section will be deleted. If you want to completely clear your disk of partitions, then perform this operation on each one separately.
Next you will need to create partitions for CentOS installations 7. This can be done in two ways: automatically and manually. The first involves selecting an item "Click here to automatically create them".

But it’s worth noting that the installer suggests creating 4 partitions: home, root, /boot and swap partition. At the same time, it will automatically allocate a certain amount of memory for each of them.

If this layout suits you, click the button "Ready", otherwise you can create all the necessary partitions yourself. Now we will tell you how to do this:

After creating the partition, you can change some settings on the right side of the installer window.

Note: if you do not have sufficient experience in partitioning disks, it is not recommended to make changes to the created partition. By default, the installer sets the optimal settings.
Knowing how to create partitions, partition the disk as you wish. And press the button "Ready". At a minimum, it is recommended to create a root partition, indicated by the symbol «/» and swap partition - "swap".
After clicking "Ready" A window will appear listing all changes made. Read the report carefully and, if you notice nothing unnecessary, click the button "Accept changes". If there are discrepancies in the list with previously performed actions, click the button “Cancel and return to partition settings”.

After partitioning the disks, the last, final stage of installing the CentOS 7 operating system remains.
Step 6: Complete installation
After partitioning the disk, you will be taken to the main menu of the installer, where you need to click the button "Start installation".

After this you will be taken to a window "Custom Settings", where you need to perform a few simple steps:

All this time, while you were creating a user and setting a password for the superuser account, background The system was being installed. Once all the above steps have been completed, all that remains is to wait for the process to complete. You can track its progress using the corresponding indicator at the bottom of the installer window.

Once the bar reaches the end, you need to restart your computer. To do this, click on the button of the same name, after first removing the flash drive or CD/DVD with the OS image from the computer.

When you start the computer, the GRUB menu will appear, in which you need to select the operating system to start. In the article, CentOS 7 was installed on a clean HDD, so there are only two entries in GRUB:

If you installed CentOS 7 next to another operating system, then there will be more lines in the menu. To launch just now installed system you need to select an item "CentOS Linux 7 (Core), with Linux 3.10.0-229.e17.x86_64".
Conclusion
After you start CentOS 7 through the GRUB boot loader, you need to select the created user and enter its password. As a result, you will be taken to the desktop, if one was selected for installation during the system installer setup process. If you followed each step outlined in the instructions, then system setup is not required, since it was completed previously, otherwise some elements may not work correctly.


