How to connect a new router. We connect the home Wi-Fi router and the Internet. Video of Wi-Fi settings on a laptop
Hello! I'll probably start with the fact that I've already written a lot of articles on setting Wi-Fi router ov, and about problems that may arise during the setup and operation of wireless access points. All articles are on this site, mainly in the “Internet” section. In this article I will provide links to the most necessary materials that may be useful to you when setting up a Wi-Fi router.
What is this article about? I want to talk in general terms about installing and configuring a Wi-Fi router yourself. Perhaps you want to buy a router and create a wireless network at home. Now is the time that we can’t live without it. One computer connected to the Internet via cable is a thing of the past. These are constant fights in the family for the opportunity to surf the Internet and a long line in the back :).
Moreover, now almost all devices have the ability to connect to the Internet via Wi-Fi. Phones, smartphones, tablets, laptops, netbooks, etc. And if there is no Wi-Fi at home, then you are simply limiting their capabilities. Before I forget, I would like to separately write a few words about the harmfulness of Wi-Fi, or rather the waves that Wi emits -Fi router. I wrote about this in a separate article. If you are interested in this question, then read the article. I will only say that there is no point in hiding from these “harmful waves”.
Start searching for networks in your home. And you will see how many routers your neighbors have already installed (provided that you do not live in a village, there most likely will not be Wi-Fi networks). Moreover, radiation from Wi-Fi is several times less than from regular mobile phone, which we also hold near our heads. So they are afraid of a Wi-Fi router, this is not entirely normal and stupid.
Another plus of a wireless access point (aka Wi-Fi router) the fact that you can completely get rid of wires in your home. For some reason I am sure that your computer is not installed near the front door :). This means that the network cable needs to be stretched through the entire house. And if you just did good repair? A Wi-Fi router solves all problems. You can put it or hang it near the entrance doors, and some manage to place it in the common corridor (well, when there is a corridor for two apartments).
You probably ask: “But what about an ordinary desktop computer that does not have the ability to connect via Wi-Fi and needs to connect via a network cable?” everything is very simple, there are Wi-Fi receivers for such cases. About how to connect desktop computer I wrote about Wi-Fi in the article.
Is it possible to connect and configure a Wi-Fi router yourself?
Maybe! And put aside any doubts and excuses, like I don’t know how, it’s difficult, etc. Well, for example, I set everything up myself, and I also wrote instructions for the site. If you are planning to call a specialist who will install and configure Wi-Fi, then my advice to you is to try it yourself first. It won't work out- Call the master. It will work out- Great! Will you be able to, for example, change the provider and what, call the technician again? And then you can set everything up yourself. Moreover, everything is relatively simple. You just need to want it!
Here is my detailed information to help you. Everything is there in detail and point by point, there shouldn’t be any problems. Using these instructions, you can configure other routers, because the process is practically no different. A lot of useful information is also in the comments, you can read them too.
Now I just remembered that I didn’t write about choosing Wi-Fi router, because you are probably very interested in this question. I won’t recommend anything specific. Choose a router based on the amount of money you are willing to spend on it and the advice of the store salesperson (well, if the sales consultant is smart). All routers are good in their own way and all have their drawbacks. A year ago I bought a cheap one for my home (250 UAH/1000 rubles) router TP-Link TL-WR841N, the store recommended it to me. Excellent device, after a year of operation, no problems at all.
Possible problems when setting up a Wi-Fi router yourself
Judging by the comments to the articles on this site, there are problems. But this shouldn't scare you. Someone came across a defective router, someone simply did not want to understand the nuances of the setup and immediately wrote: “Serega help, for some reason it’s not working!” :).
Setting up a router - main points:
- Connect the router to the computer via a network cable
- Connecting the Internet to the router
- Go to the router settings
- Setting up a tab WAN. Settings from the provider, if you don’t know what settings to specify, then you can safely call and ask the provider.
- Wireless setup Wi-Fi networks . Set password, encryption type, security type, etc.
These are the main points; read the article for more details on setting up. As for various kinds of problems and errors, they most often arise when specifying settings from the provider and when configuring wireless network.
But if there is a problem, then there is a solution. I tried to collect all the main problems when setting up a router and connecting to Wi-Fi. Of course, not just problems, but their solutions.
For convenience, I'll probably make a list of links to pages where I wrote about solving certain errors:
- Well, the most common problem when setting up a router is probably... Not only is this article the most popular on this site, also on this moment(04/09/2013) left to her 739 comments.
If you still doubt whether you need to buy a router and organize a wireless network in your home, then don’t hesitate, but run to the store to buy a router. A wireless network is really convenient, for example, you will read my blog more often :).
In reality modern world Every Internet user should know how to connect a router. Routers are fairly simple network equipment. Anyone can set them up, but only if they follow certain instructions. We will tell you everything from “A” to “Z” about connecting, activating and setting up a home modem.
Selecting a location
Once you've purchased your new router and unpacked it, don't rush to connect it. The router needs to choose the right location, because the quality of the signal and its distribution throughout the apartment depend on this. The choice of location is based on several parameters:
- available network cable length;
- availability of a nearby outlet;
- dimensions of the house or apartment.
Most even budget models have powerful transmitters to ensure signal distribution in three-room apartments. It is recommended to place the device on a hill (on the highest shelf, on top of a table, or attach it to the wall) for better signal propagation. Make sure that the LAN cable and power cord are loose and not under tension.
Do not install the modem near electrical appliances (TVs, microwave ovens or on the system unit). Remember that metal barriers weaken Wi-Fi the most. If you have metal cabinets or cabinets, of course, we recommend moving them to the outer walls. If in a private house the coverage area does not cover all rooms, then it is worth strengthening the signal or purchasing a repeater.
Connecting the router to a laptop or PC
Having chosen a place, it is worth inspecting the purchase package to begin connecting. As a rule, the kit also includes a LAN cable, instructions and a disk with electronic documentation or support software. At a minimum, you need to connect the router to an Internet cable, and you can configure it either from a PC or laptop via Wi-Fi.
Via cable
If you are using an ADSL or Ethernet connection, then you need to connect a wire with the Internet to the router (usually a classic “twisted pair”). Take the end of the cable and then plug it into a port called WAN. It is usually highlighted in color separately from others. Next, connect the output network card with the router's LAN port. There are usually 4 of them in the device. They are marked in yellow/orange.

Next, take the power supply and plug it into a power outlet, and insert the end of the wire into the connector on the modem (it can be designated as 5V-2.5A or Power). Use only factory power supplies, as products from third-party manufacturers may produce a different voltage, which in extreme cases will lead to burnout of the microcircuits.

Connecting the router is very simple, and then you can configure the device via the web interface directly from your computer.
Via Wi-Fi
A Wi-Fi router has one important advantage - it can be configured remotely, without resorting to a physical connection through a wire between the device and the computer. As a rule, most models immediately distribute Wi-fi after switching on. A password is not set, but if there is an icon with a lock on the network, then you should look at the factory code for the network on the label of the router.
- Find the wireless networks icon in the tray and click on it;
- Select your wireless access point from the list and click “Connect”.

We recommend sitting as close to the device as possible, since the data transfer speed directly depends on the distance. If Wi-Fi does not activate automatically, you will have to do it manually. Then you can connect to the router only in one way - wired.
Setting up the router
Some providers do not require the user to set up a modem, since after the steps described above the Internet is already available on the computer, however, these are rare situations. More often than not, you have to manually establish the connection. Setting up Wi-Fi is mandatory if you want to put your password on the network.
Login to the web interface
First, you need to learn how to enter the main menu of the router. Please note that the device does not need to be connected to the Internet at all to do this. You will need any browser ( Google Chrome, Opera, Firefox or similar). Next you need to know:
- IP address where you can access the modem menu;
- username and access code (password).
This information is located on a special label attached to the case. The login is usually the English word admin, the password is either similar or presented as a combination of numbers (1234 or 0000). It depends on the manufacturer.

Once all the information received has been found, follow these simple steps:
You will be taken to the main menu when you provide the correct information. Now you can change the device settings. You can log in not only with personal computer, but even from a phone, repeating this procedure in a mobile browser.
Reset all settings
Before performing any actions, you need to figure out how to return everything to its place if incorrect parameters are set. Modems have special function called "Factory Reset". It will override any changes made by the user. You can reset the device in several ways:
- Separate RESET button. Hold it for more than 10 seconds until all indicator lights come on and go off.
- Combined WPS/RESET button. It is also necessary to hold it for more than ten seconds.
- Soft reset via the corresponding item in the system menu.

After the reset, the login information and Wi-Fi password (if there was one) will be reset to the factory settings. This the only way regain “control” over the device if it has been hacked by intruders.
Internet setup, connection types
Let's move on to the most interesting part - setting up an Internet connection. Usually the procedure comes down to determining the connection type and setting specified parameters, which are provided by the provider. Let's look at connection types using the example of the common Wi-Fi router TP-LINK TL-WR840N. Menu options may vary slightly on other devices.
The connection is configured in the “Network” section, WAN subsection. The following types are available for you to choose from:


This router model has a “Detect” button. Once it has been pressed, the system will automatically select the connection type to be used.
Wi-Fi setup
If you are using a Wi-Fi modem, then the menu will have a special item for setting up the device as an access point. More advanced models can work as a client or repeater. To start setting up, you need:

At the end, all you have to do is click the “Save” button. Some models will also require a reboot for the changes to take effect. Do not use simple passwords similar to combinations of numbers from 1 to 8 or the famous “qwerty”. They are easily selected not only by specialized software, but also by ordinary users. These are all the steps needed to activate Wi-fi.
Other settings
Depending on the manufacturer, of course, routers have a whole range of additional settings. We recommend reading in detail about each of them in the technical manual. The most common and useful ones will be presented here:
- MAC address filtering. The function allows you to restrict access to Wi-Fi for individual devices. For example, you can prevent your neighbor’s phone from connecting, but you will first have to find out the MAC address of his device.
- Creating an additional guest network. The device creates a separate network with its own password. You can limit the number of users, connection speed, and more. Useful when using the modem in public places.
- Virtual servers. Allows you to redirect incoming packets to the required address.
- Parental control. Restricts access to specific resources (either completely or at certain times). A useful feature if there are children in the family.
- Backup copy. With its help, you can create a file with settings, and if there are problems with the device, restore them in just a couple of clicks.
Do not set parameters on the router that you have no idea about. They may disrupt or block Internet access.
Changing the password to log into the web interface
As you noticed, standard passwords The web interface is identical on almost all models. To prevent attackers from playing around with your router, we recommend changing your password. This is done through one of the sections of the standard menu:

This simple step will significantly improve the security of your network. The knowledge gained will be useful many times in life. You shouldn’t pay an adjuster for basic steps that you can do yourself in 5-10 minutes. If difficulties arise, do not be lazy to open the instructions.
Report content
Copyright infringement Spam Incorrect content Broken links
The configuration of routers is usually carried out by the provider’s specialists when connecting to the Internet. However, there are situations when it is not possible to call a specialist. Can I handle the setup myself? How to enter the router settings and what parameters need to be changed in order for the Internet to appear?
Follow these rules when choosing a location for the device in your home:
If you have a large house or apartment and after setting up the router it turns out that it does not reach all rooms, purchase an additional Wi-Fi repeater. This is a small adapter that plugs into a power outlet. It picks up the router’s network and transmits it to “dead” zones - the coverage area increases significantly.
A repeater will help increase the coverage area of your router
To search for a place you can use special programs. For example, free application NetSpot. How does it work? You load a diagram of your apartment into the program, indicate where you are now, and select your Wi-Fi network from the list, and it builds a coverage map for you.
Special programs will help you visualize the current coverage area of your router and understand where there are “dead” spots in the apartment
Connecting the router to the computer
Before setting up, establish a connection between the computer on which you are going to set up Wi-Fi and the router. The connection can be via an Ethernet cable (it usually comes with the router, but not always) or via Wi-Fi (the device begins to emit a signal after it is turned on, even if the provider’s cable is not connected to it). It’s better to choose a connection via a cord - it’s more reliable:
- We insert the cable that your provider brought into your apartment into the WAN connector. It may be called Internet or DSL (if the connection is via telephone line). The output is located on the back of the router - usually it is placed separately from the local outputs (LAN). Often colored with blue. The cable must be firmly secured - you will hear a click from the plug.
The blue WAN connector is for the provider cable
- We connect the Ethernet cable with one end to any LAN socket (usually yellow), and the other end to the output of the network card on the PC. On a laptop it is located on the right or left, and on a stationary one it is located on the back.
On laptops, the network output is located on one of the side panels
- We connect the router to electrical network using the included power adapter. Turn it on using the Power key.
In total, you must connect three cables to the router: a power adapter, a local cord from the PC, and a cable from the provider
Preparing to configure the router
The router settings are usually located on a page in the browser - the web interface. To access this page, please Windows system you need to do the following:
- Press the Windows and R buttons on the keyboard at the same time - enter the word in English control in the line. To execute the command, click on OK.
Execute the control command in a small window
- On the panel we are interested in the center with networks - click on the link.
Go to Network and Sharing Center
- Go to the section with adapters (second link on the left).
Proceed to change adapter settings
- Select an Ethernet network connection or a local connection (for Windows 7 and below) with the right mouse button - go to properties.
Expand the properties of a local or Ethernet connection
- We look for a component with IPv4 in the name in the list. Select it with the cursor and click on “Properties”.
Click on IPv4 and click on "Properties" under the list
- Set IP and DNS to “Obtain an address automatically.” Click OK to save.
Specify in the settings that the PC should receive data automatically
Where are the router settings: login to the web shell
The connection between the PC and the router is established and configured - it’s time to go to the router settings. Now and in subsequent instructions, we will use the D-Link DIR-300 router as an example:
- Copy using Ctrl + C one of the local addresses: 192.168.0.1 or 192.168.1.1. In a new tab of any browser on your PC, paste it into the line at the top and press “Enter.” We have given two addresses since only one of them will work for your router.
The interface of your router may be located at one of the addresses: 192.168.0.1 or 192.168.1.1
- The exact data is located on the bottom panel of the router. You will always see the default IP address of the web interface there (Default router settings).
Read the information on the router label carefully
- Next we go to Personal Area router. Usually, for authorization, it is enough to enter admin in two fields, for example, in the case of D-Link and TP-Link routers. But other combinations may work on your router - again, look at the label.
Use admin as the username and password to enter the router settings
How to change the router settings password
Change the password so that no one but you can log into the web shell and change your network settings:

Setup via the built-in wizard in the web interface - suitable for beginners
Router web shells usually have quick setup wizards that ask you to specify only the most important parameters. If you are a novice user, use this wizard. Let's take the D-Link shell as an example:
- In the " Quick setup" Click the link on the Network tile.
Open the “Quick setup” section, and in it the “Network” block
- Connect your ISP cable to your router if you have not already done so. Click “Next”.
Insert the cable into the WAN connector and click on “Next”
- Select the connection type: PPPoE (some branches of Rostelecom), PPTP, L2TP (Beeline), static or dynamic IP. Select the type that your provider uses, taking into account the type of IP - static or dynamic. It will be static if you purchased the additional service of a personal address on the Internet from the operator. Click "Next".
Correctly indicate the type of connection your provider uses
- Enter the data from the contract. For PPPoE this is the network login and password. If it is PPTP or L2TP, the VPN server is also specified. Beeline's server is tp.internet.beeline.ru.
In order for the router to be able to enter the provider’s network, write the authorization data from the contract
- If you selected a dynamic IP, you do not need to enter anything, just click on “Next”.
Change the connection name if necessary
- Check all the entered data with those in the contract again and click “Apply”.
Click on "Apply" in the lower right corner
- Now, in the “Quick Setup” tab, follow the link in the second Wi-Fi tile to configure the router’s network.
- Select an access point - click on “Next”.
Set the operating mode to “Access Point”
- Write a name for your access point - it can be anything. The only thing is that you need to use English letters. Click "Next".
Enter the name of the network or leave the default name
- Select "Secure Network". Come up with a complex key for the network and enter it. Click “Next”.
Be sure to install protection on the access point
- Read the information, rewrite the entered password if necessary, and click “Apply.”
Apply the changes you just made to the access point settings
Setting up a router manually - for confident users
If you are a more experienced PC user, you can go straight to manual setting router (advanced settings).
Internet setup
The first task is to establish the connection type that your ISP uses. If you do not have such information, read the contract carefully or contact the provider's support. Also check with your operator if binding by MAC address is required.
PPPoE connection
First, let's look at the PPPoE protocol:
- In the advanced settings section on the “Network” tile, click on WAN.
Go to the WAN section through the “Network” tile
- Click on "Add" at the bottom right.
Click the “Add” button in the lower right corner
- Select PPPoE in the first menu. Do not change the name and MTU.
Select PPPoE as connection type
- In the PPP section, enter the data provided by the operator: login, security key for the connection itself.
- Specify the service name only if required by the provider. Otherwise, leave it blank. Leave all other settings as standard.
- In the “Miscellaneous” section, check the boxes next to NAT and “ Firewall" Click "Apply".
Check NAT and Firewall and save the settings
- In the WAN section, check the box for PPPoE connection.
L2TP or PPTP connection
These two protocols are related to VPN networks(private networks). Their settings are identical:
- Access the WAN again through the Network tile. Click on "Add". Select PPTP or L2TP from the menu - taking into account the type of IP (dynamic or static). Usually it is static - not everyone buys the additional “Static IP” service from their provider.
Specify one of two protocols - PPTP or L2TP
- The network name can be left unchanged. Check the box next to Allow.
- We do not change MTU. If your provider uses MAC address binding, enter the MAC address of your network adapter. Or click on the round icon on the right with arrows to enable MAC address cloning. If binding is not needed, leave everything as is.
If required by your provider, enable MAC address copying
- If you chose a connection type with a static IP, write the address and all related data from the contract - gateway, mask, two DNS server addresses.
- Enable NAT and Firewall. If you use digital TV, also select IGMP technology.
- In the VPN section, enter the following information: user name, double password, address of your provider's VPN server.
Fill out the VPN form with the data from the contract
- Set the encryption type to MPPE AUTO if your provider uses MPPE. Otherwise, leave it at No Encryption.
- We do not change the value in the authentication algorithm - it needs to be set to “Auto”.
Set the algorithm to "Auto" and click "Apply"
- Click “Apply” to save the settings.
Static IP
If the Internet is provided to you using the Static IP protocol, you need to configure the router as follows:
- Click "Add" in the WAN section. In the connection type, select the second item “Static IP”. Leave the checkbox next to “Allow”. The name does not need to be changed, just like the MTU.
Select the line “Static IP” in the menu
- If your ISP requires a binding, enter your ISP's MAC address or click the arrow icon.
You need to specify not only the IP address, but also the mask along with the gateway and DNS addresses
- In the IP block, enter the combinations from the contract, including the IP address itself. At least one DNS server must be specified, but it is better to write two.
- Enable NAT, Firewall and, if necessary, IGMP (if you use digital TV from a provider).
- Click on "Apply". In the WAN section, install the newly created “Static IP” connection - it should be the default.
Most often, providers connect the Internet using Dynamic IP technology. This connection is the easiest to set up, since no data needs to be specified in most cases:
- Proceed to create a new connection in the WAN section. Specify “Dynamic IP” in the type.
Put "Dynamic IP" in the drop-down menu
- Do not change the MTU; if necessary, configure MAC address cloning (click on the round icon to the right of the line).
- Leave Vendor ID and device name blank.
The fields for the device name and Vendor ID can be left blank
- If you need to enter DNS server addresses manually, uncheck “Obtain an address automatically” and enter them yourself.
Enter two DNS addresses
- Check “Firewall”, NAT. Click “Apply” and highlight the “Dynamic IP” connection in the WAN block with a dot.
Select the line “Dynamic IP” in the list
Setting up a wireless network (access point)
The connection type has been determined - it’s time to change some settings of your Wi-Fi access point:
- In the advanced settings on the Wi-Fi tile, click the “Basic settings” link.
On the Wi-Fi tile, select basic settings
- Check the “Enable connection” checkbox. Enter the network name - SSID. Use numbers and English letters.
Change, if necessary, the name of your Wi-Fi
- Leave the country. Select channel - from 1 to 11 (you can test the Internet speed in different channels and determine the best one for your router). Or leave it at "Auto".
- In wireless mode, specify the network standard - it is better to set it to mixed so that the router independently chooses which one to work in.
Specify a mixed network standard if your router supports several
- Set the maximum number of clients to 0 only if you do not want to limit the number of visitors to your network.
- Click "Apply".
- From the Wi-Fi tile, go to Security Settings. Set network authentication to WPA-PSK/WPA2-PSK. Create a complex password - a combination of numbers, Latin letters. The key must contain at least 8 characters.
Set a strong network password
- Set AES for encryption so that the router does not slow down the speed.
- Leave WPA as default. Click on "Apply".
Video: step-by-step setup of the D-Link DIR-300 router
Reflashing the router
Problems may arise in the operation of the router due to the fact that it has an outdated firmware version. In this case, you need to update it. How to update on D-Link DIR-300:
- Go to the company's official website using this link - you will immediately be taken to the page with the DIR-300 model. If you have a different model or manufacturer, go to home page company and use the search on the website to look for your model.
Download latest version firmware for your router from the manufacturer's website
- In the "Downloads" section, find the latest firmware version (look at the release date). Click on the link to download the bin file.
- Go to the router settings interface. On the “System” tile, click the arrow and select “Software Update”.
Run the firmware update
- Wait for the system to complete the update. Do not under any circumstances disconnect the router from the electrical network during the update. An unsuccessful flashing can cost you your device - it will become unusable.
Do not turn off the device - wait until the update is completed
How to reset settings to factory defaults
A reset is needed in different situations: when you have forgotten the password for the web interface with settings or when access to the Internet has disappeared. After the reset, the router is reconfigured.
There are two ways to return the router to its original settings: using the Reset (or Default) button on the back panel of the router or through the web interface. Press and hold the key for 5 – 10 seconds. Most likely, you will need a thin, pointed object like a needle, since manufacturers often place the key deep into the device so that it is not easy to reach.
Hold the Reset button for a few seconds
Flashing indicators will indicate the completion of the reset - the router will reboot with factory settings. How to make a refund through the D-Link web shell:
- Point the arrow at the System menu at the very top right.
Wait until the system resets everything to its original settings
How to perform port forwarding
Set up forwarding when you need to receive remote access to any device on the local network, for example, a computer, video camera, etc. How to do port forwarding on D-Link:
- On the “Firewall” tile, click on the “Virtual servers” link.
Define the port range
- Do the same for internal ports - data packets will already be sent to them.
- In internal IP put local address IP device to which ports are forwarded.
- Click “Apply” to save.
You can configure the router without outside help. The main thing that needs to be done is to indicate the type of connection and, if necessary, login information to the provider’s network. They should all be specified in your agreement with the provider. Next, change the password for the access point so that no one can get into your local network without permission. If you have lost access to the Internet, you can try resetting the device to factory settings using the Reset button and setting it up again.
Today, many families have long had a couple of computers or laptops, and sometimes both. Plus to all this there are also smart phones, and maybe a tablet. And, of course, the center of entertainment for every family member is the big one. Up to a certain point, everything usually goes fine, as long as everyone in the house uses their devices, but then the desire for something more appears.
This requires a home wireless network. It helps to get rid of unnecessary wires, be more mobile, and, of course, makes all the media content accumulated by family members available to everyone.
Such home wireless network is organized at wi-fi help router that distributes a signal to many devices that support wireless connection. Or you can join the distribution using network cables, but for this you will need to register IP addresses for each connected device.
For greater comfort in accessing content, use a NAS server. This can be a separate system unit with several HDD drives, and a ready-made boxed solution. Such home server allows you to connect any device wirelessly and watch HD videos, music, play games and much more, and most importantly, store it all on your disks. The home server is also connected to the wi-fi router.

The most common Internet connection options
- With dynamic IP (Auto IP or DHCP)
- With a static IP address (Manual configuration of the WAN IP address setting field, mask, gateway...)
We will consider the 2nd option, with a static IP address. As soon as you select it, the fields for entering static connection parameters will become active - “Setting up the WAN IP address”, which must be filled in according to the data received from the Internet provider.

Click “No” and fill out all the fields one by one.

It is worth noting that in this case the IP address and other network parameters are fixed, they should be entered exactly as specified by the provider.
If you select the option with a dynamic IP address, or PPPoE or L2TP, then the setup is simplified and the router will receive all connection parameters from the provider automatically. Only for the last two connection types you need to specify the name and password provided by the provider (or in rare cases, the “Service Name”).

Complete the settings by clicking the "Apply" or "Save" button.
In some cases, the provider binds the user to the MAC address (physical address) of his computer so that no one else can connect instead of him. In this case, attempting to access the Internet using the router will become impossible.
To avoid this, the MAC address of the router's external interface should be changed so that it matches the MAC address that your ISP assigned you to (usually the address network interface your computer).
This operation is called MAC address cloning, although this function in the router’s web interface does not always have the same name.
To clone the MAC address of your computer, which was connected to the Internet by cable before installing the router, enter it in the field MAC partition“Special requirements of the Internet service provider” in the WAN section, Internet connection tab.

Save the settings by clicking the "Apply" button.
How to find out the MAC address of a computer
To find out the MAC address of your computer and enter it when setting up an Internet connection on the router,
do the following:
1. Click on the computer icon in the task tray (tray), click “Network and Sharing Center”
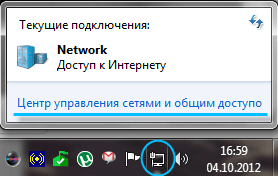
and in the window that opens, select “Local Area Connection”.
2. Click on the "Details" button to see the MAC address.

The MAC address will be located in the Physical Address field.

Configure Wi-Fi settings manually
If you did everything correctly and specified the correct connection parameters, then after rebooting the router you will have access to the Internet from the computer on which you made the settings. Open your browser and type
address of any website, for example . The site page has opened, so you can start
to setting up a wireless network (wi-fi).
In the router web interface menu, select the “Wireless” section, “General” tab.

Please note that some routers support wireless networks in two bands at once (5 GHz and 2.4 GHz). Set up your wireless network in the more popular 2.4 GHz band.

Specify the wireless network operating mode. The best option is a universal setup that ensures compatibility with both new and old versions Wi-Fi standard. It is called “Mixed” or “Auto” (automatic mode).

Enter the network SSID (Network name that will be displayed when scanning) in the field of the same name. Select a security option in the “Authentication method” field, I recommend WPA2-Personal, read why in the Wi-Fi section. Enter the password (or key) in the WPA Pre-Shared Key field. This key and network name (SSID) will be required to configure access on your wireless devices, so it is recommended that you save them to a file or write them down somewhere, keeping them in a safe place.
It is recommended to hide the SSID so that your home wireless network was not visible from the outside, but you will still be able to connect to it, since you already know the SSID. To save the settings, click on the “Apply” or “Save” button. By the way, a wireless network in the 5 GHz band is configured in the same way.
Attention! Be careful when updating your router firmware. The need for it is determined by incorrect operation of the router and communication problems. Carefully read the update section of the user manual software router and strictly follow the recommendations. Updating the router firmware is a last resort; you should not resort to it unless absolutely necessary, since initial setup There is no such need for a wireless network.
P.S. I would be very grateful if you point out those points that need to be examined in more detail.


